
SteelTrak ratchet not disengaging
Before you start
Before starting any work, check the machine is firmly fixed to the wall or freestanding leg and that you have the following equipment:
- 5mm Allen (hex) key
- Oil
- Small screw driver
1. First check the ball bearing
If your ratchet is not disengaging properly, check that the ball bearing that disengages the ratchet is not damaged and rotates easily.
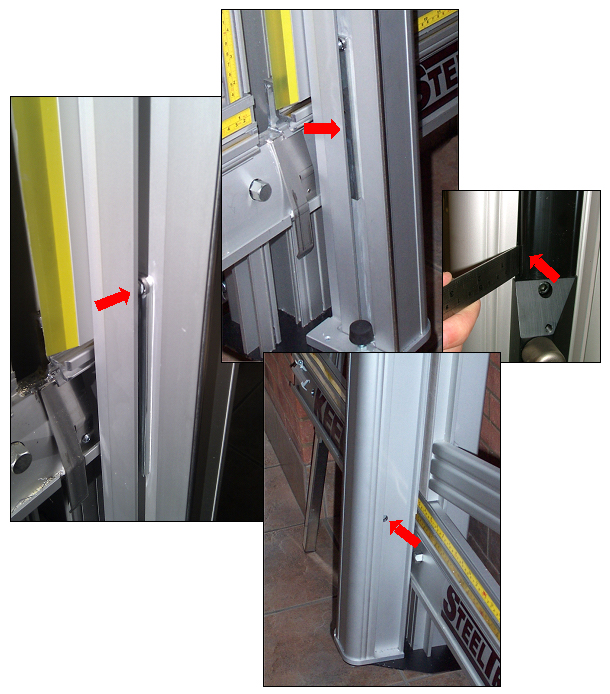
If the bearing needs replacing, the ratchet release bar will need to be removed. This bar holds the ball bearing in place and is situated in the wide groove running down the left hand side of the slideway. It is held in place by a single screw that enters from the right hand side of the slideway.
To get access to the screw, use a screw driver to prise out the black plastic cover strip that runs down from the clamp handle.
Using a 5mm Allen key, pass the long end in the hole, as shown and undo the screw that holds the bar in position but do not completely remove the screw. Hold it in place while you change the bar over and re-tighten the screw.
2. Check for a worn ratchet lever
When the cutter head is lowered and the head touches the ball bearing, the ratchet should still be engaged (A) and there should be a small gap between the two plates. Once the head is lowered further, the ball bearing should push the ratchet lever and release the cutting head. If this does not happen, first look for signs of wear on the ratchet lever where it should contact the ball bearing.
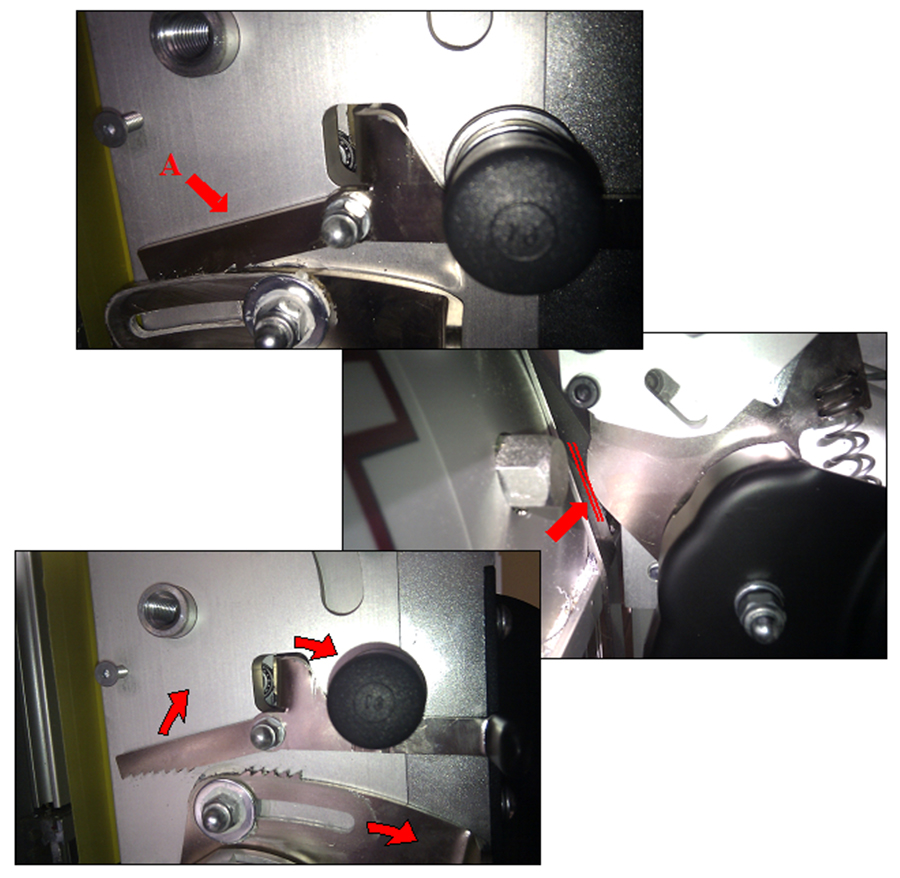
3. Check the ratchet lever pivot
If there are no visible signs of wear, check the ratchet lever is sitting flat against the main cutter plate and not twisted at a slight angle, if it is, the small nut that holds the lever in place at its pivot point may have come loose.
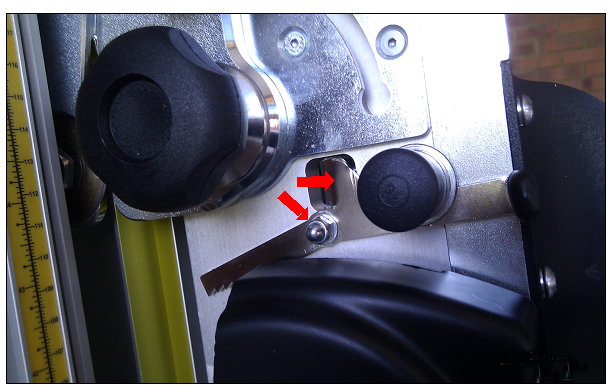
To adjust the nut, firstly make sure it is not dry and in need of lubrication, if it is, apply one or two small drops of light oil and work the lever up and down a few times.
Pull down and hold the ratchet lever, as if disengaging the cutting head and tighten the nut a little, until the lever only just returns under its own spring pressure when released.
4. Replace the ratchet lever
If all the above checks and adjustments have been carried out and there are still issues with your ratchet, a new ratchet lever and parts should be ordered and fitted. The ratchet lever kit can be viewed here > and ordered by emailing [email protected] quoting the order code of SS31-058. Fitting instructions can be viewed here >

Ⓒ Keencut 2020 | Baird Rd, Corby NN17 5ZA United Kingdom | Contact us
Created by DeType | Privacy | Website Disclaimer | Terms & Conditions