
Evolution3 FreeHand Installation Manual – Installation
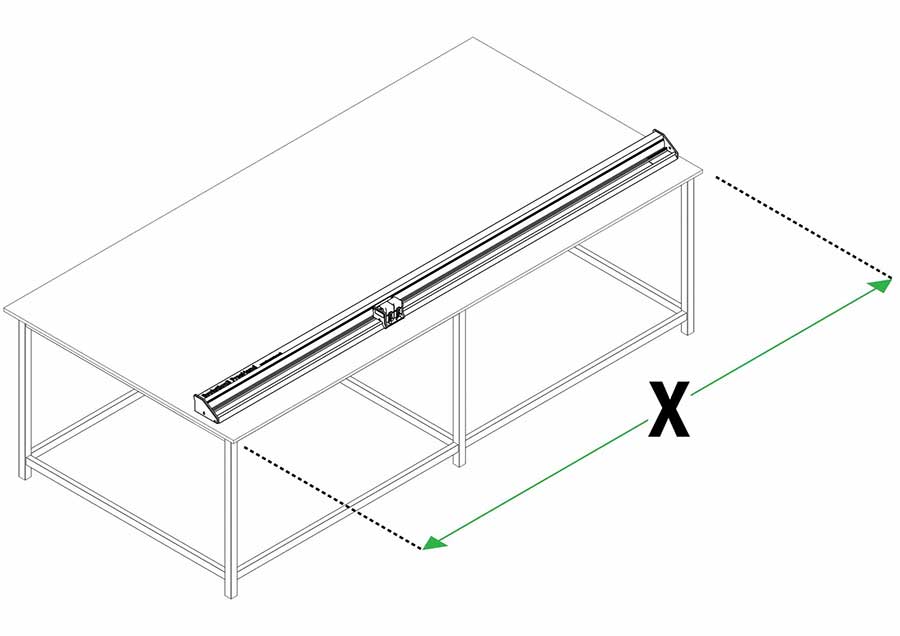
The width of the work surface needs to be 40cm (16″) wider than the cut length of the FreeHand.
Metric example: E3FH260 260cm + 40cm = 300cm
Imperial example: E3FH104 104” + 16” = 118”
If your workbench does not meet the following parameters and cannot be adjusted for flatness it is recommended to use a different bench. Keencut’s BenchTop Bench is designed especially for this purpose.
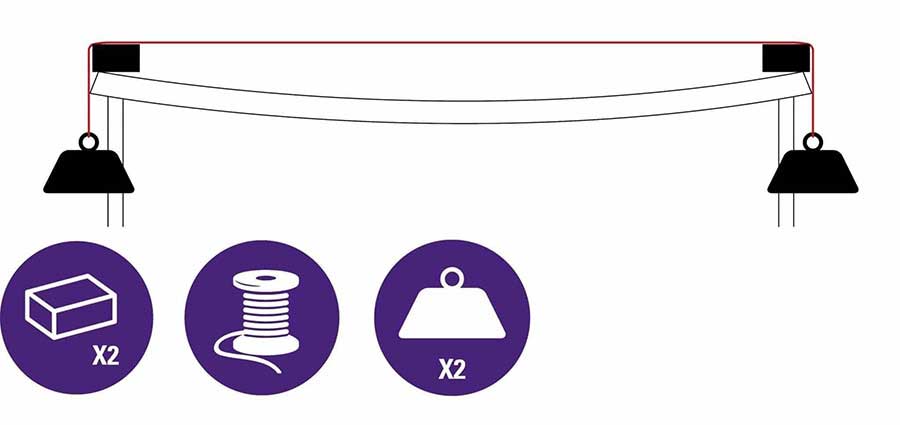
Check the flatness of the worktop by stretching a thin piece of strong thread between two blocks of the same height approximately over the area the cutter is to be used.
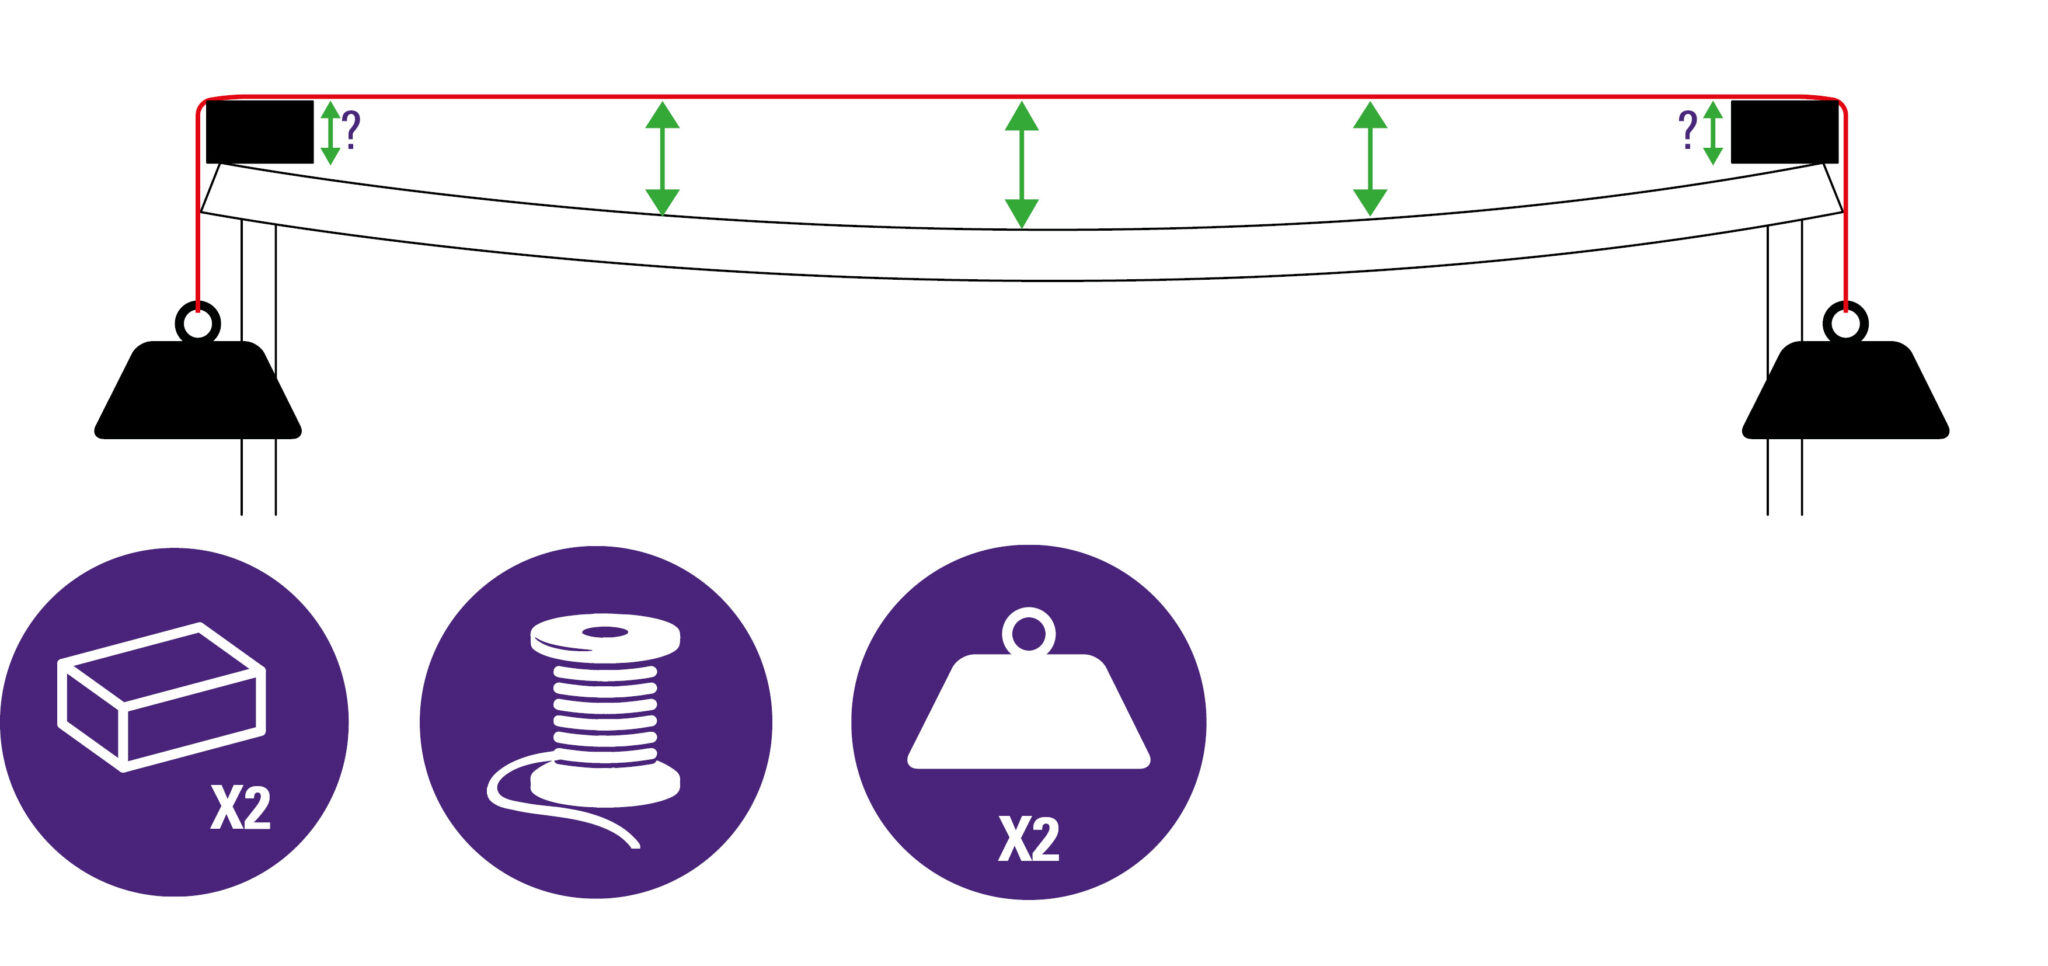
Measure the highest and lowest part of the worktop under the thread, the difference between the two measurements should ideally be no more than 1mm (1/16″). If it is greater it will be necessary to adjust the surface flatness with a new top or by using spacing pieces between the worktop and bench framework.
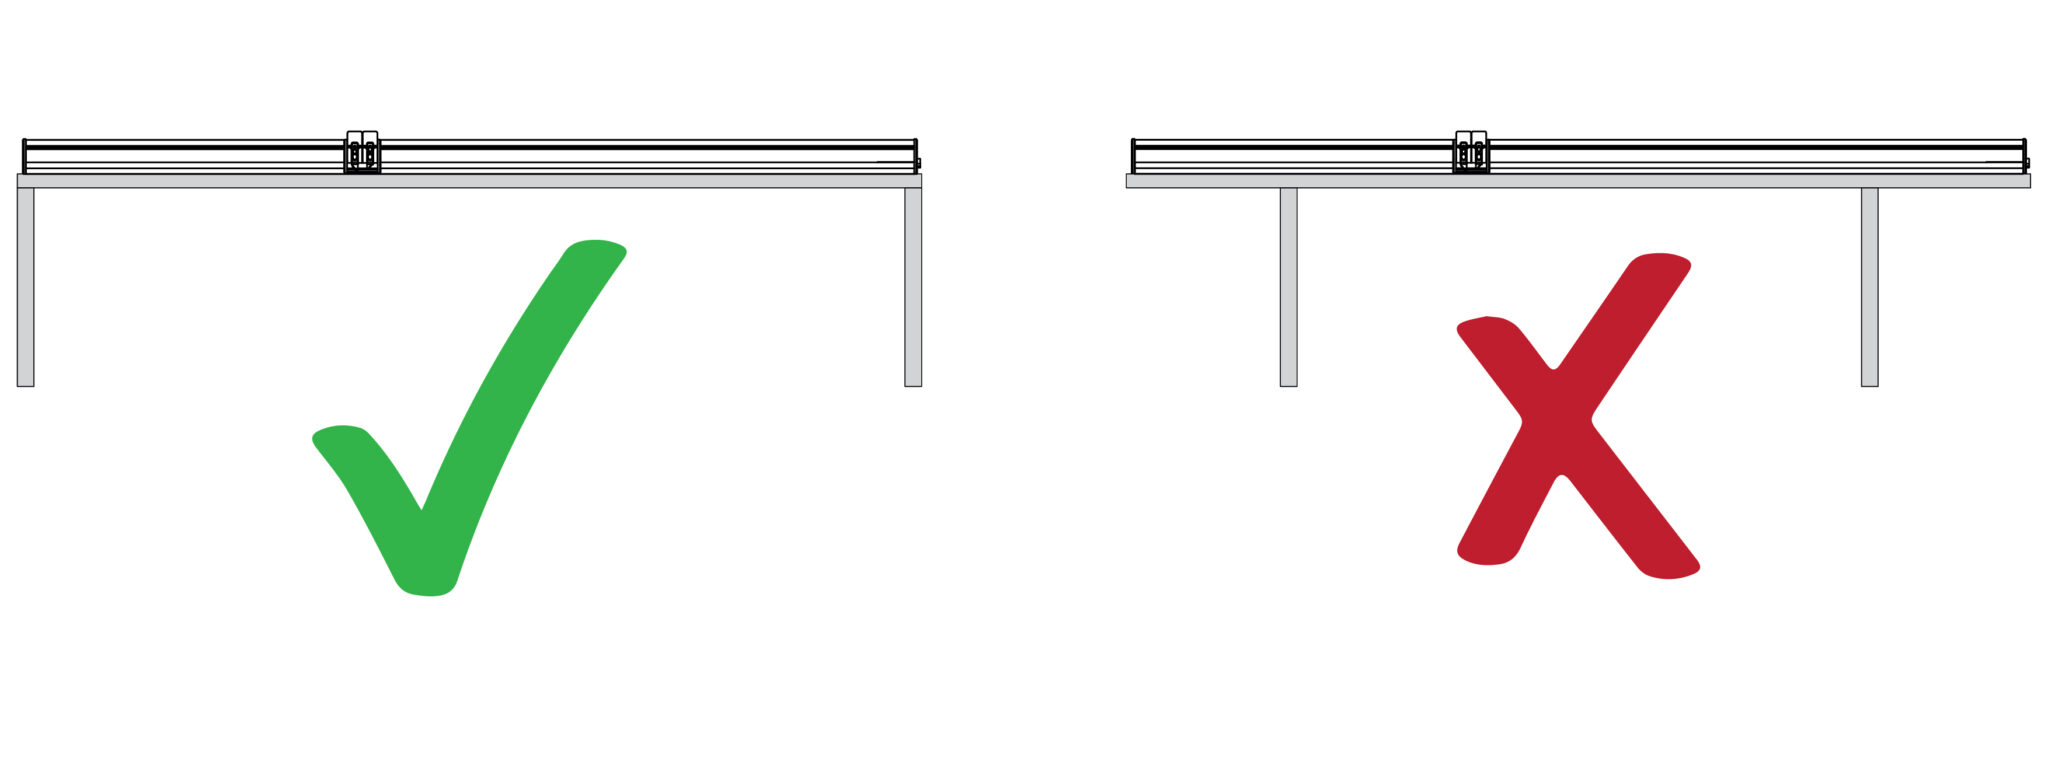
The work surface must be stable with a robust framework below and good support (no flexing) particularly in the area under the two ends of the cutter.
Both ends of the cutter should be fully supported and not overhanging the work surface.
This section suggests a method of creating a cutting station, although beneficial for productivity and accuracy it is not essential.
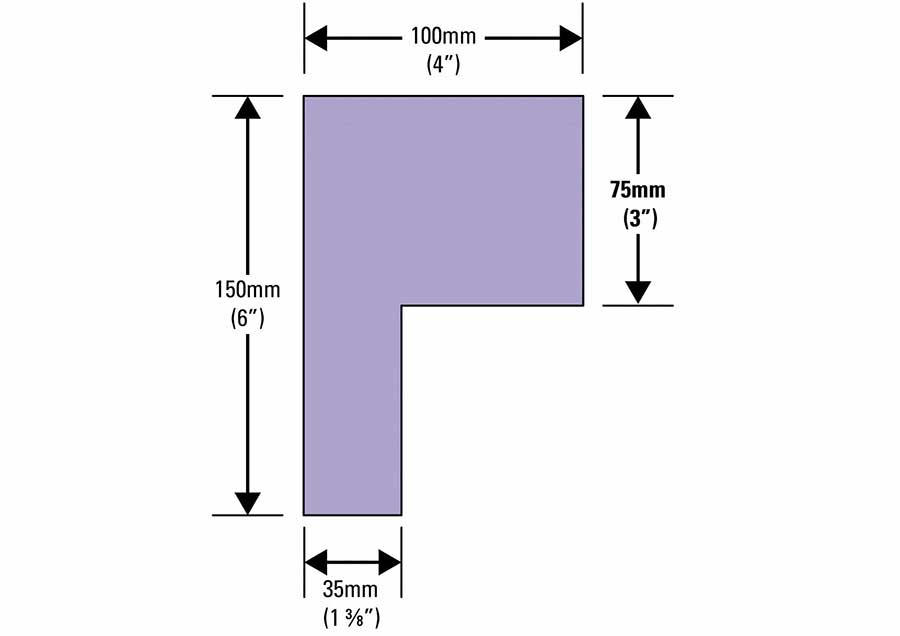
Create two ‘L’ shape blocks from 25mm (1″) wood, MDF or plastic approximately to the following dimensions. These will be used as location guides for your FreeHand and a means of holding it above the worksurface whilst you have both hands free to place the material to be cut.
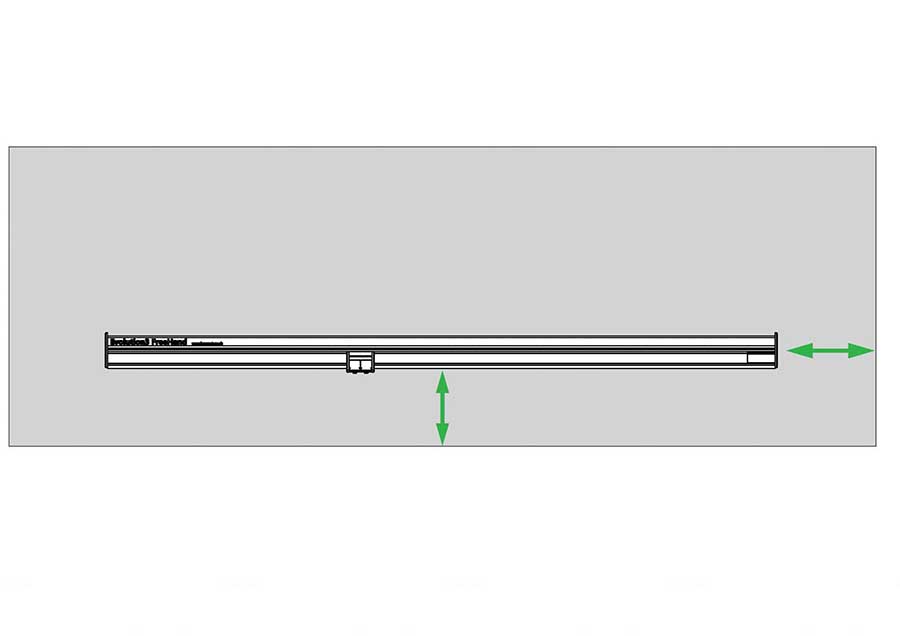
Place the FreeHand in its flat working position on the workbench. Make sure that it is in alignment with the edge of the work bench and a comfortable distance in from the edge of your bench.
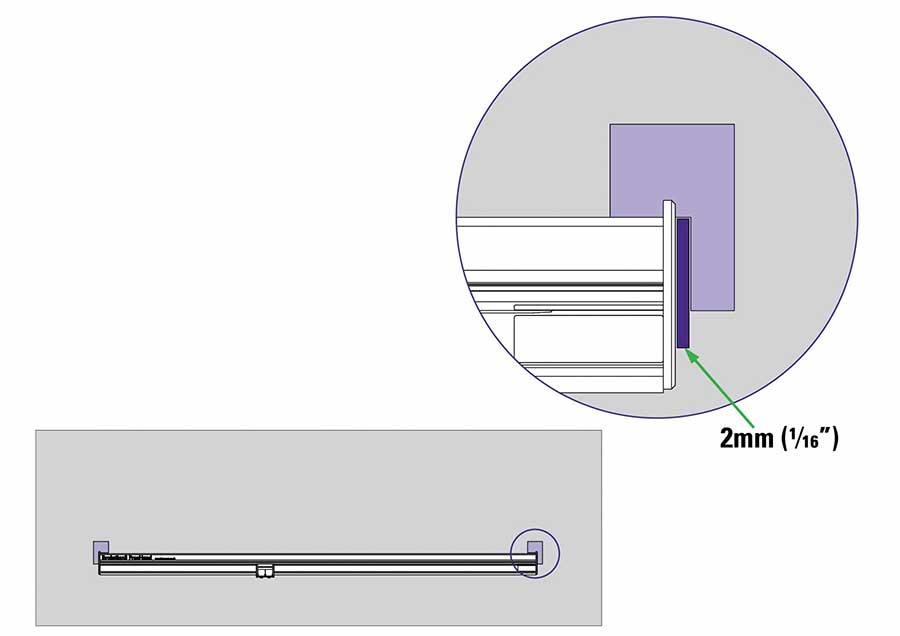
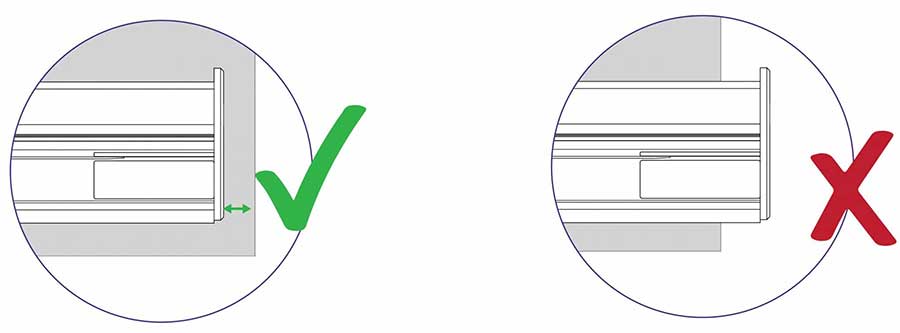
Position the two blocks as shown with a 1-2mm (1/16”) spacer between one end of the FreeHand and the inside edge of the adjacent block. Fix the blocks to the work surface. Ensure the FreeHand can be lifted and moved with ease and is not rubbing against the blocks.
When placed within the blocks the FreeHand is in a fixed cutting position. Either:
1) Make a cutting groove in the work surface:
A mark can be made on the table surface using Graphik blade and this used as a guide to cut a groove in the worksurface with a power saw. A cutting mat will be required should the Fabric Tool head be used.
2) Line the table surface with a cutting mat, PVC foamboard or similar:
This will need to be fixed in place either by screwing the two blocks through it or by using double sided adhesive tape. The blade tip should always run in the original cutline when the FreeHand is positioned within the blocks.
Multiple workstations can be created and the FreeHand shared between them.
The width of the work surface needs to be 40cm (16″) wider than the cut length of the FreeHand.
Metric example: E3FH260 260cm + 40cm = 300cm
Imperial example: E3FH104 104” + 16” = 118”
If your workbench does not meet the following parameters and cannot be adjusted for flatness it is recommended to use a different bench. Keencut’s BenchTop Bench is designed especially for this purpose.
Check the flatness of the worktop by stretching a thin piece of strong thread between two blocks of the same height approximately over the area the cutter is to be used.
Measure the highest and lowest part of the worktop under the thread, the difference between the two measurements should ideally be no more than 1mm (1/16″). If it is greater it will be necessary to adjust the surface flatness with a new top or by using spacing pieces between the worktop and bench framework.
The work surface must be stable with a robust framework below and good support (no flexing) particularly in the area under the two ends of the cutter.
Both ends of the cutter should be fully supported and not overhanging the work surface.
This section suggests a method of creating a cutting station, although beneficial for productivity and accuracy it is not essential.
Create two ‘L’ shape blocks from 25mm (1″) wood, MDF or plastic approximately to the following dimensions. These will be used as location guides for your FreeHand and a means of holding it above the worksurface whilst you have both hands free to place the material to be cut.
Place the FreeHand in its flat working position on the workbench. Make sure that it is in alignment with the edge of the work bench and a comfortable distance in from the edge of your bench.
Position the two blocks as shown with a 1-2mm (1/16”) spacer between one end of the FreeHand and the inside edge of the adjacent block. Fix the blocks to the work surface. Ensure the FreeHand can be lifted and moved with ease and is not rubbing against the blocks.
When placed within the blocks the FreeHand is in a fixed cutting position. Either:
1) Make a cutting groove in the work surface:
A mark can be made on the table surface using Graphik blade and this used as a guide to cut a groove in the worksurface with a power saw. A cutting mat will be required should the Fabric Tool head be used.
2) Line the table surface with a cutting mat, PVC foamboard or similar:
This will need to be fixed in place either by screwing the two blocks through it or by using double sided adhesive tape. The blade tip should always run in the original cutline when the FreeHand is positioned within the blocks.
Multiple workstations can be created and the FreeHand shared between them.
Ⓒ Keencut 2020 | Baird Rd, Corby NN17 5ZA United Kingdom | Contact us
Created by DeType | Privacy | Website Disclaimer | Terms & Conditions