
Inside the SteelTrak clamp housing assembly
Before you start
Before starting any work, check the machine is firmly fixed to the wall or freestanding leg and that you have the following equipment:
- A set of steps, high enough to reach the top of the machine
- 5mm (3/16″) Allen key (hex key)
- Small slotted screwdriver or steel ruler
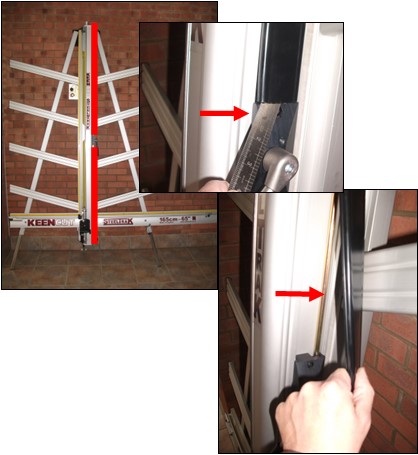
1. Remove the cover strips
The two black plastic cover strips are fixed on the right hand side of the slideway, they are shown in red in the picture. Use a small screwdriver or steel ruler to prise them off.
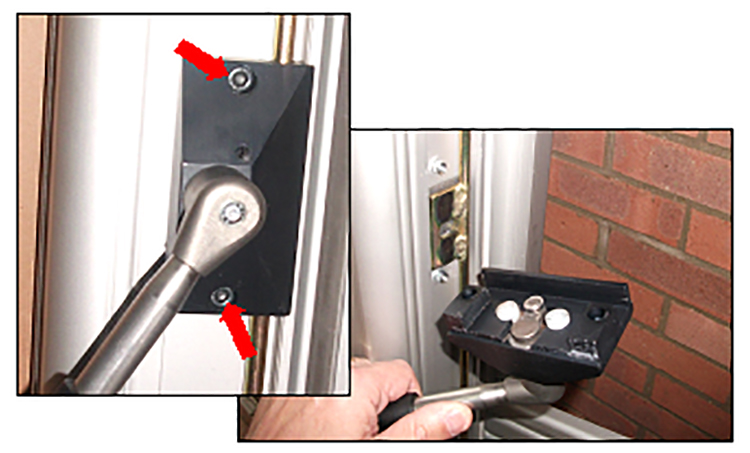
2. Remove the clamp housing assembly
Remove the two screws using a 5mm (3/16″) Allen key (hex key). As you remove the assembly, make sure the inside faces upwards to prevent parts falling to the floor.
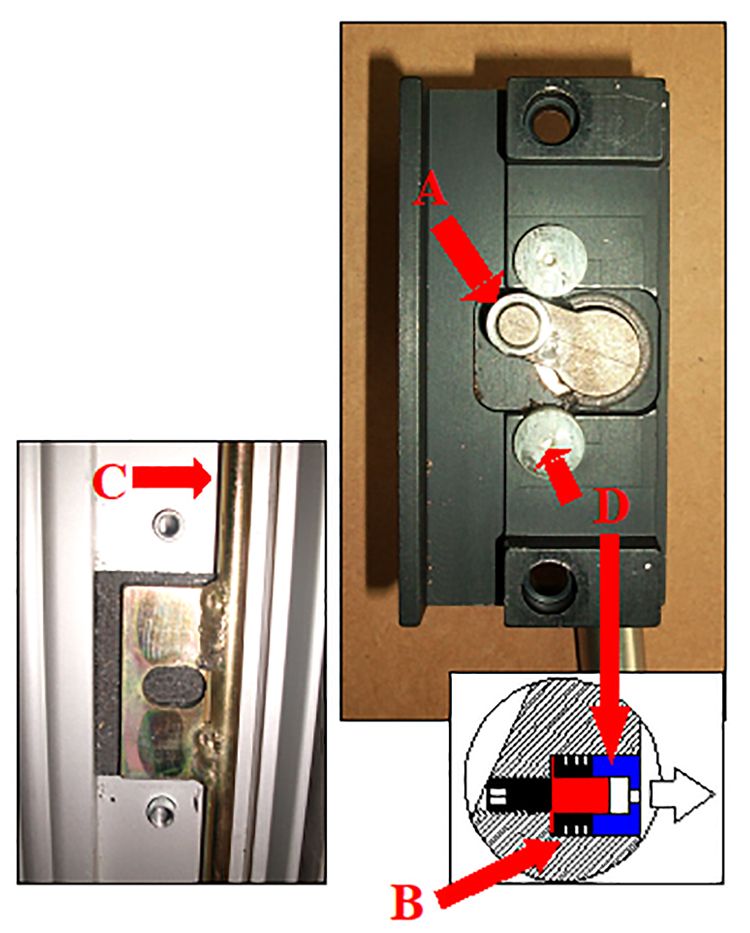
3. Check the clamp housing
The clamp roller (A) should be a snug fit on its spigot. If it is a loose fit, has excessive wear on its outside edge, or is split it should be replaced.
The pressure pads have a series of 7 spring washers (B) behind each of them. The pressure pads will need replacing if they are damaged or worn. to such an extent that there is a 6mm (1/4”) hole visible. Should the spring washers be disturbed, it is essential that they are orientated as shown in the drawing when re-assembled.
Please note: clean any debris from the housing faces but do not lubricate the clamp roller or pressure pads as they must remain clean and dry.
Under the clamp housing assembly is the push rod (C), check the oval hole in the plate is not badly worn, it is not unusual to find a little wear and some rub marks on the face of the plate. Behind the plate is a brake pad (D), which should be fixed to the aluminium slideway. If this needs re-fixing or replacing, use Cyanoacrylate Adhesive e.g superglue and position centrally between the two threaded inserts, as shown.
If replacing the push rod, always replace the adjuster with it. There have been design changes that affect the length of the push rod but compensated for in the adjuster in order to keep the overall length the same.
Ⓒ Keencut 2020 | Baird Rd, Corby NN17 5ZA United Kingdom | Contact us
Created by DeType | Privacy | Website Disclaimer | Terms & Conditions