
Evolution3 SmartFold User Guide – Get to know cutter
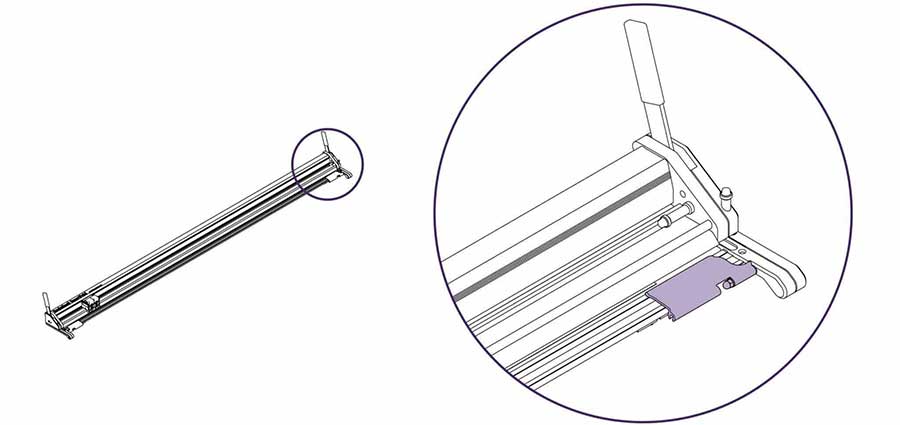
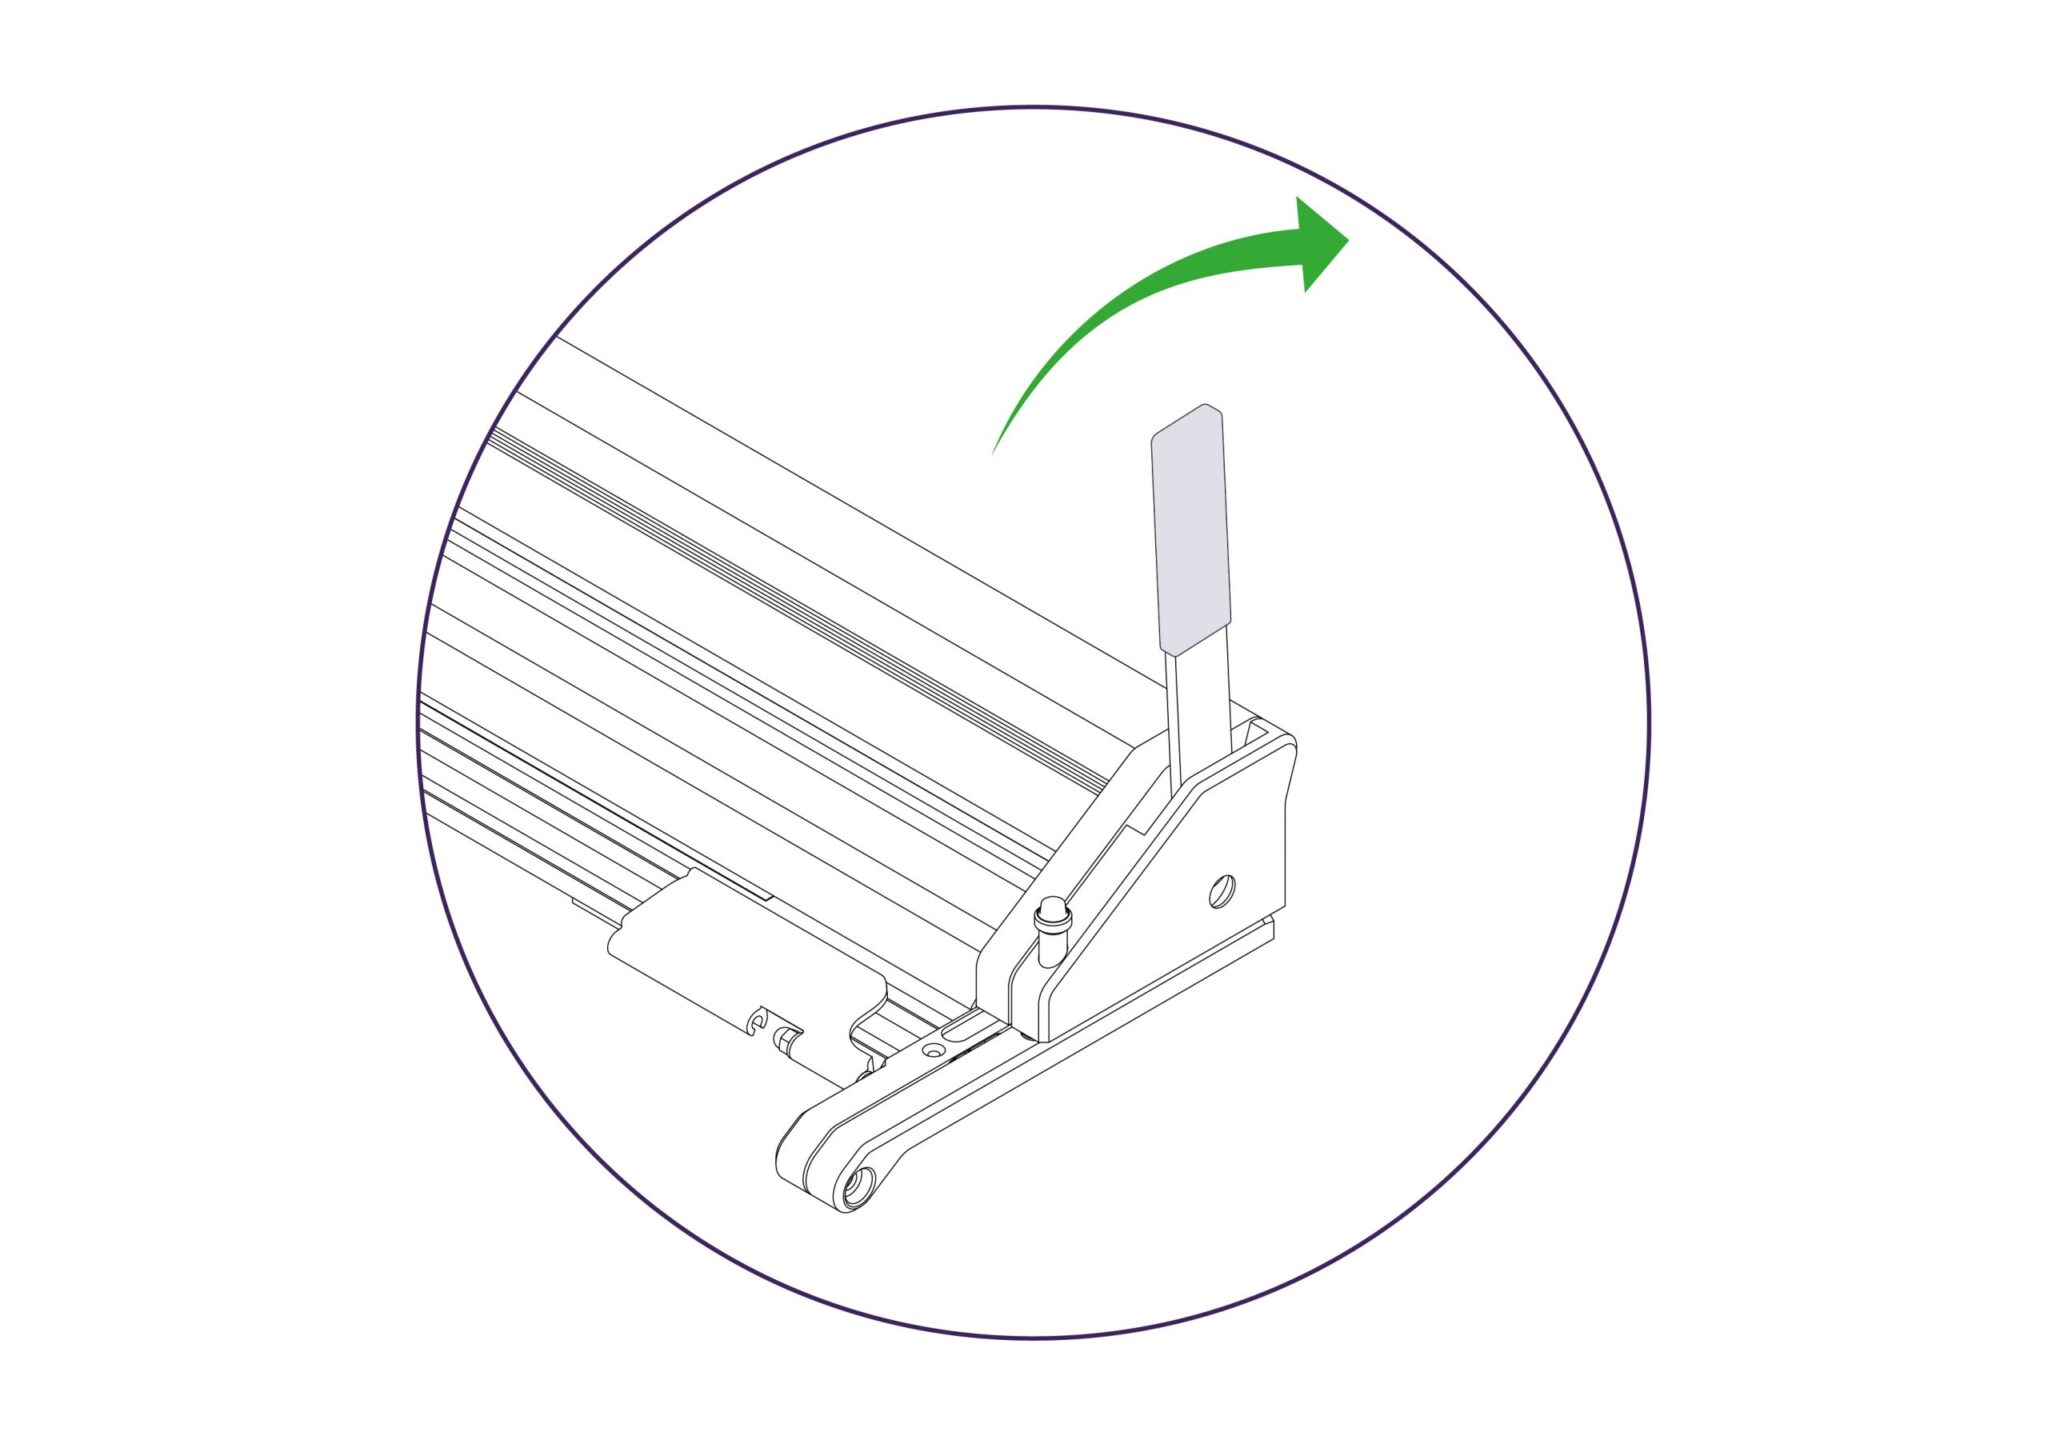
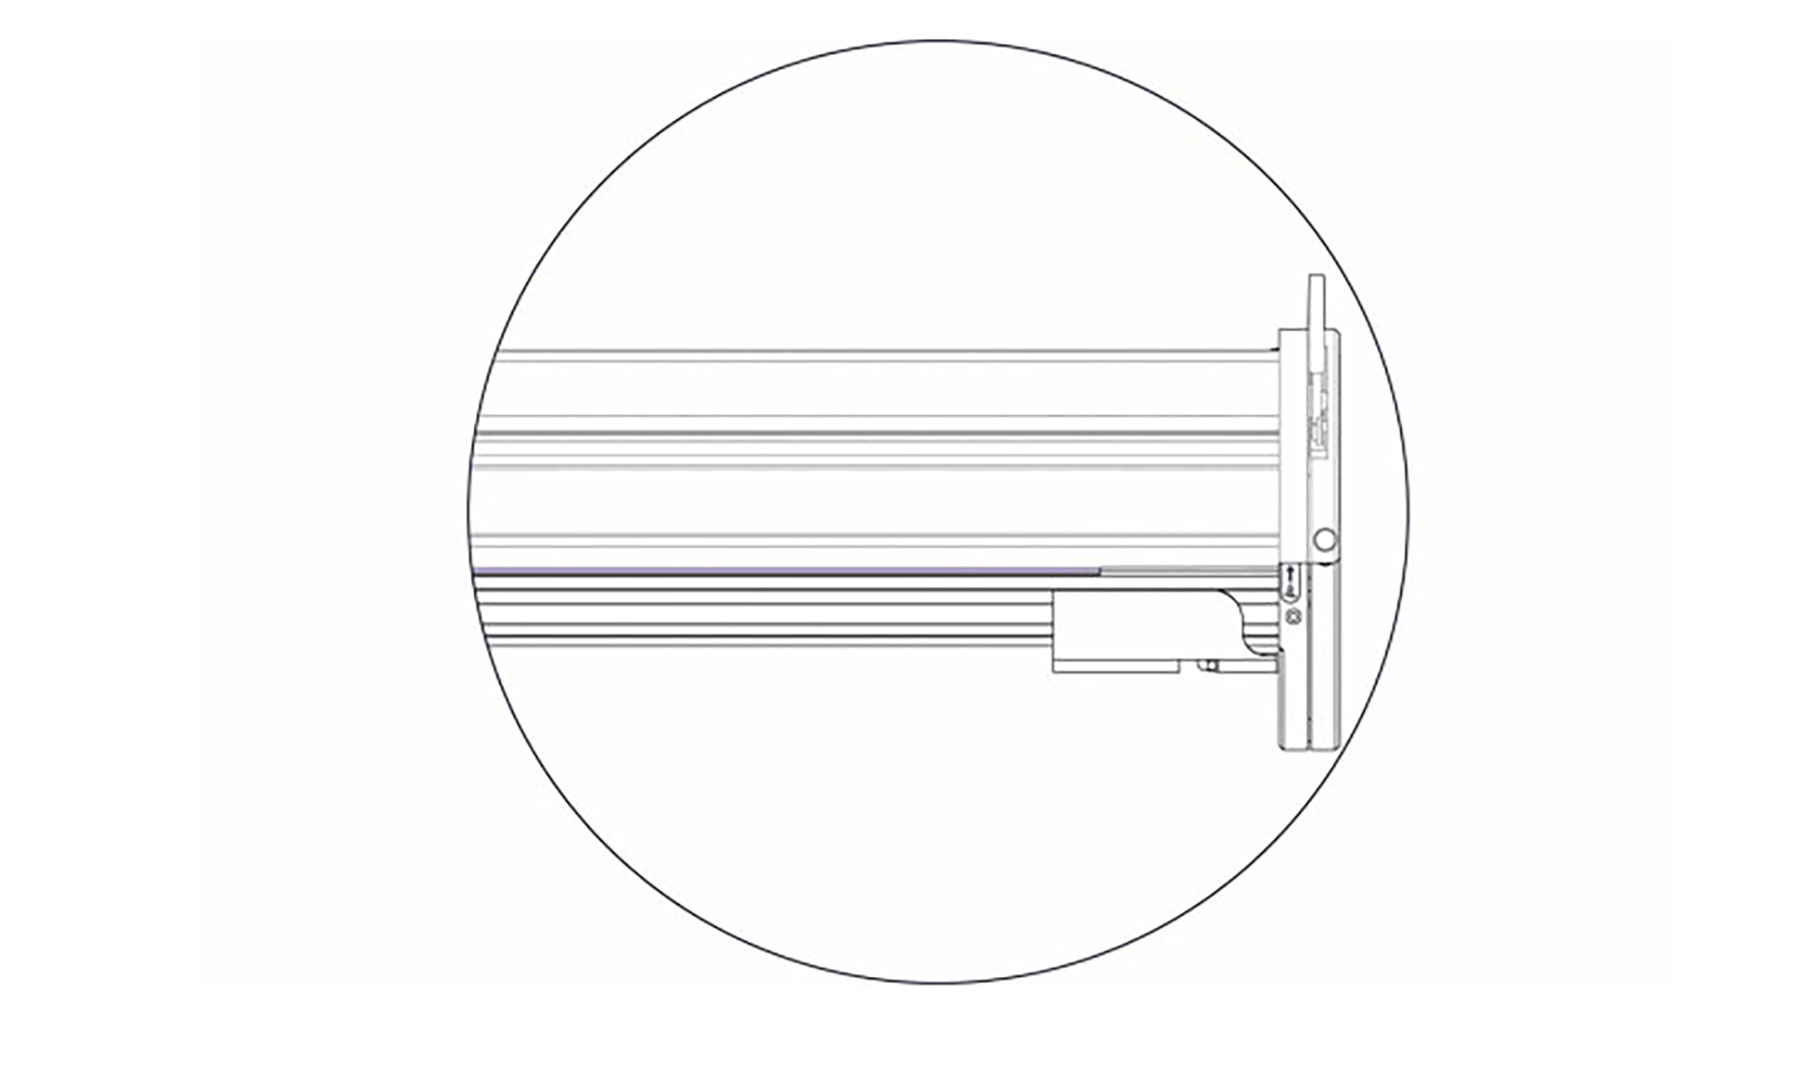
A material stop is mounted at both ends end of your SmartFold (seen highlighted in this image). When cutting tough or thick materials at prevents it sliding when being cut.

Insert your piece of material and lower the lift and hover so that it is just above the face of the material (as shown previously).
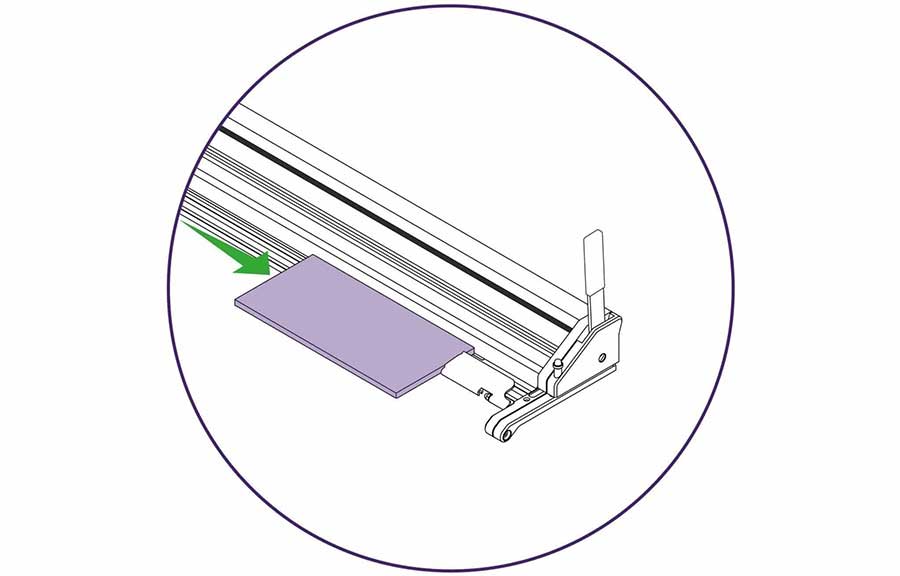
Butt the material up to the stop before clamping it in place.
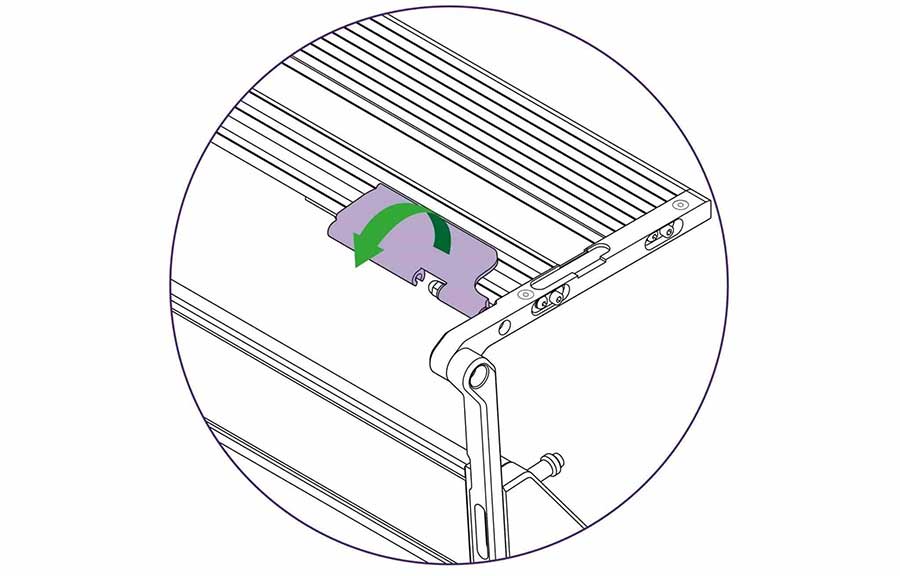
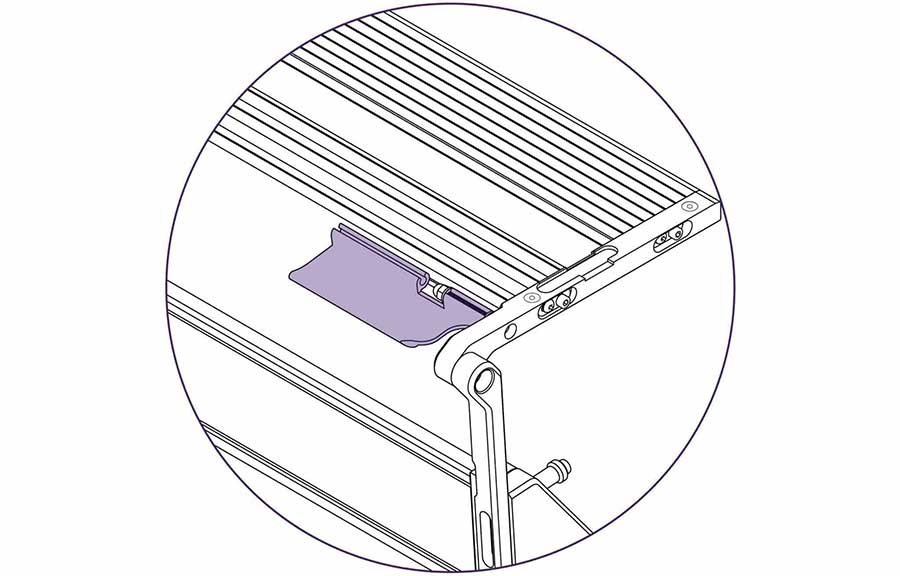
The material stop can be rotated to move it out of the way.
Particularly useful when an clear work surface is required for other purposes.
The patented ‘Lift-and-Hover’ is a unique Keencut development that combines three features to give the ultimate in accuracy and productivity.
The SmartFold can hold the whole length of the cutter bar a very short distance above the object being trimmed and hold it there even if the levers are released. This leaves both hands free to align the objects cutting marks to the edge of the sightline strip. Pushing either lever fully lowers the cutter bar and clamps the object ready for cutting.
Hover action – See how to adjust the hover action >
Sightline strip – These are easily replaceable and are available from your supplier.
See how to replace the sightline strip >
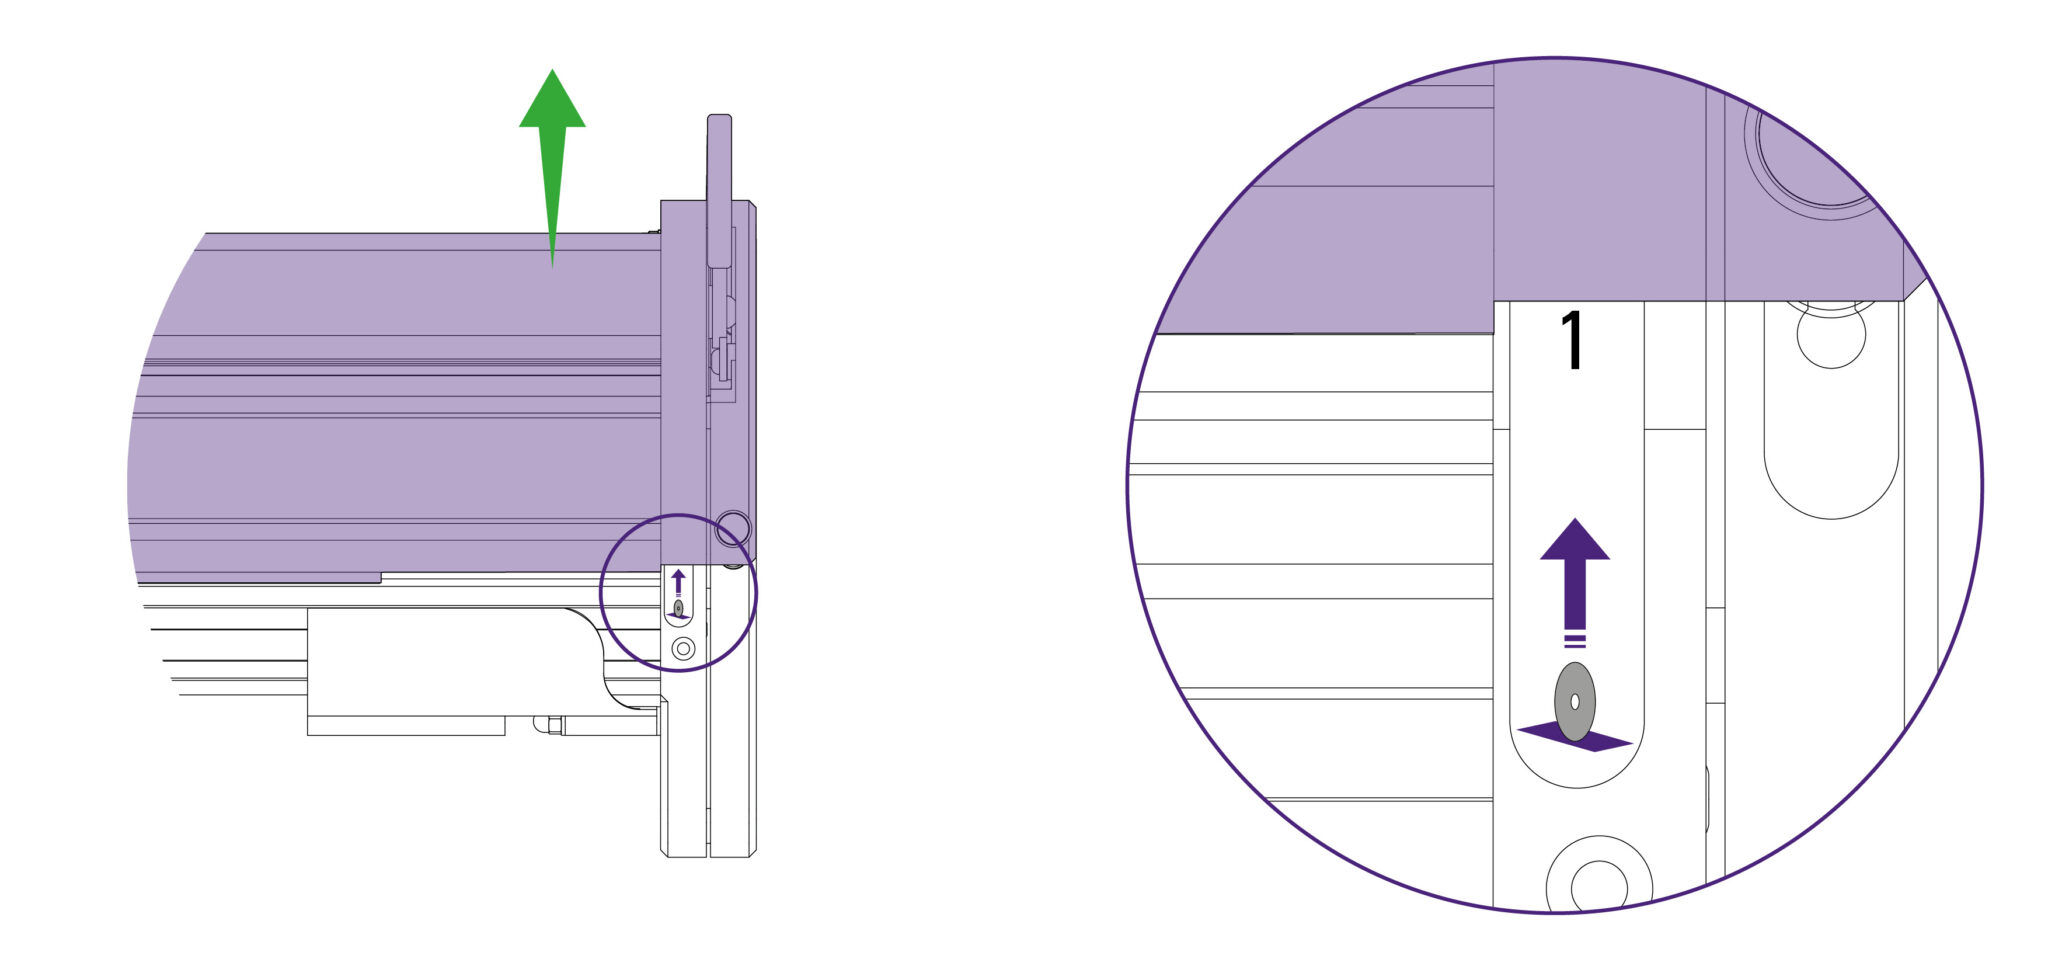
The SmartFold includes an integral polymer cutting strip for use with the Evolution3 Fabric tool head to cut textiles and fragile materials. A simple push button at each end of the bar allows the cutter to be set on any of four cut lines, extending the life of the strip. There is no need for a separate cutting mat.
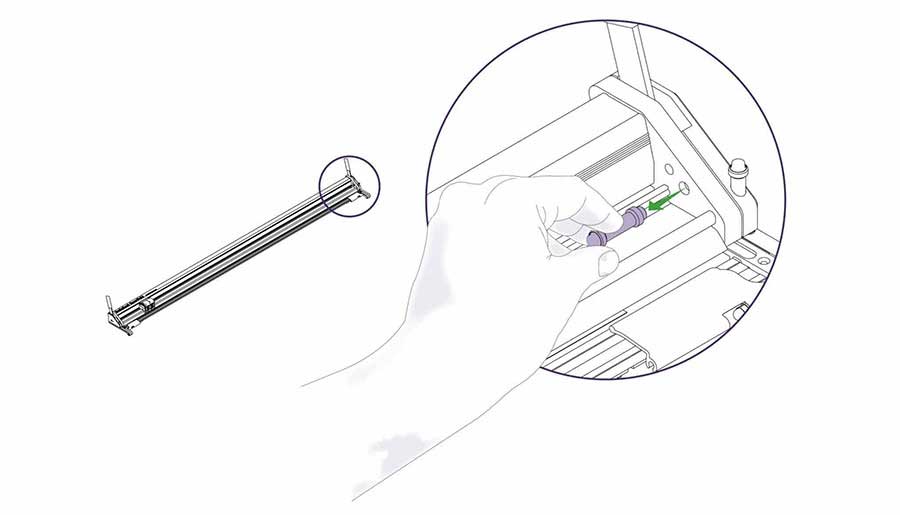
Pull and remove end stop.
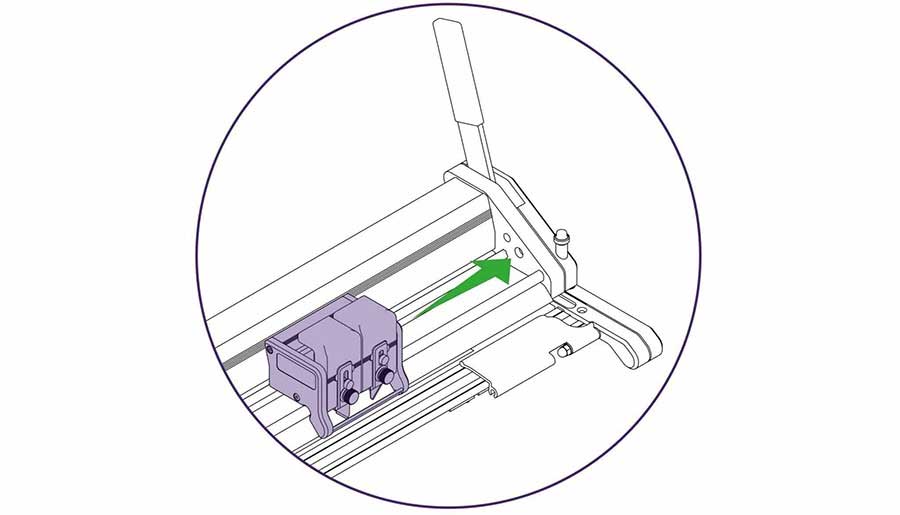
Slide the cutting head to the right.
Lift up the head to remove it.
Insert the cutting head of your choice, and slide it to the left.
More than one tool can be mounted on the cutter bar if required.

Always replace the end stop.
IMPORTANT: It is essential to remove cutter head before folding
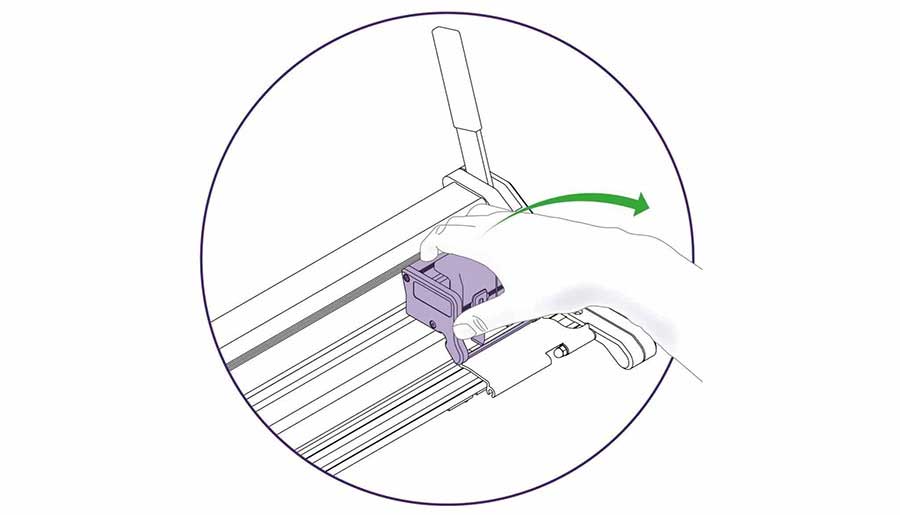
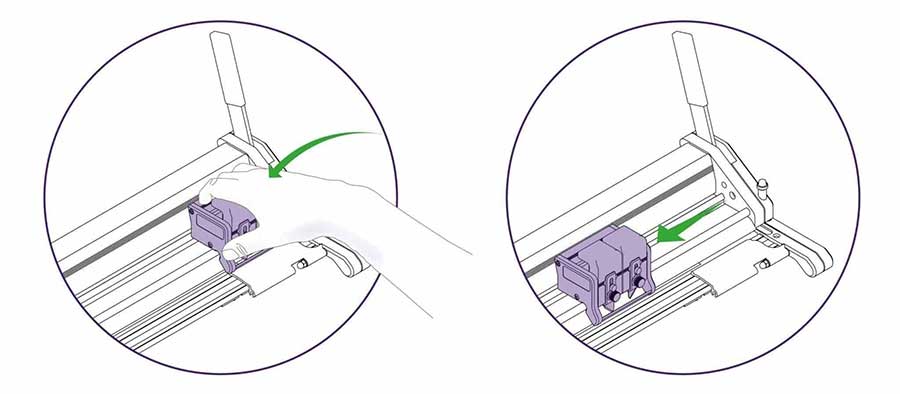
Pull and remove end stop.
Slide the cutting head to the right.
Gently lift to remove the cutter head, then replace end stop.
IMPORTANT: This next step may require more than one person on longer cutters to prevent damage or injury
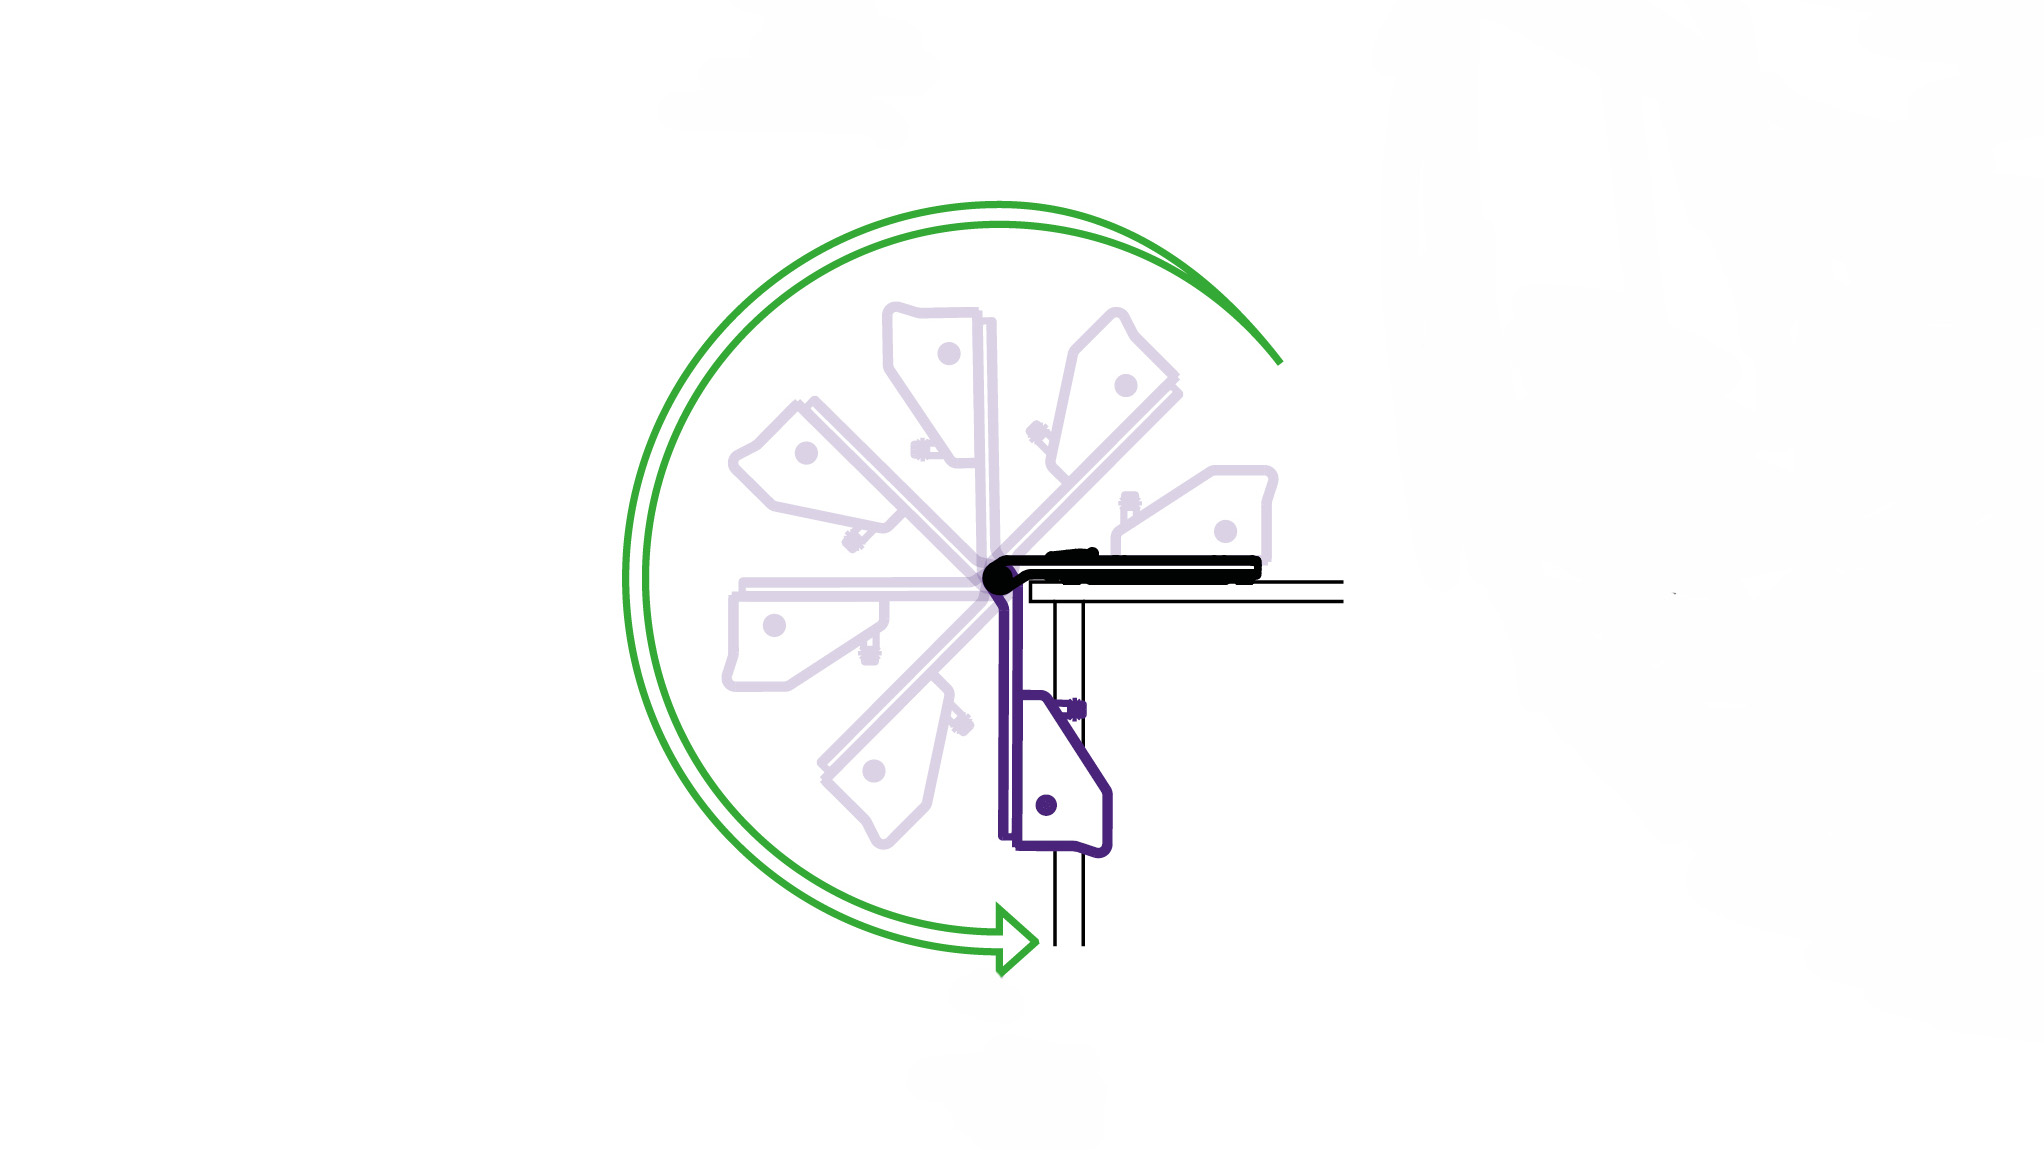
Grip the cutter bar firmly, lift carefully and swing over the edge of the bench, bring gently to a stop when vertical.
| Be careful when lifting |
A material stop is mounted at both ends end of your SmartFold (seen highlighted in this image). When cutting tough or thick materials at prevents it sliding when being cut.
Insert your piece of material and lower the lift and hover so that it is just above the face of the material (as shown previously).
Butt the material up to the stop before clamping it in place.
The material stop can be rotated to move it out of the way.
Particularly useful when an clear work surface is required for other purposes.
The patented ‘Lift-and-Hover’ is a unique Keencut development that combines three features to give the ultimate in accuracy and productivity.
The SmartFold can hold the whole length of the cutter bar a very short distance above the object being trimmed and hold it there even if the levers are released. This leaves both hands free to align the objects cutting marks to the edge of the sightline strip. Pushing either lever fully lowers the cutter bar and clamps the object ready for cutting.
Hover action – See how to adjust the hover action >
Sightline strip – These are easily replaceable and are available from your supplier.
See how to replace the sightline strip >
The SmartFold includes an integral polymer cutting strip for use with the Evolution3 Fabric tool head to cut textiles and fragile materials. A simple push button at each end of the bar allows the cutter to be set on any of four cut lines, extending the life of the strip. There is no need for a separate cutting mat.
Pull and remove end stop.
Slide the cutting head to the right.
Lift up the head to remove it.
Insert the cutting head of your choice, and slide it to the left.
More than one tool can be mounted on the cutter bar if required.
Always replace the end stop.
IMPORTANT: It is essential to remove cutter head before folding
Pull and remove end stop.
Slide the cutting head to the right.
Gently lift to remove the cutter head, then replace end stop.
IMPORTANT: This next step may require more than one person on longer cutters to prevent damage or injury
Grip the cutter bar firmly, lift carefully and swing over the edge of the bench, bring gently to a stop when vertical.
| Be careful when lifting |
Ⓒ Keencut 2020 | Baird Rd, Corby NN17 5ZA United Kingdom | Contact us
Created by DeType | Privacy | Website Disclaimer | Terms & Conditions