Evolution3 BenchTop User Guide – Make your first cut
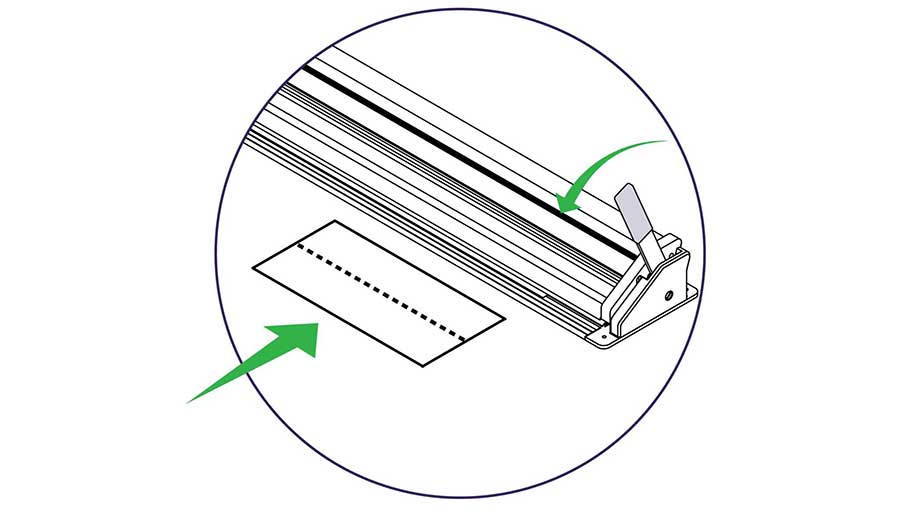
Pull the lever to raise the cutter bar, place the material for cutting approximately in position under the cutter bar.
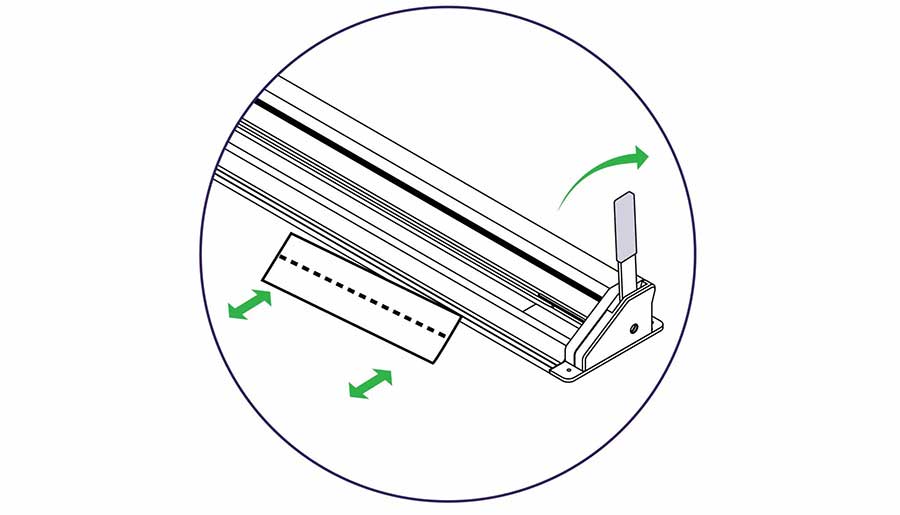
Push the lever to lower the cutter bar so it is only 1-2mm (1⁄16”) above the surface of the material, the closer to the material it is the less lining up error you will get when viewing the cut marks.
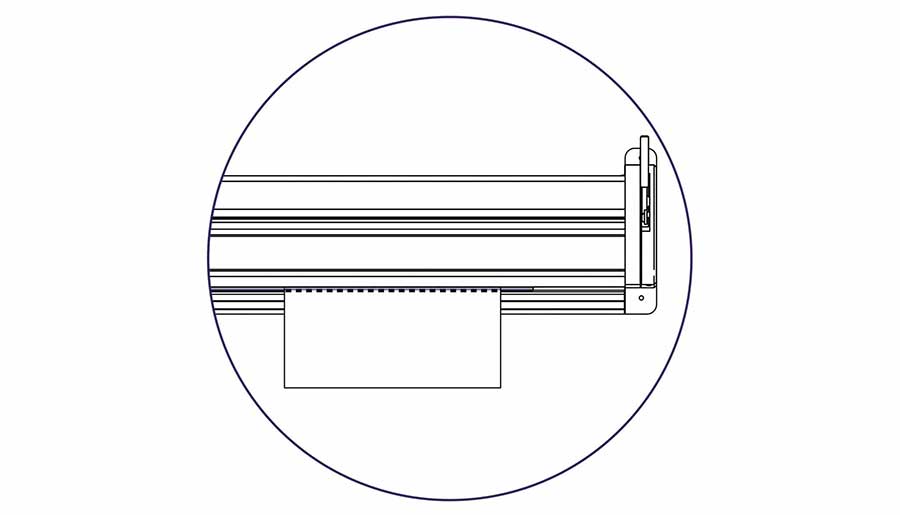
Look down vertically to align the edge of the sightline strip to the cut mark.
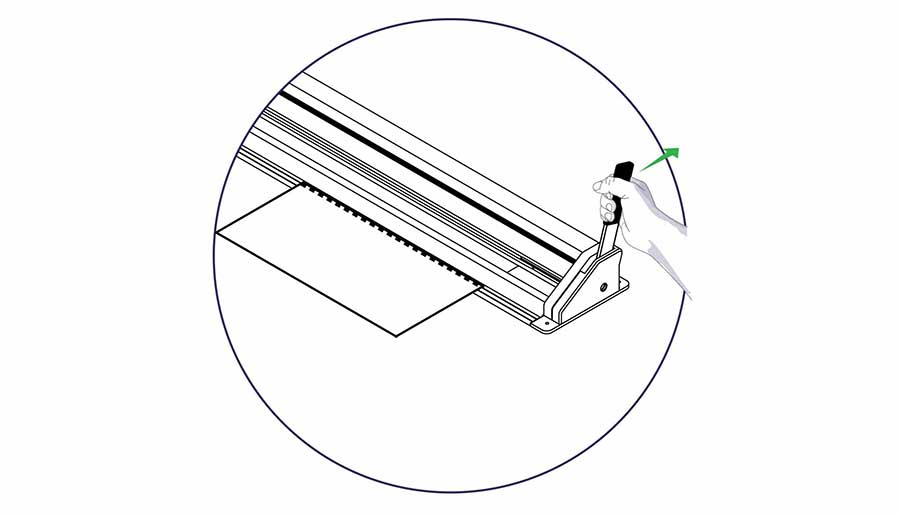
When fully aligned use the lever to lower the cutter bar onto the material and clamp it in position ready for cutting. Further cutting information is given in the sections under relevant tool heads.
See Double Graphik cutting techniques >
See the Fabric tool head cutting techniques >
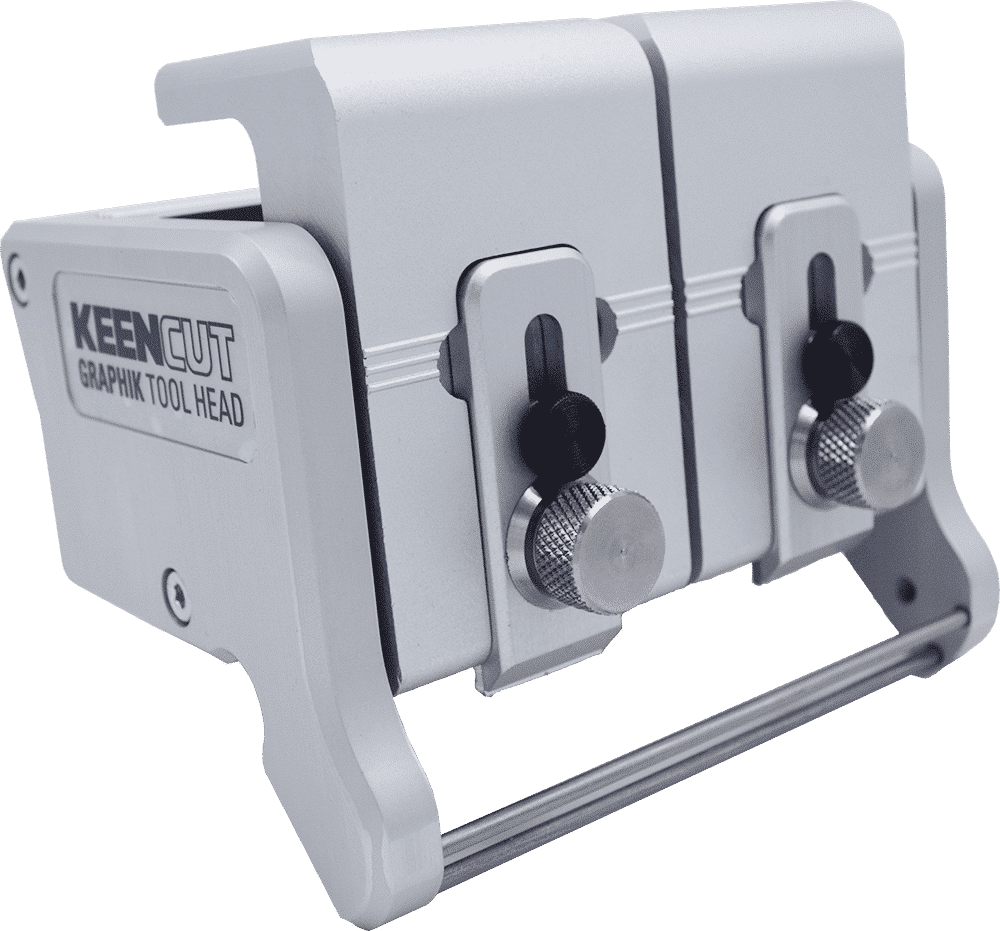
QuikSwap Graphik tool head for Evolution3 cutters, with two individual blade holders for two way cutting. Graphik blades are stronger and more stable than regular blades. Ideal for vinyl, banner, cardboard, PVC foamboard up to 13mm (½″), foam-centred board, corrugated plastic, paper, pop-up and roll-up materials.
This head is supplied as standard with all Evolution3 cutters.
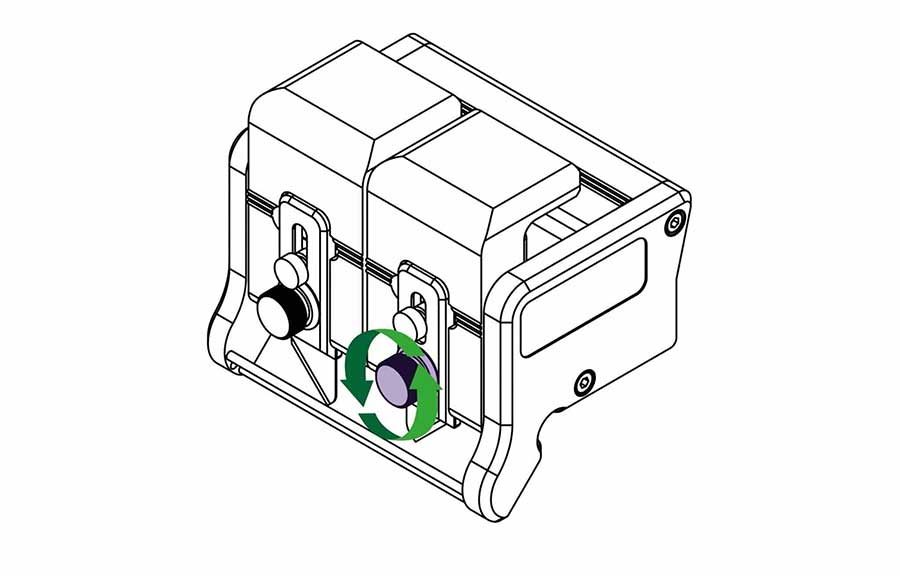
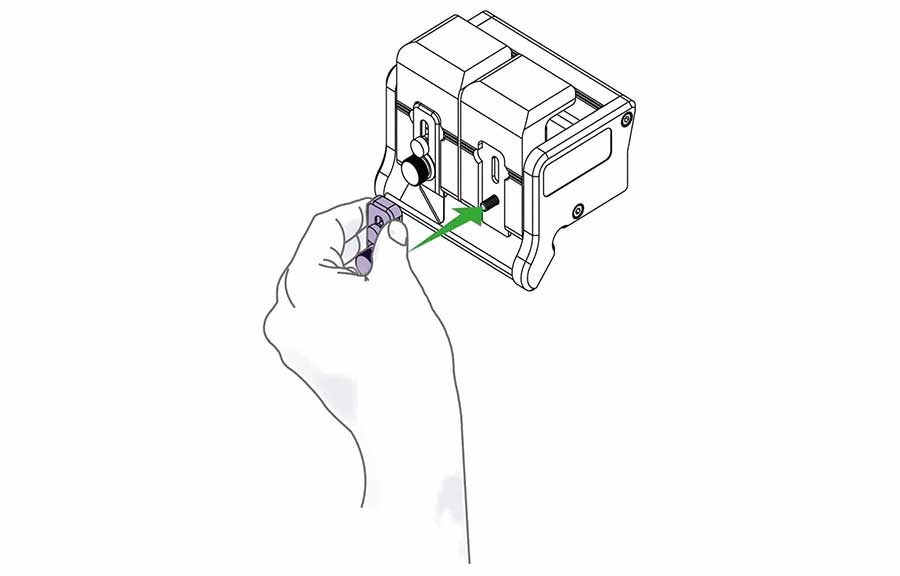
Undo the highlighted knob to remove the magnetic blade clamping plate.
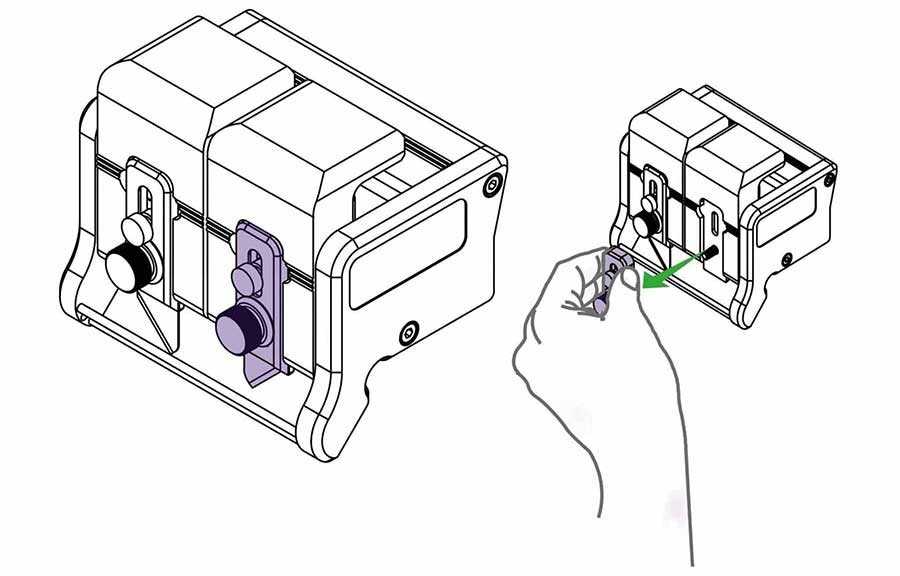
Pull the magnetic blade clamping plate away from the cutting head.
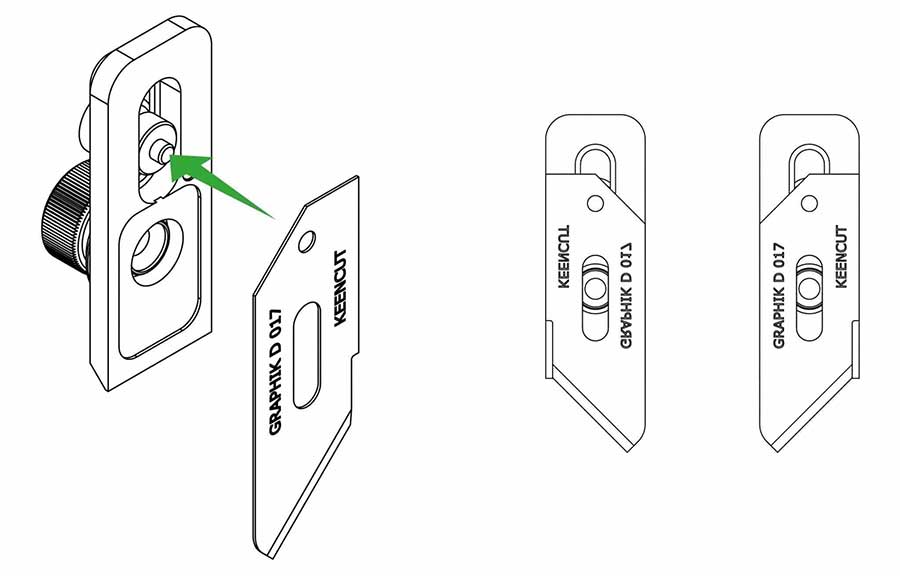
Insert a Graphik blade, check it is facing the correct way for your desired direction of cutting. Place the small pin in the hole at the top of the blade and align with the edge of the clamping plate.
Replace the blade clamping plate onto the blade holder but do not tighten fully until the blade depth has been set (see how to adjust the blade depth >).
Repeat on the other blade holder if required.
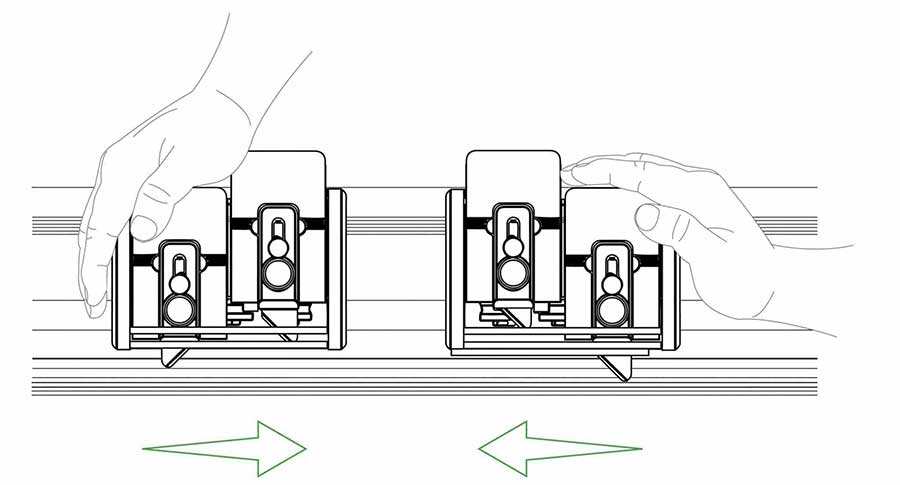
The cutting head can be pulled or pushed to cut the material. Load and align the material to be cut as described in the ‘clamping material’ section (see how to align and clamp the material >), press down the chosen blade holder whilst pushing/pulling the cutting head along the cutter bar.
Tip: Only finger pressure is needed to hold the blade holder down, if after making the cut the blade holder has risen and the blade not cut through simply cut again. This could be an indication the material should be cut in two strokes using the dual blade depth setting as explained above.
Pull the lever to raise the cutter bar, place the material for cutting approximately in position under the cutter bar.
Push the lever to lower the cutter bar so it is only 1-2mm (1⁄16”) above the surface of the material, the closer to the material it is the less lining up error you will get when viewing the cut marks.
When fully aligned use the lever to lower the cutter bar onto the material and clamp it in position ready for cutting. Further cutting information is given in the sections under relevant tool heads.
See Double Graphik cutting techniques >
See the Fabric tool head cutting techniques >
QuikSwap Graphik tool head for Evolution3 cutters, with two individual blade holders for two way cutting. Graphik blades are stronger and more stable than regular blades. Ideal for vinyl, banner, cardboard, PVC foamboard up to 13mm (½″), foam-centred board, corrugated plastic, paper, pop-up and roll-up materials.
This head is supplied as standard with all Evolution3 cutters.
Insert a Graphik blade, check it is facing the correct way for your desired direction of cutting. Place the small pin in the hole at the top of the blade and align with the edge of the clamping plate.
Replace the blade clamping plate onto the blade holder but do not tighten fully until the blade depth has been set (see how to adjust the blade depth >).
Repeat on the other blade holder if required.

