
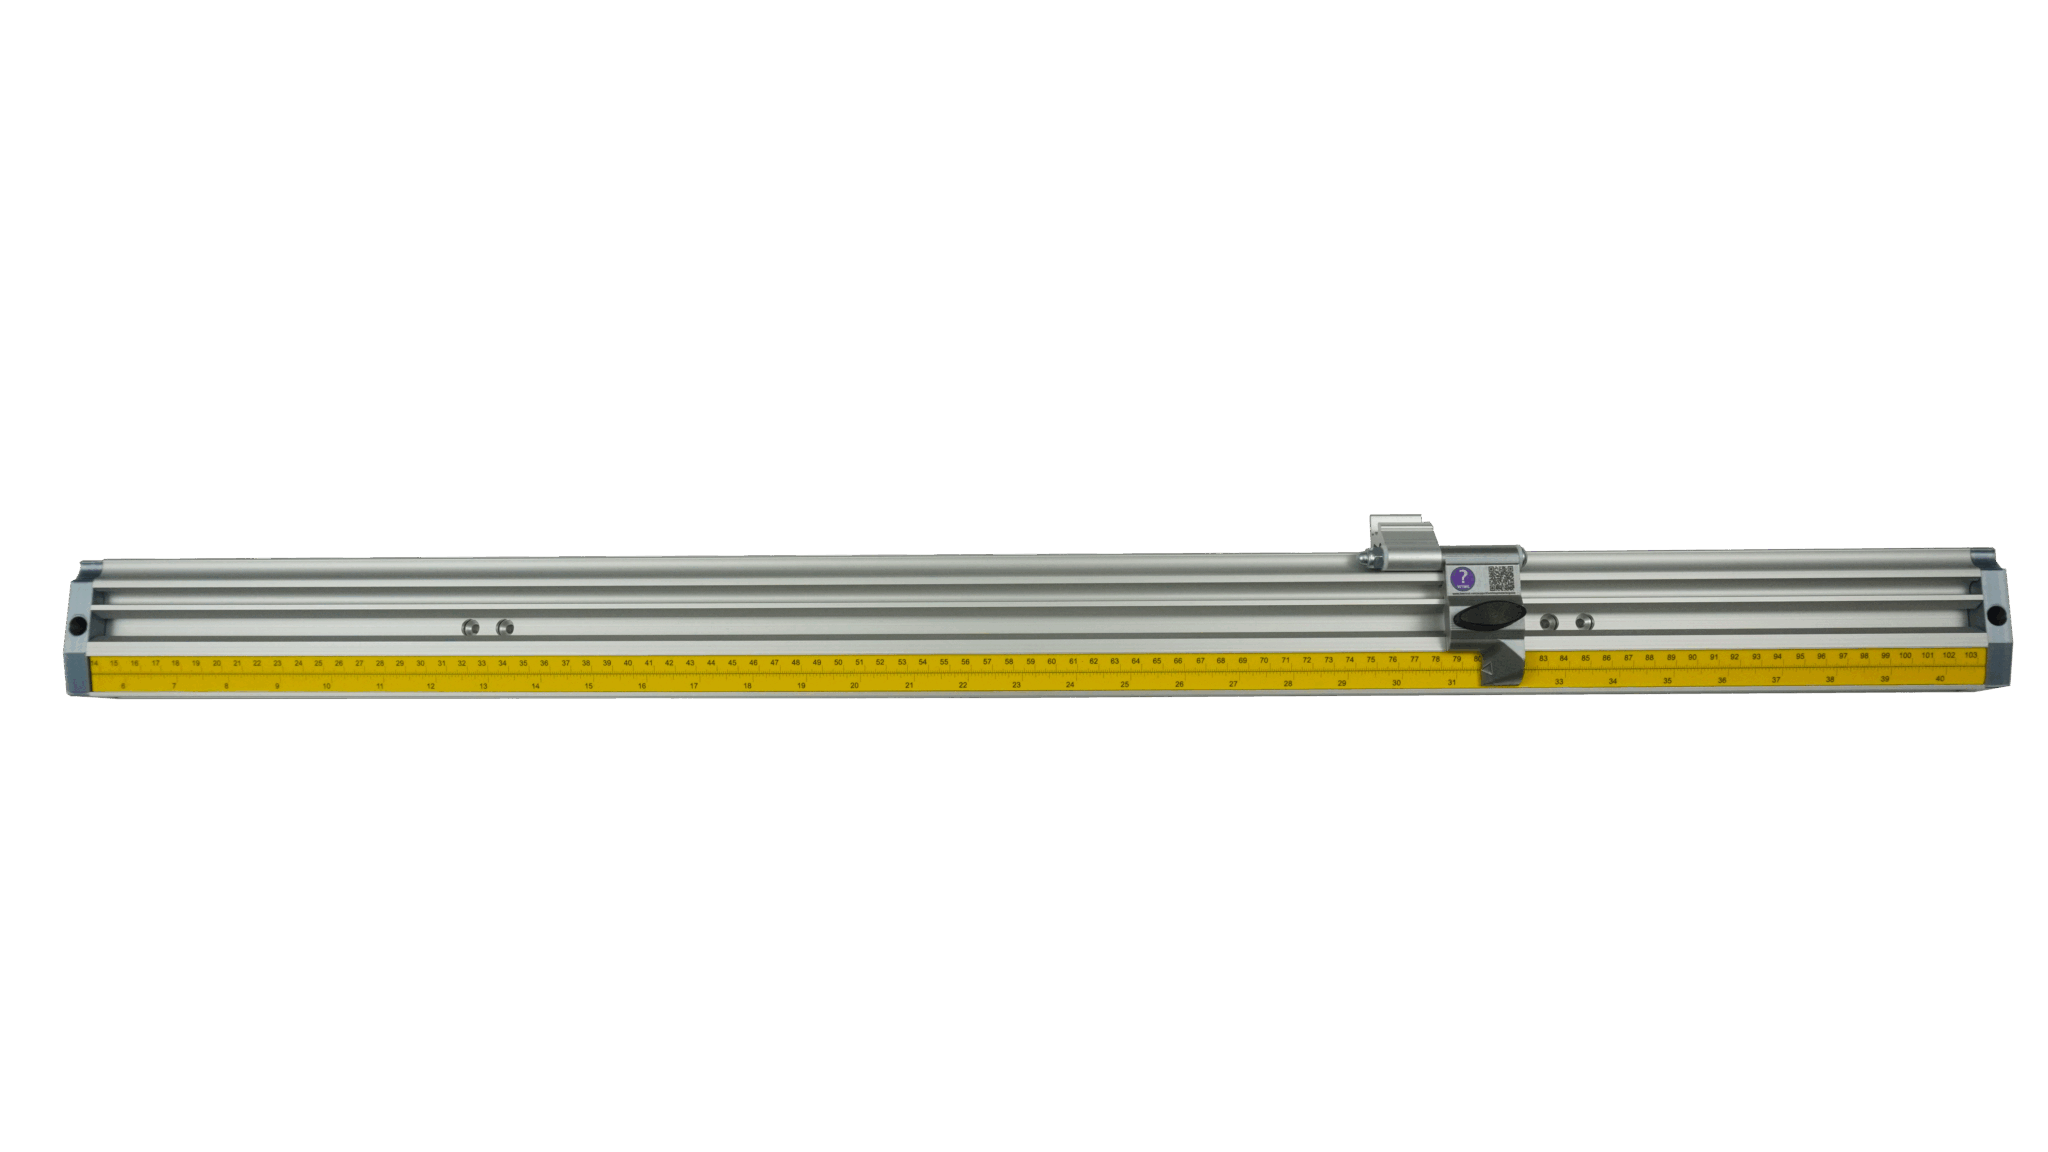

Worktop Material Guide Installation Manual
How to use this guide
Scroll down to view the guide.
You can expand and collapse sections using the + and – icons.
The images in this manual are expandable. Click/tap on them to enlarge.
View PDF version >
Other support resources
Register your cutter to activate your guarantee >
Visit Keencut support centre >
Visit user forum >
Contact Keencut >
The Material Guide has been designed to work on any worksurface to assist with measuring and aligning rigid and semi-rigid materials. It can be used in conjunction with many Keencut cutters or most other situations where precise positioning of workpieces is required.
NOTE: The Material Guide can be installed on the left or the right-hand side of the worktop. The following diagrams show it on the right, but the process is the same for fitting on the left. The ‘Squaring check’ section covers both left and right installation.
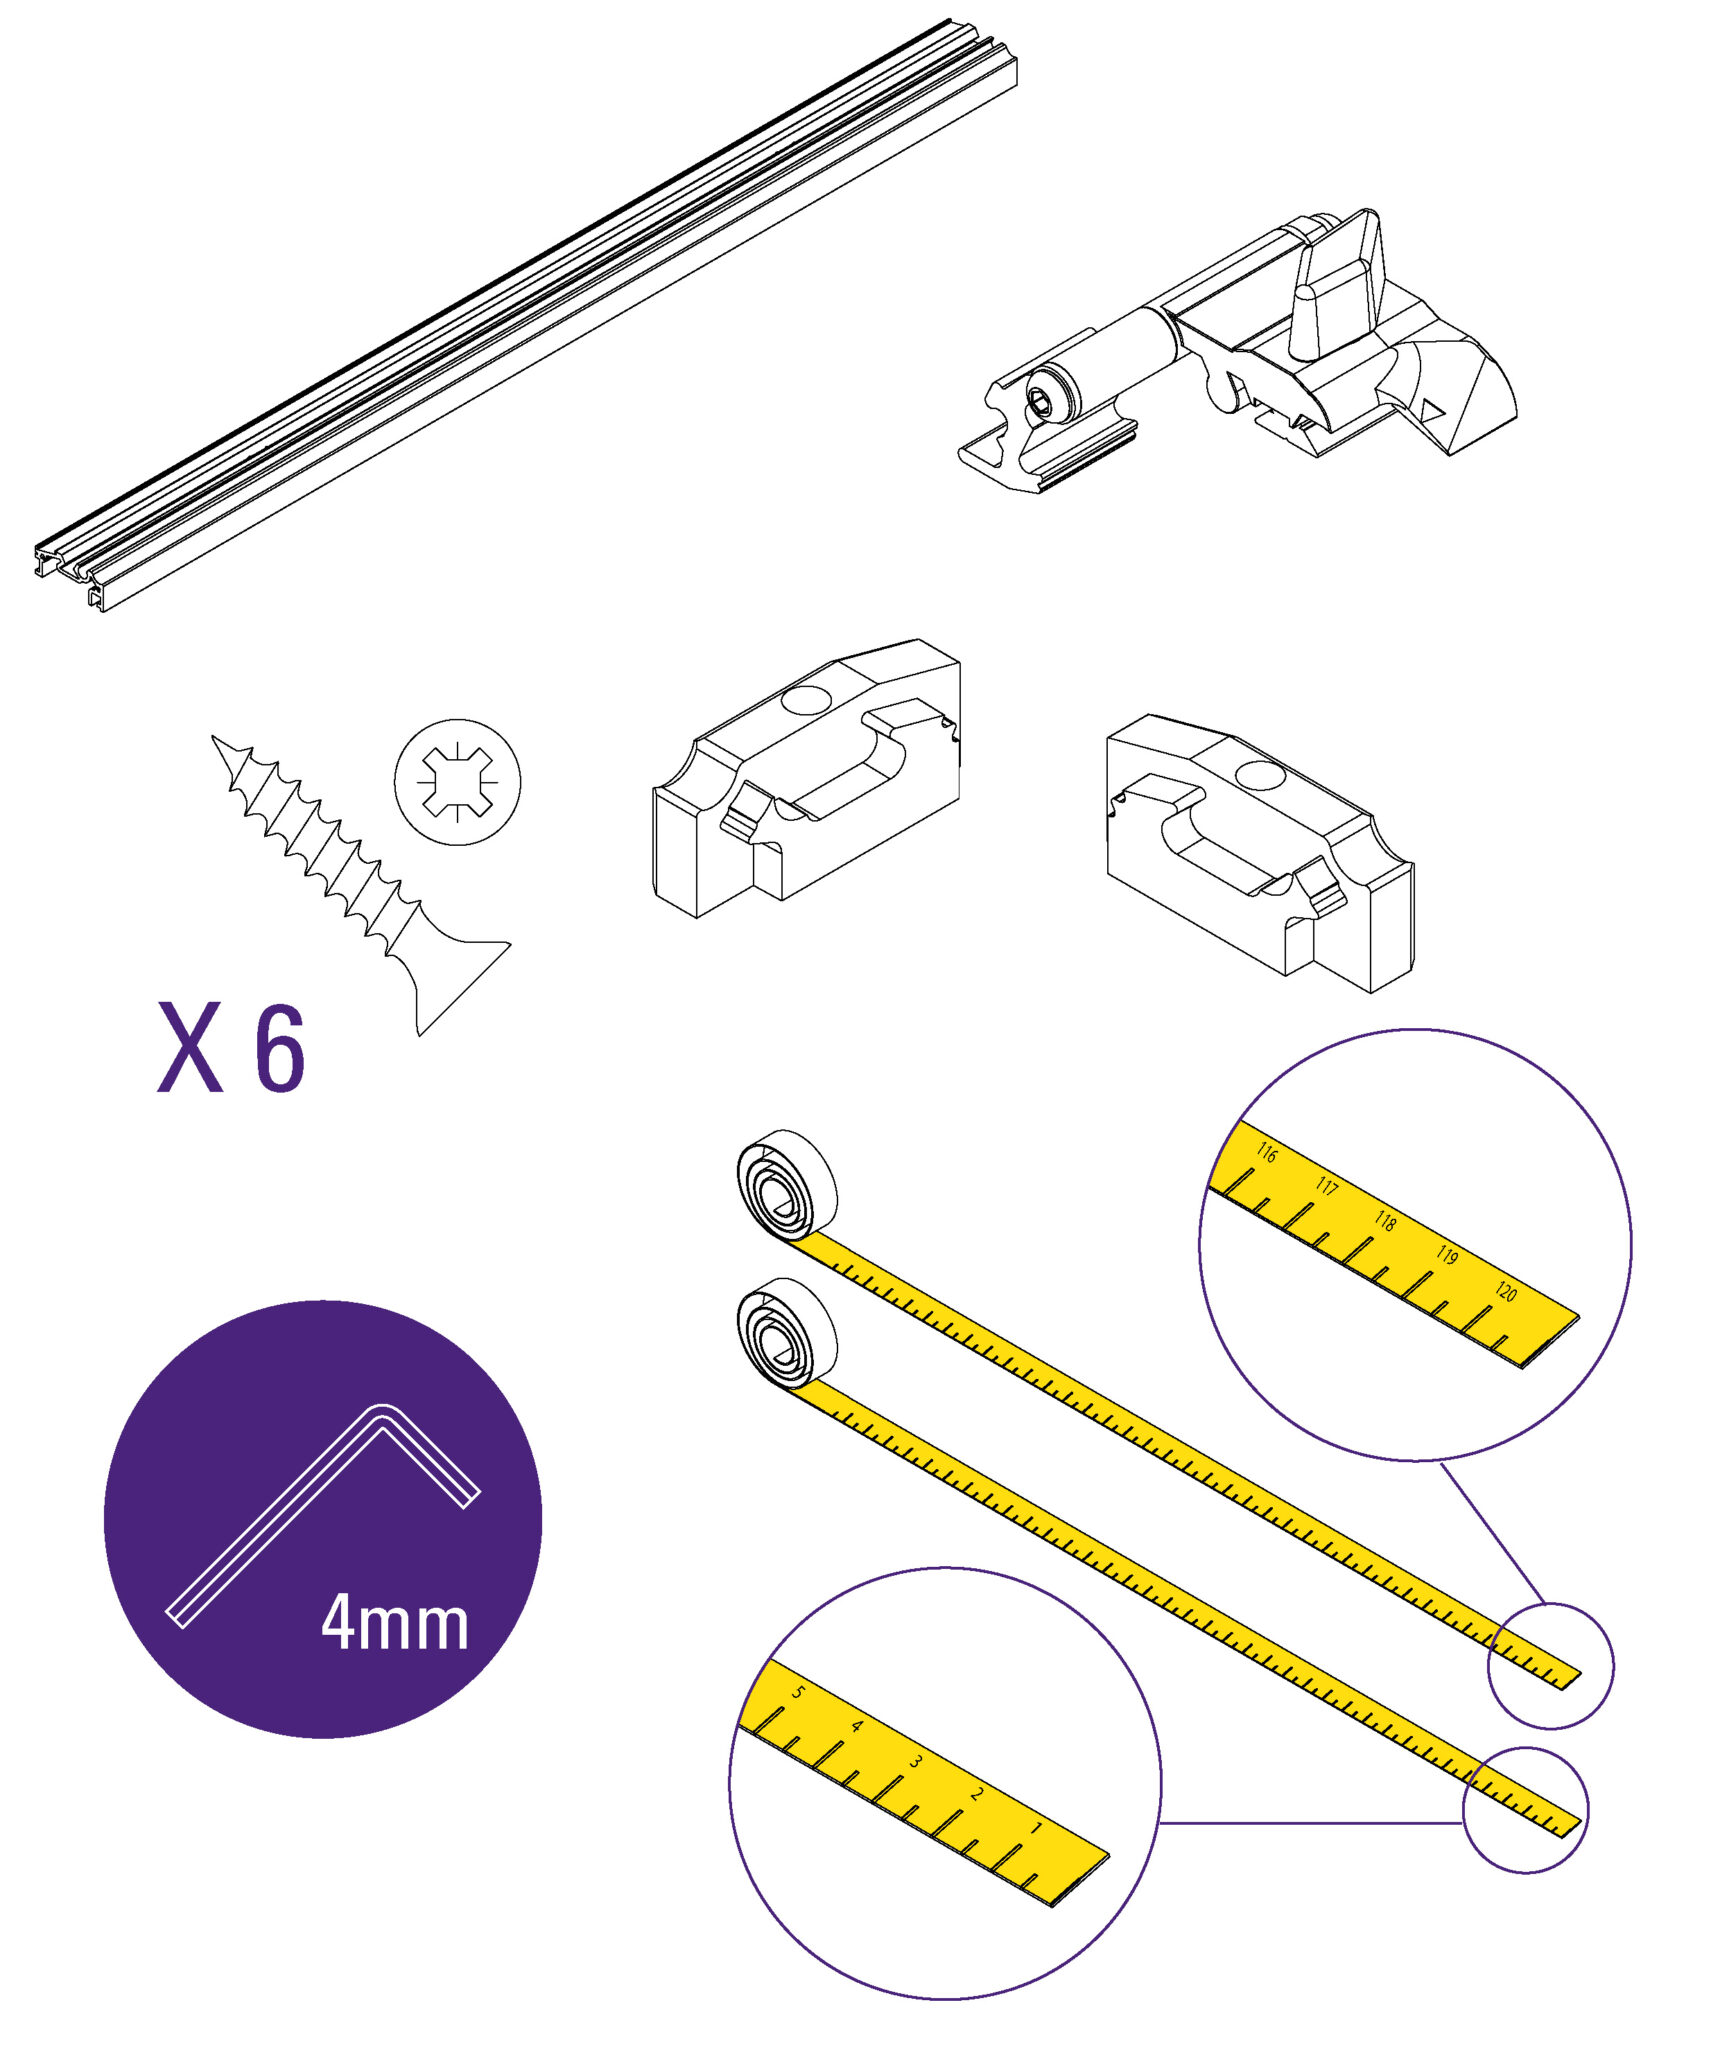
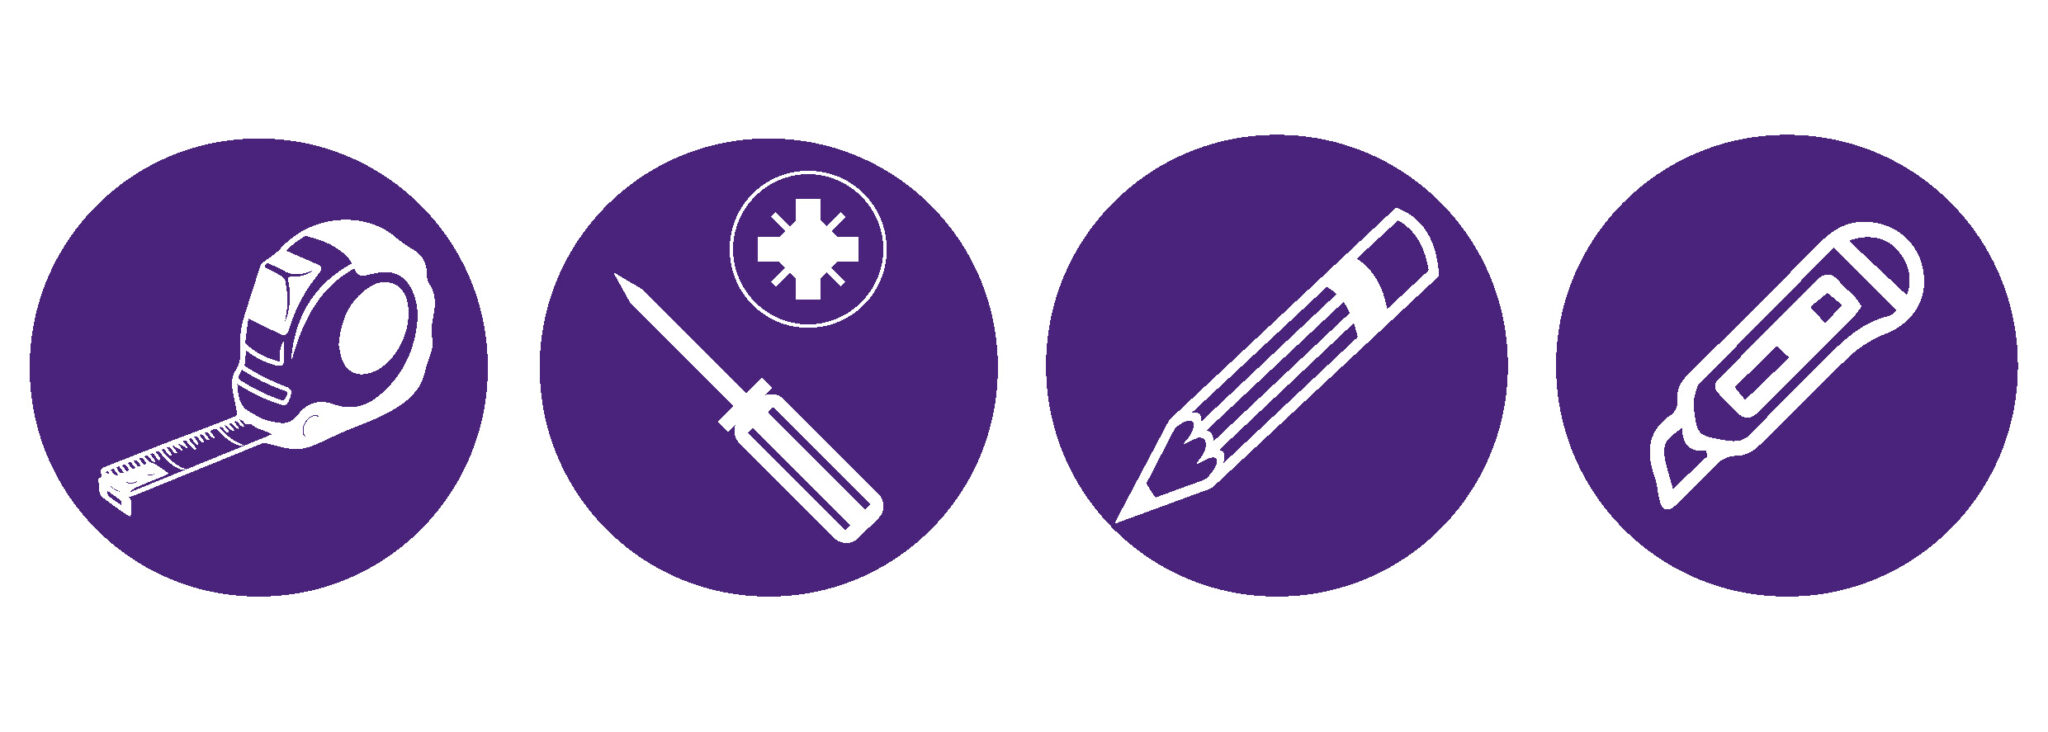

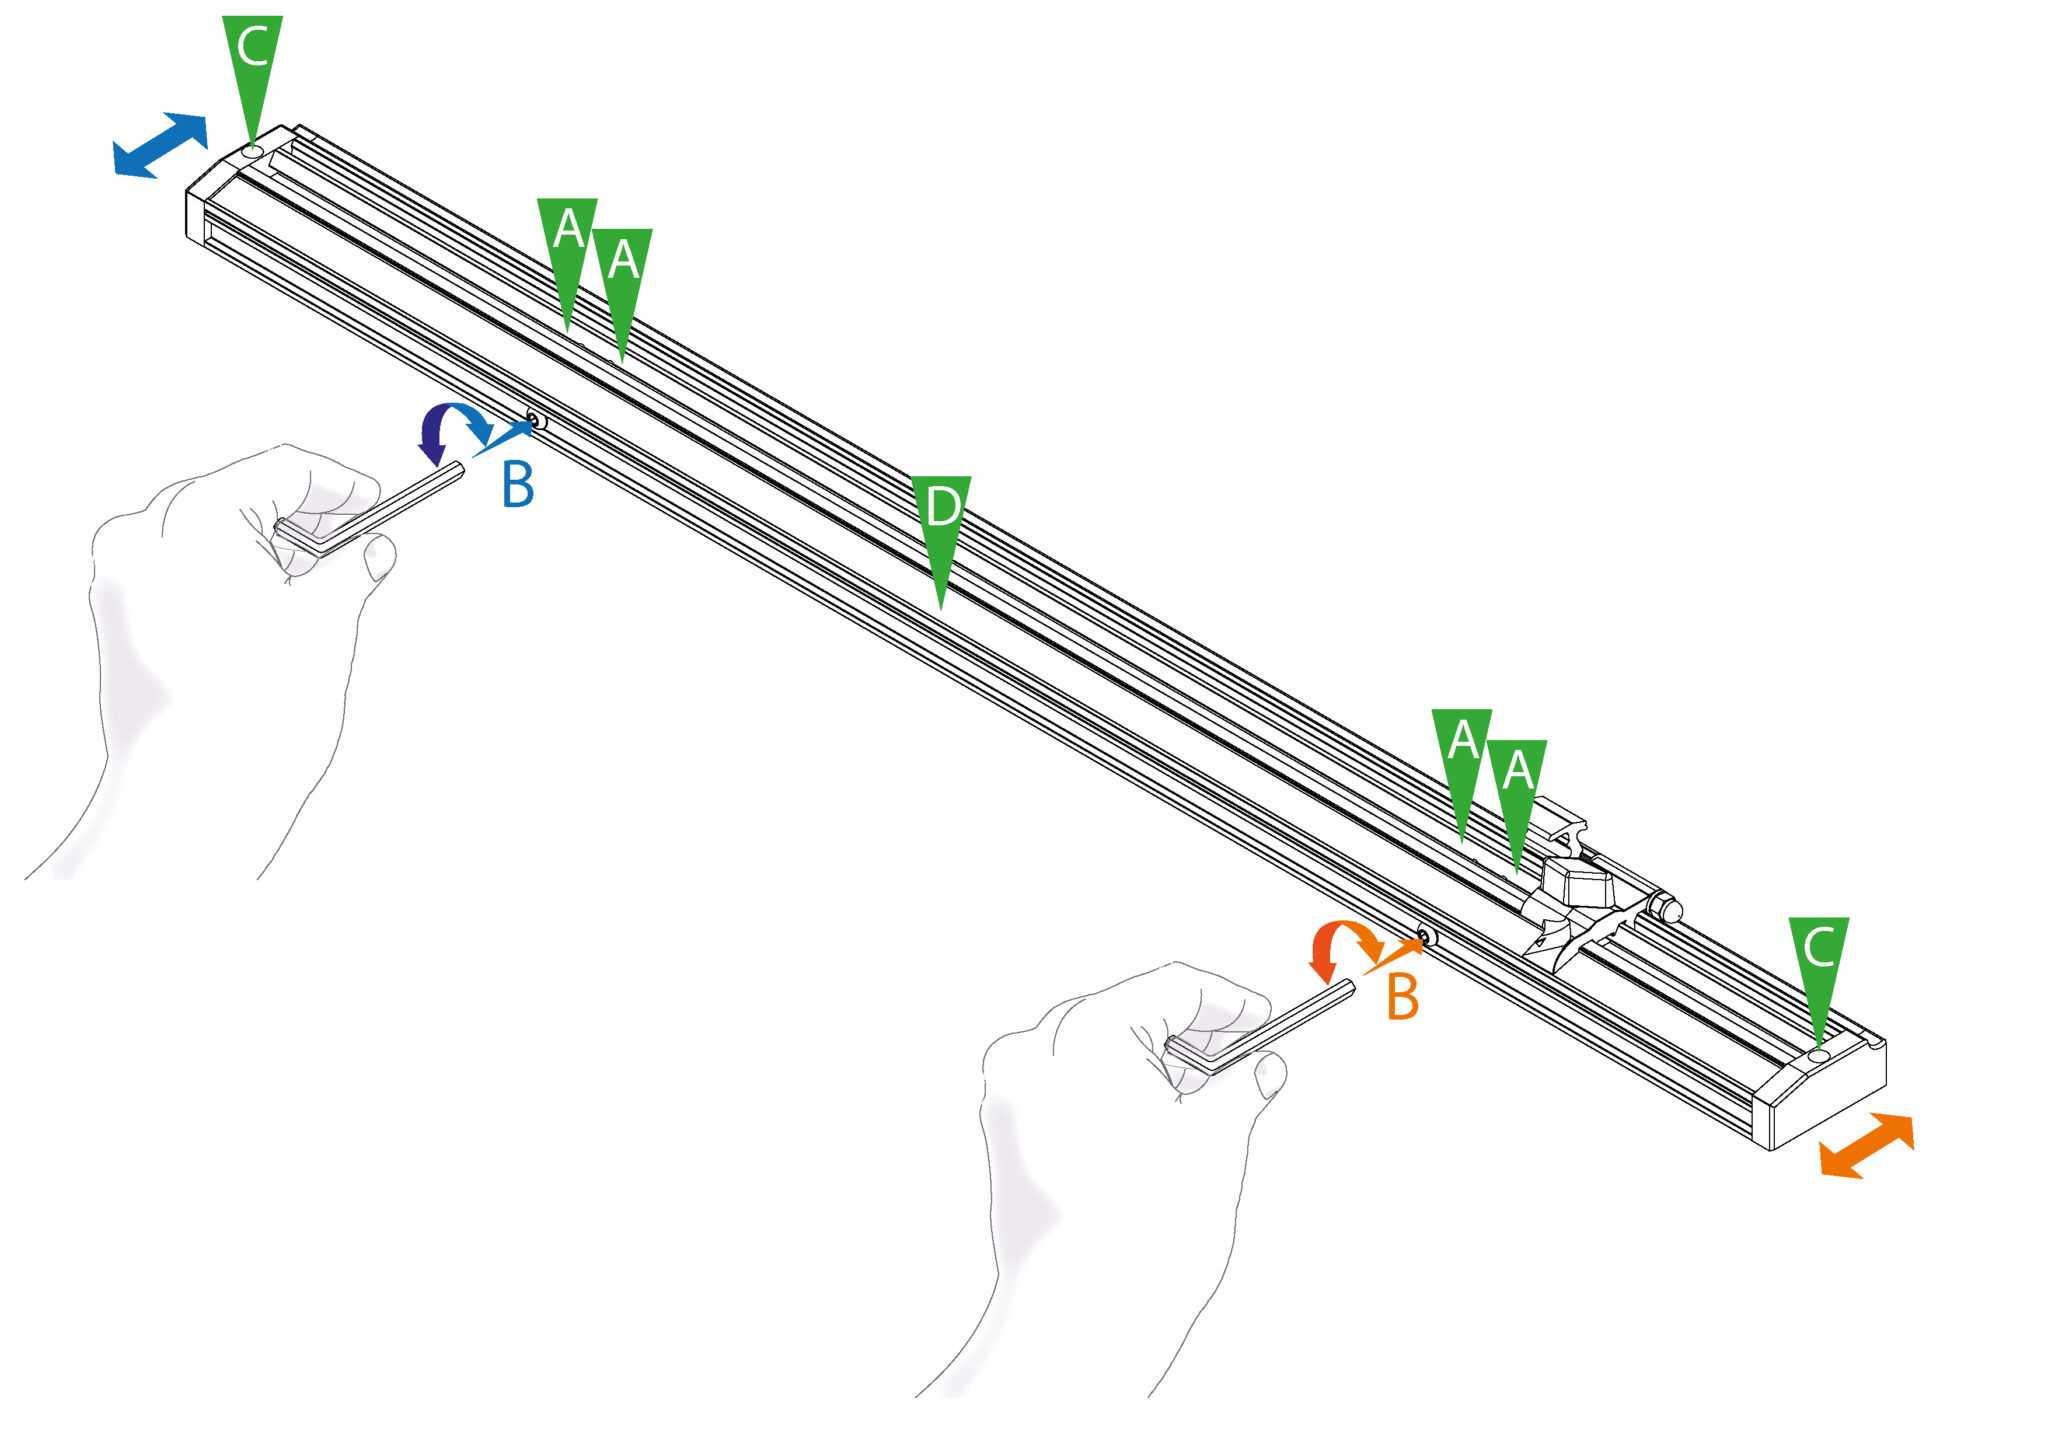
The installation process should follow a set procedure:
A. Place the Material Guide in its approximate position and fix down using the four in-board screws.
B. The two adjusters can then be used to fine-tune its position and angle:
– By rotating both adjusters the same amount the Material Guide will move parallel forward or back.
– By rotating either one of the adjusters the Material Guide will alter its angle.
C. Once fully aligned fix and calibrate the measuring scale.
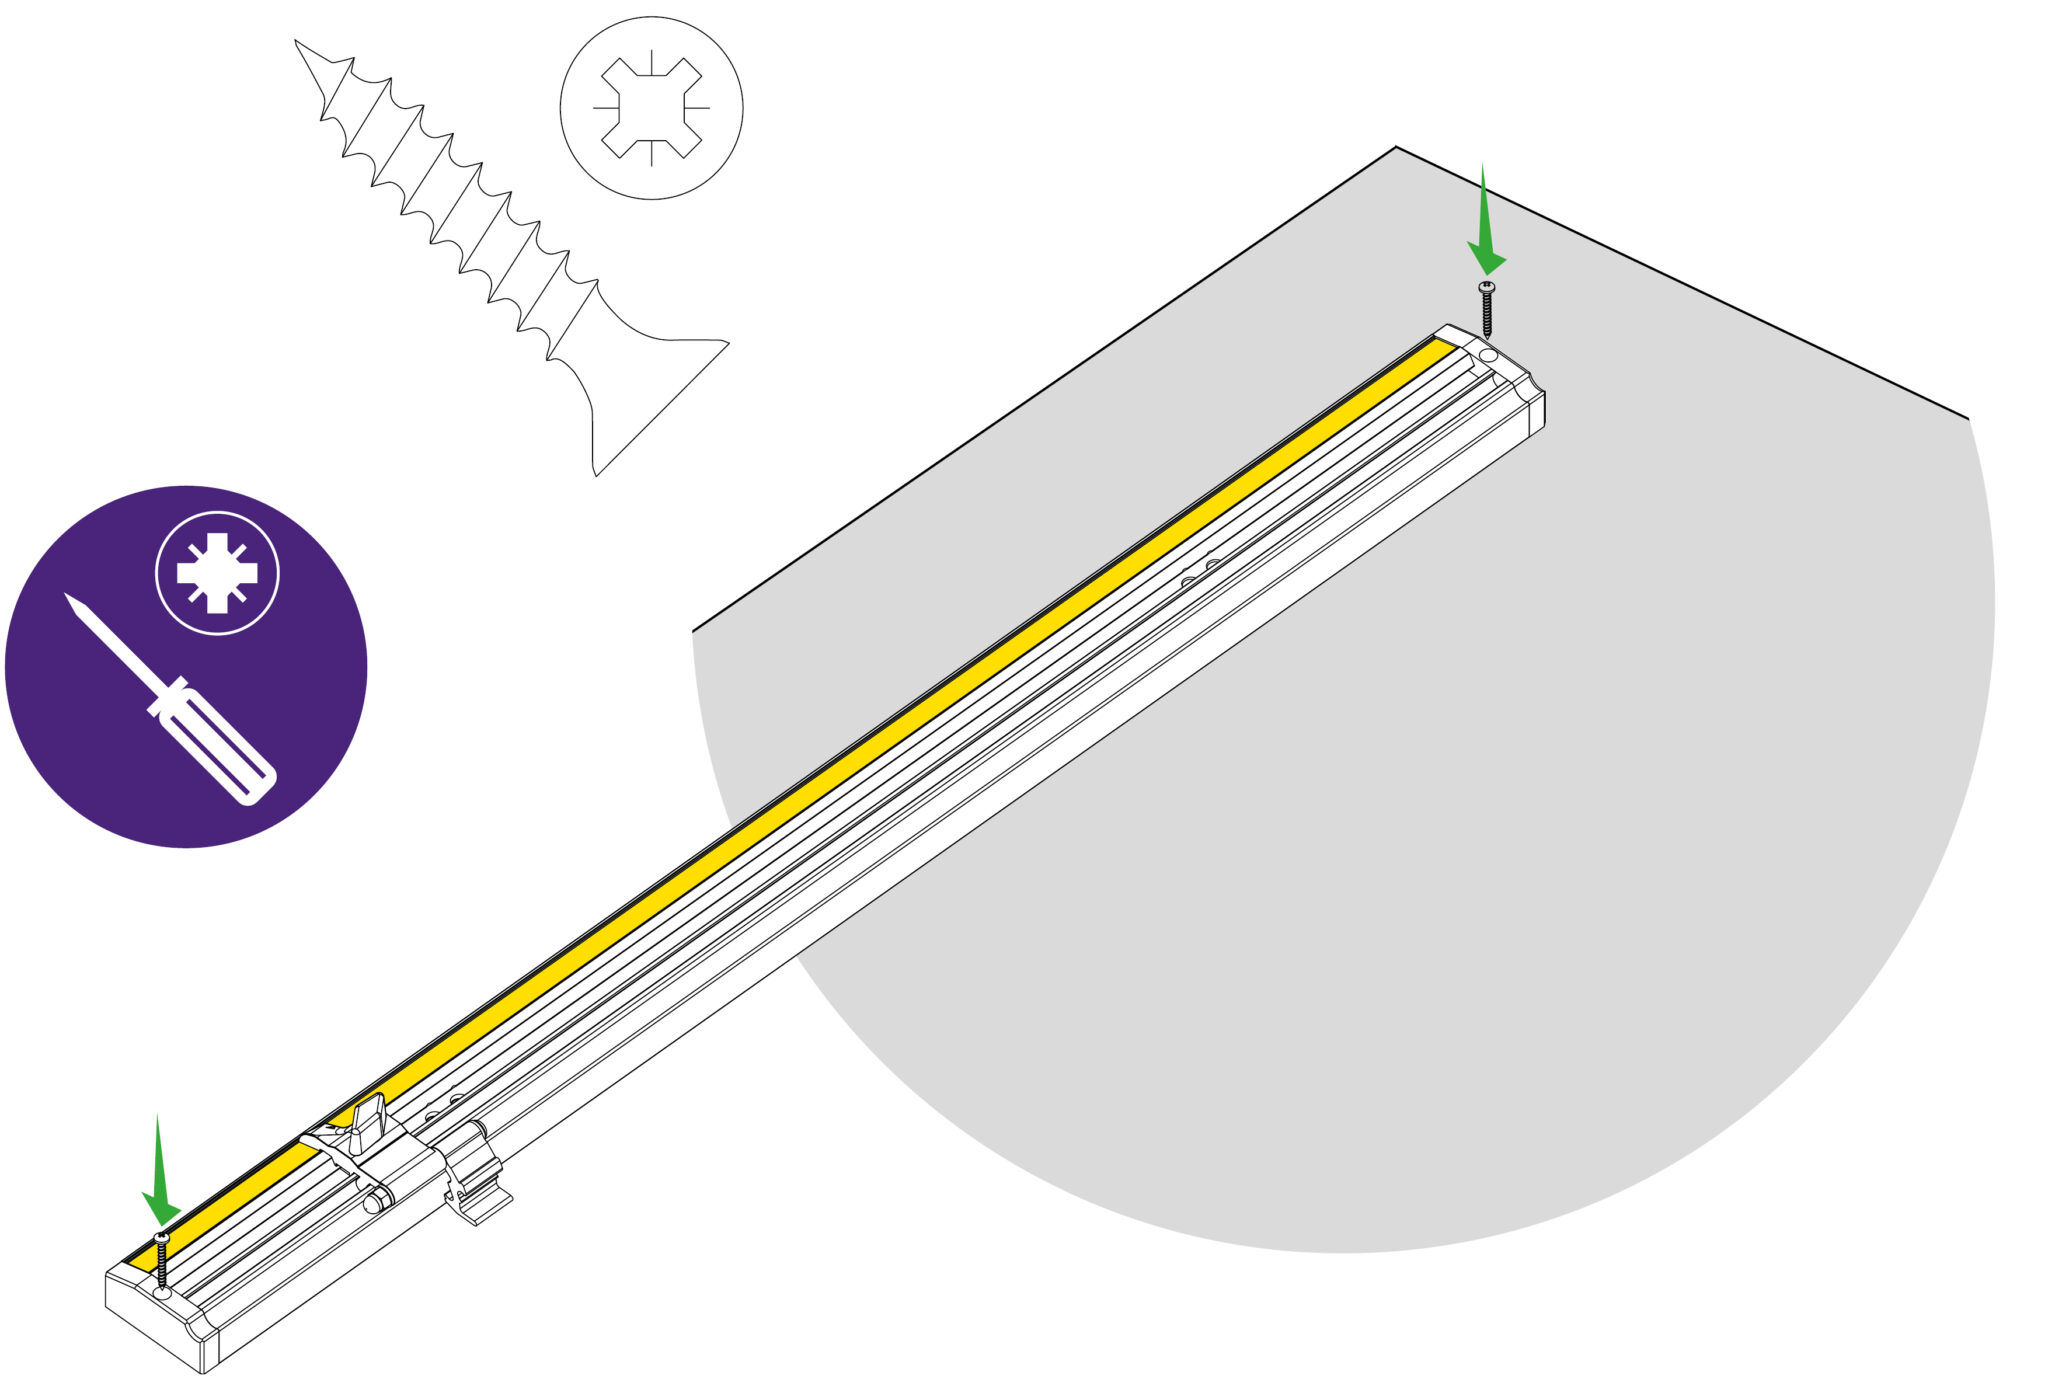
D. Slide on the measuring stop and push on the two end caps. Insert the two screws in the plastic end caps to fix its position.
IMPORTANT: Be careful to place the Material Guide so it will not be in the way of any moving equipment or provide finger traps.
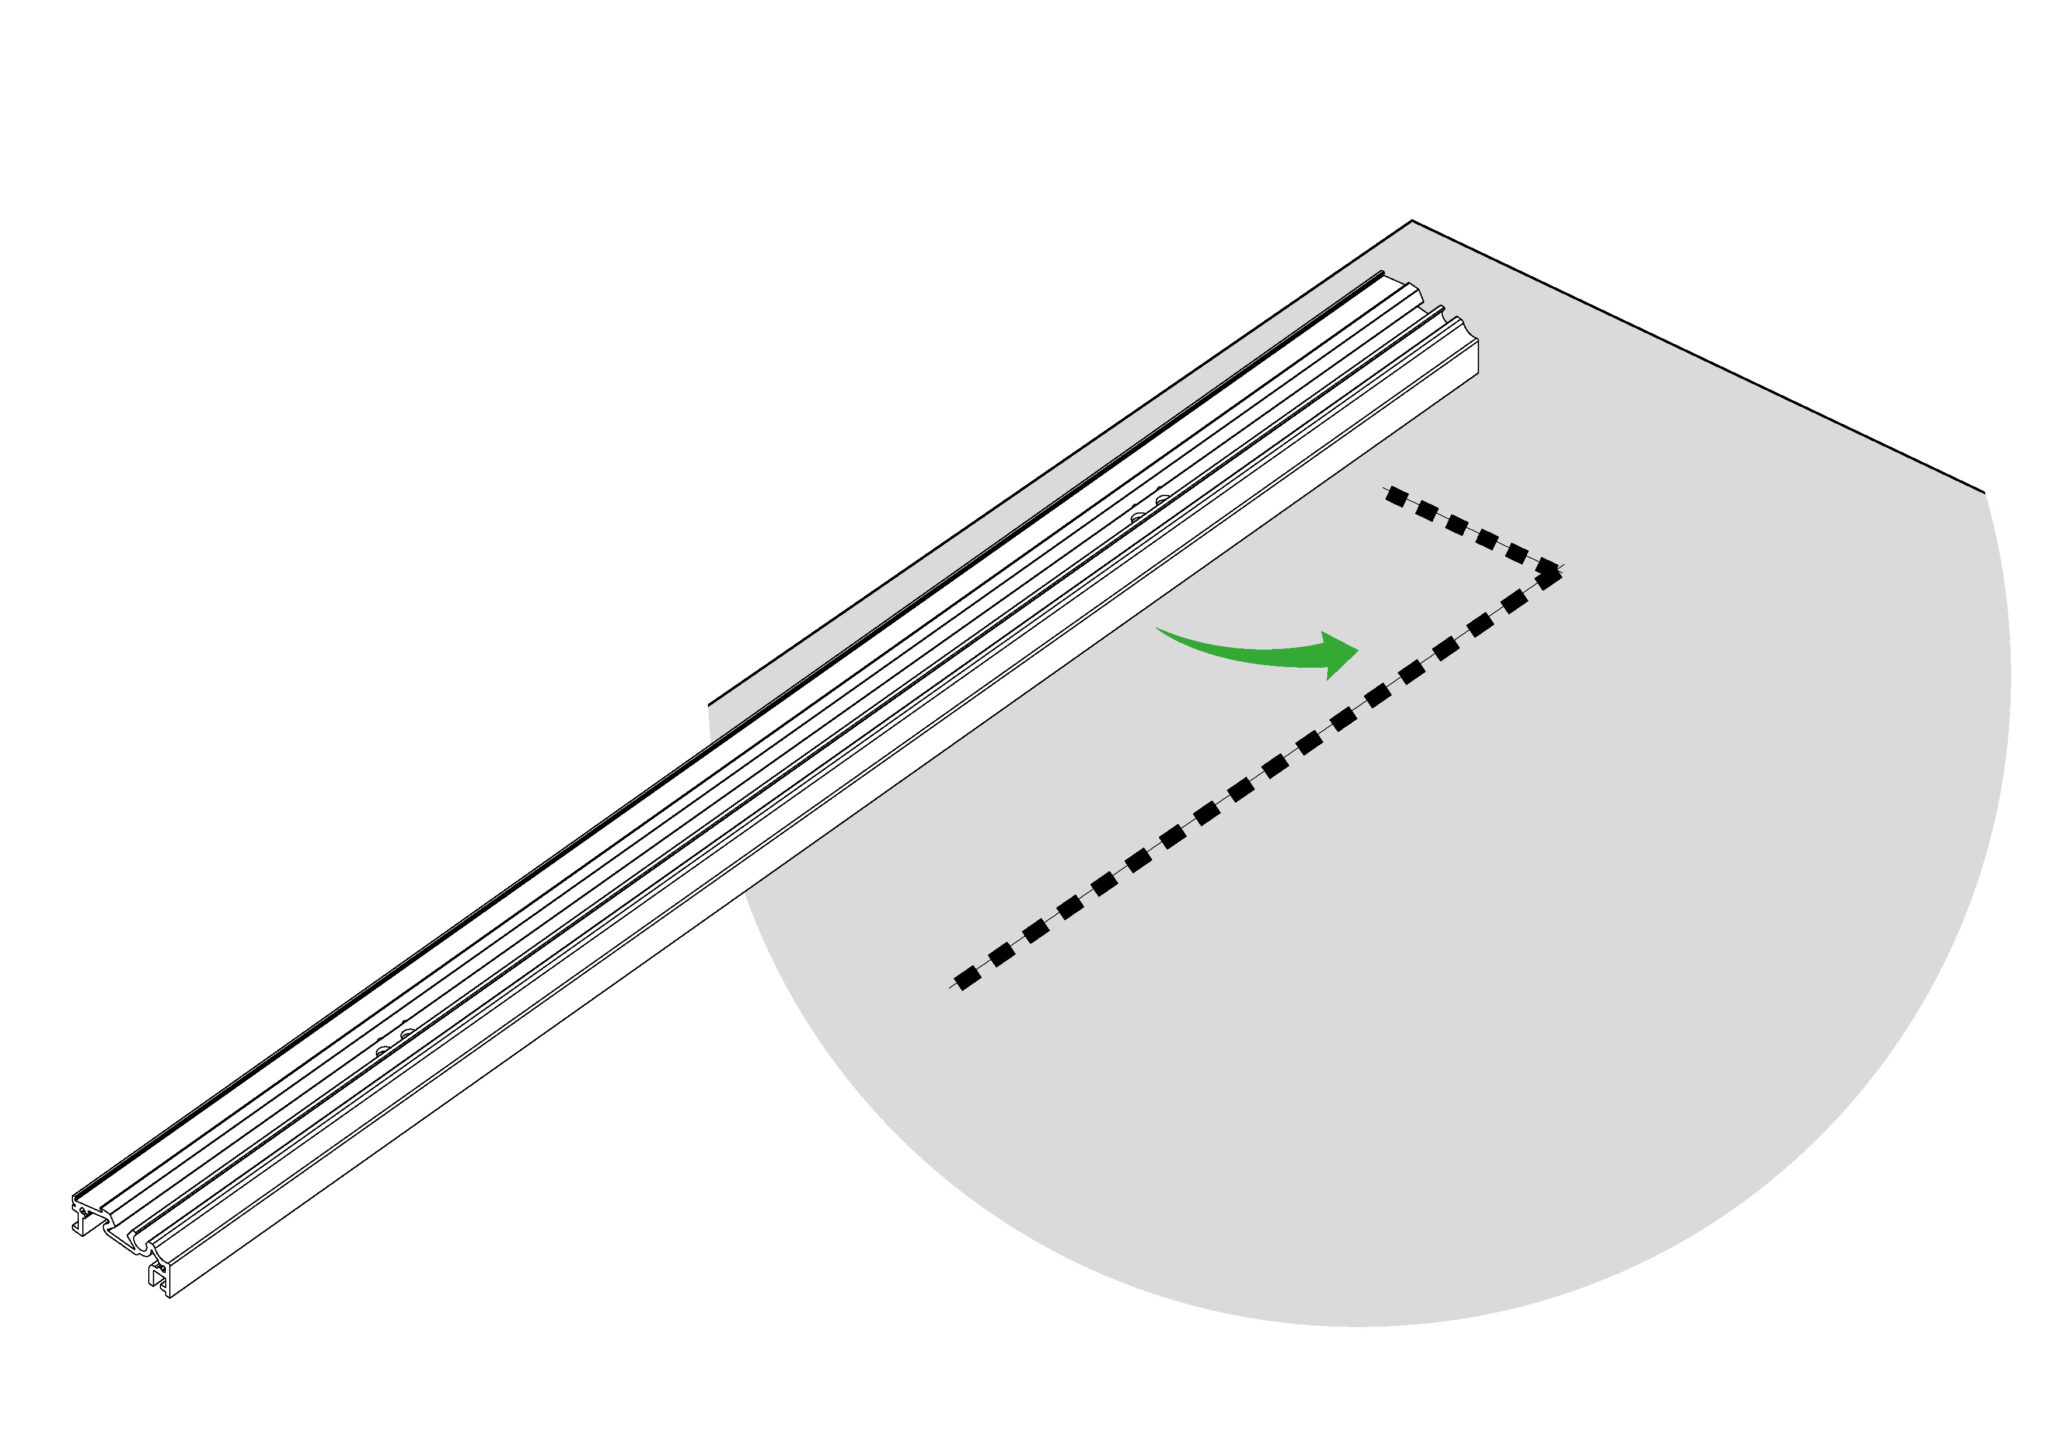
Lay the Material Guide in the desired position to guide the left or right-hand side of the work piece (following drawings show it fitted on the right), use measured pencil lines or paper tape to assist. If it is to be aligned with another guide/object use a straight edge or the edge of a large piece of board to help.
IMPORTANT: Ensure that enough space is left for when the end caps are installed at a later stage
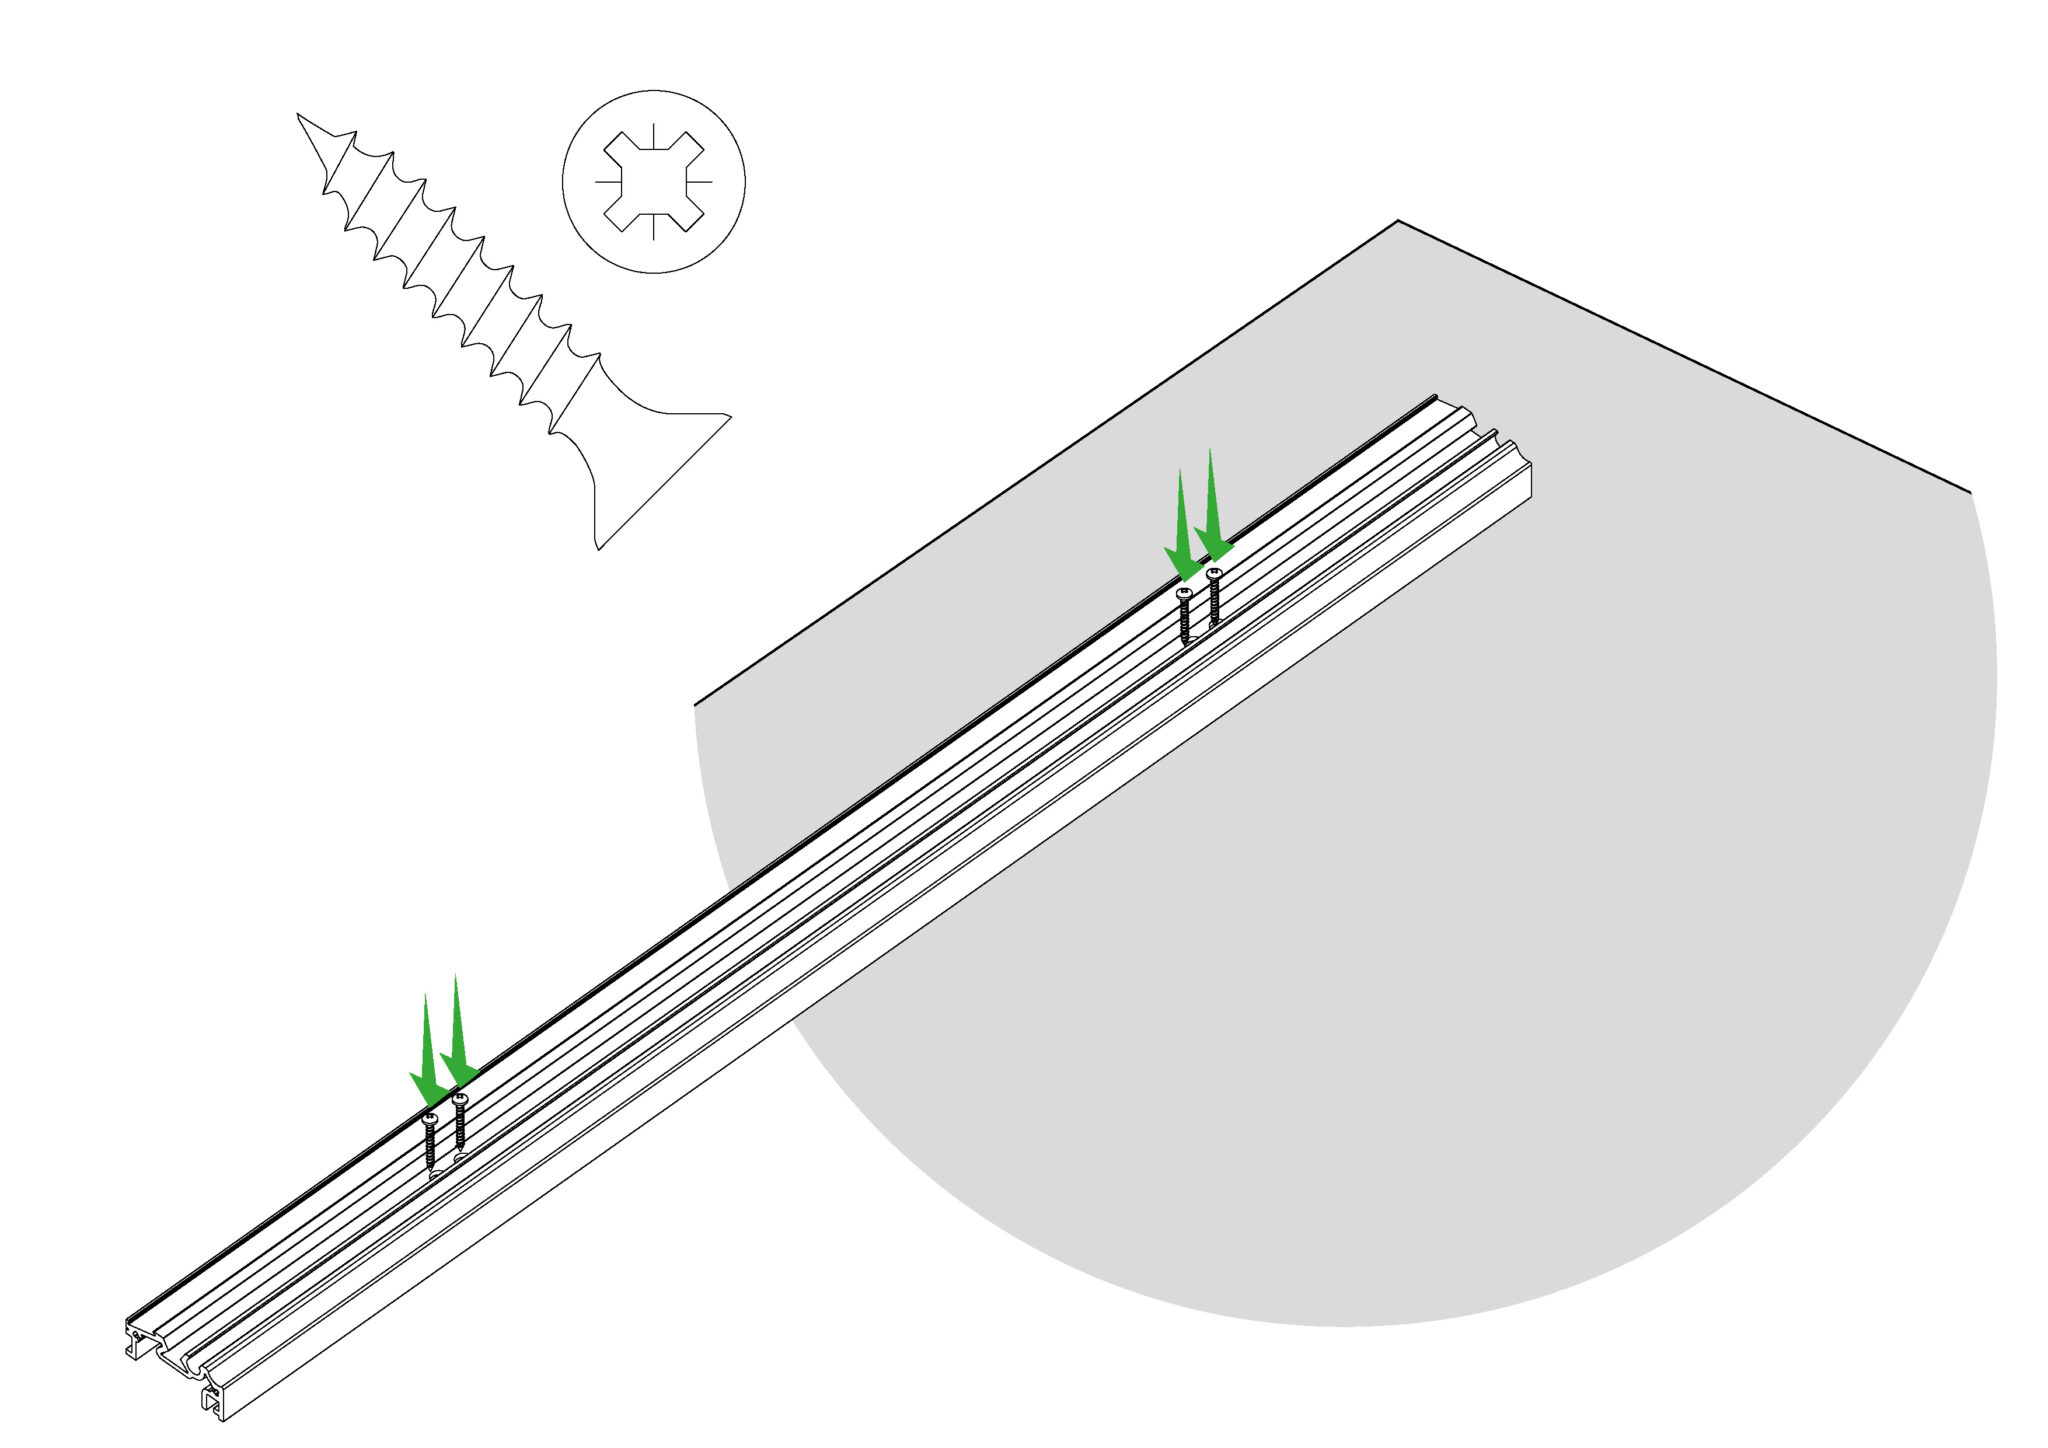
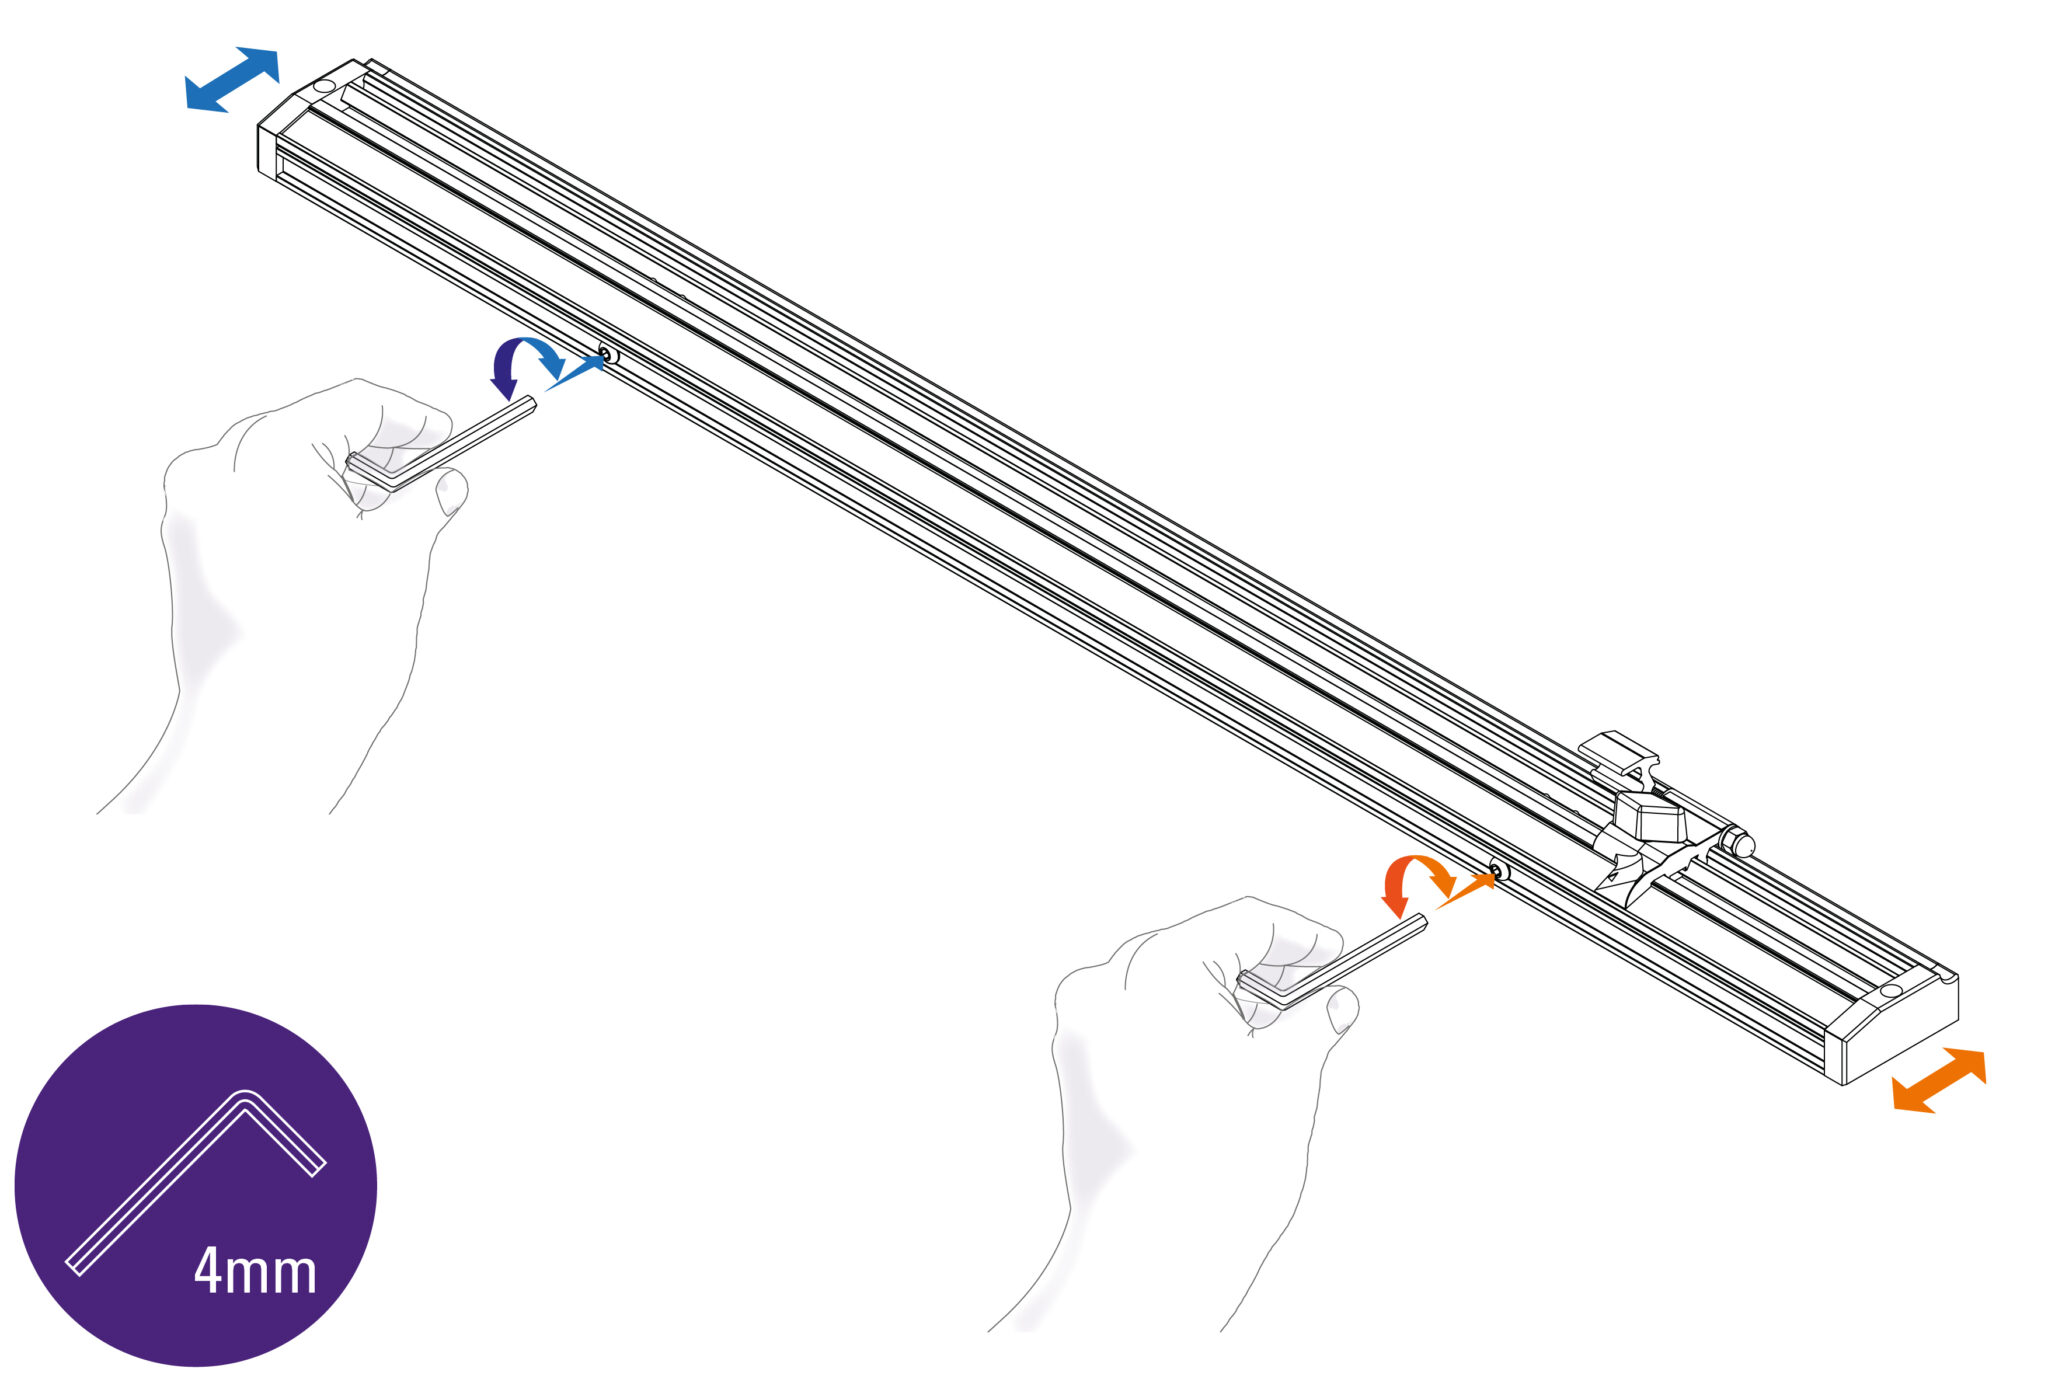
Fine squaring corrections can be made using a 4mm Allen (hex) in the two squaring adjusters.
Firstly, make any required adjustment to the angle of the Material Guide. This can be carried out using either adjustment screw. When turning the screw clockwise the Material Guide at that point advances, rotating the guide about the other adjuster.
Need help checking it is at 90 degrees when installed with a cutter? Go to Squaring check >
Once the angle has been adjusted, if the Material Guide needs to move parallel to align with another object/edge rotate both screws by equal amounts. As a guide, one full rotation of the screw equals 1mm (0.040”).
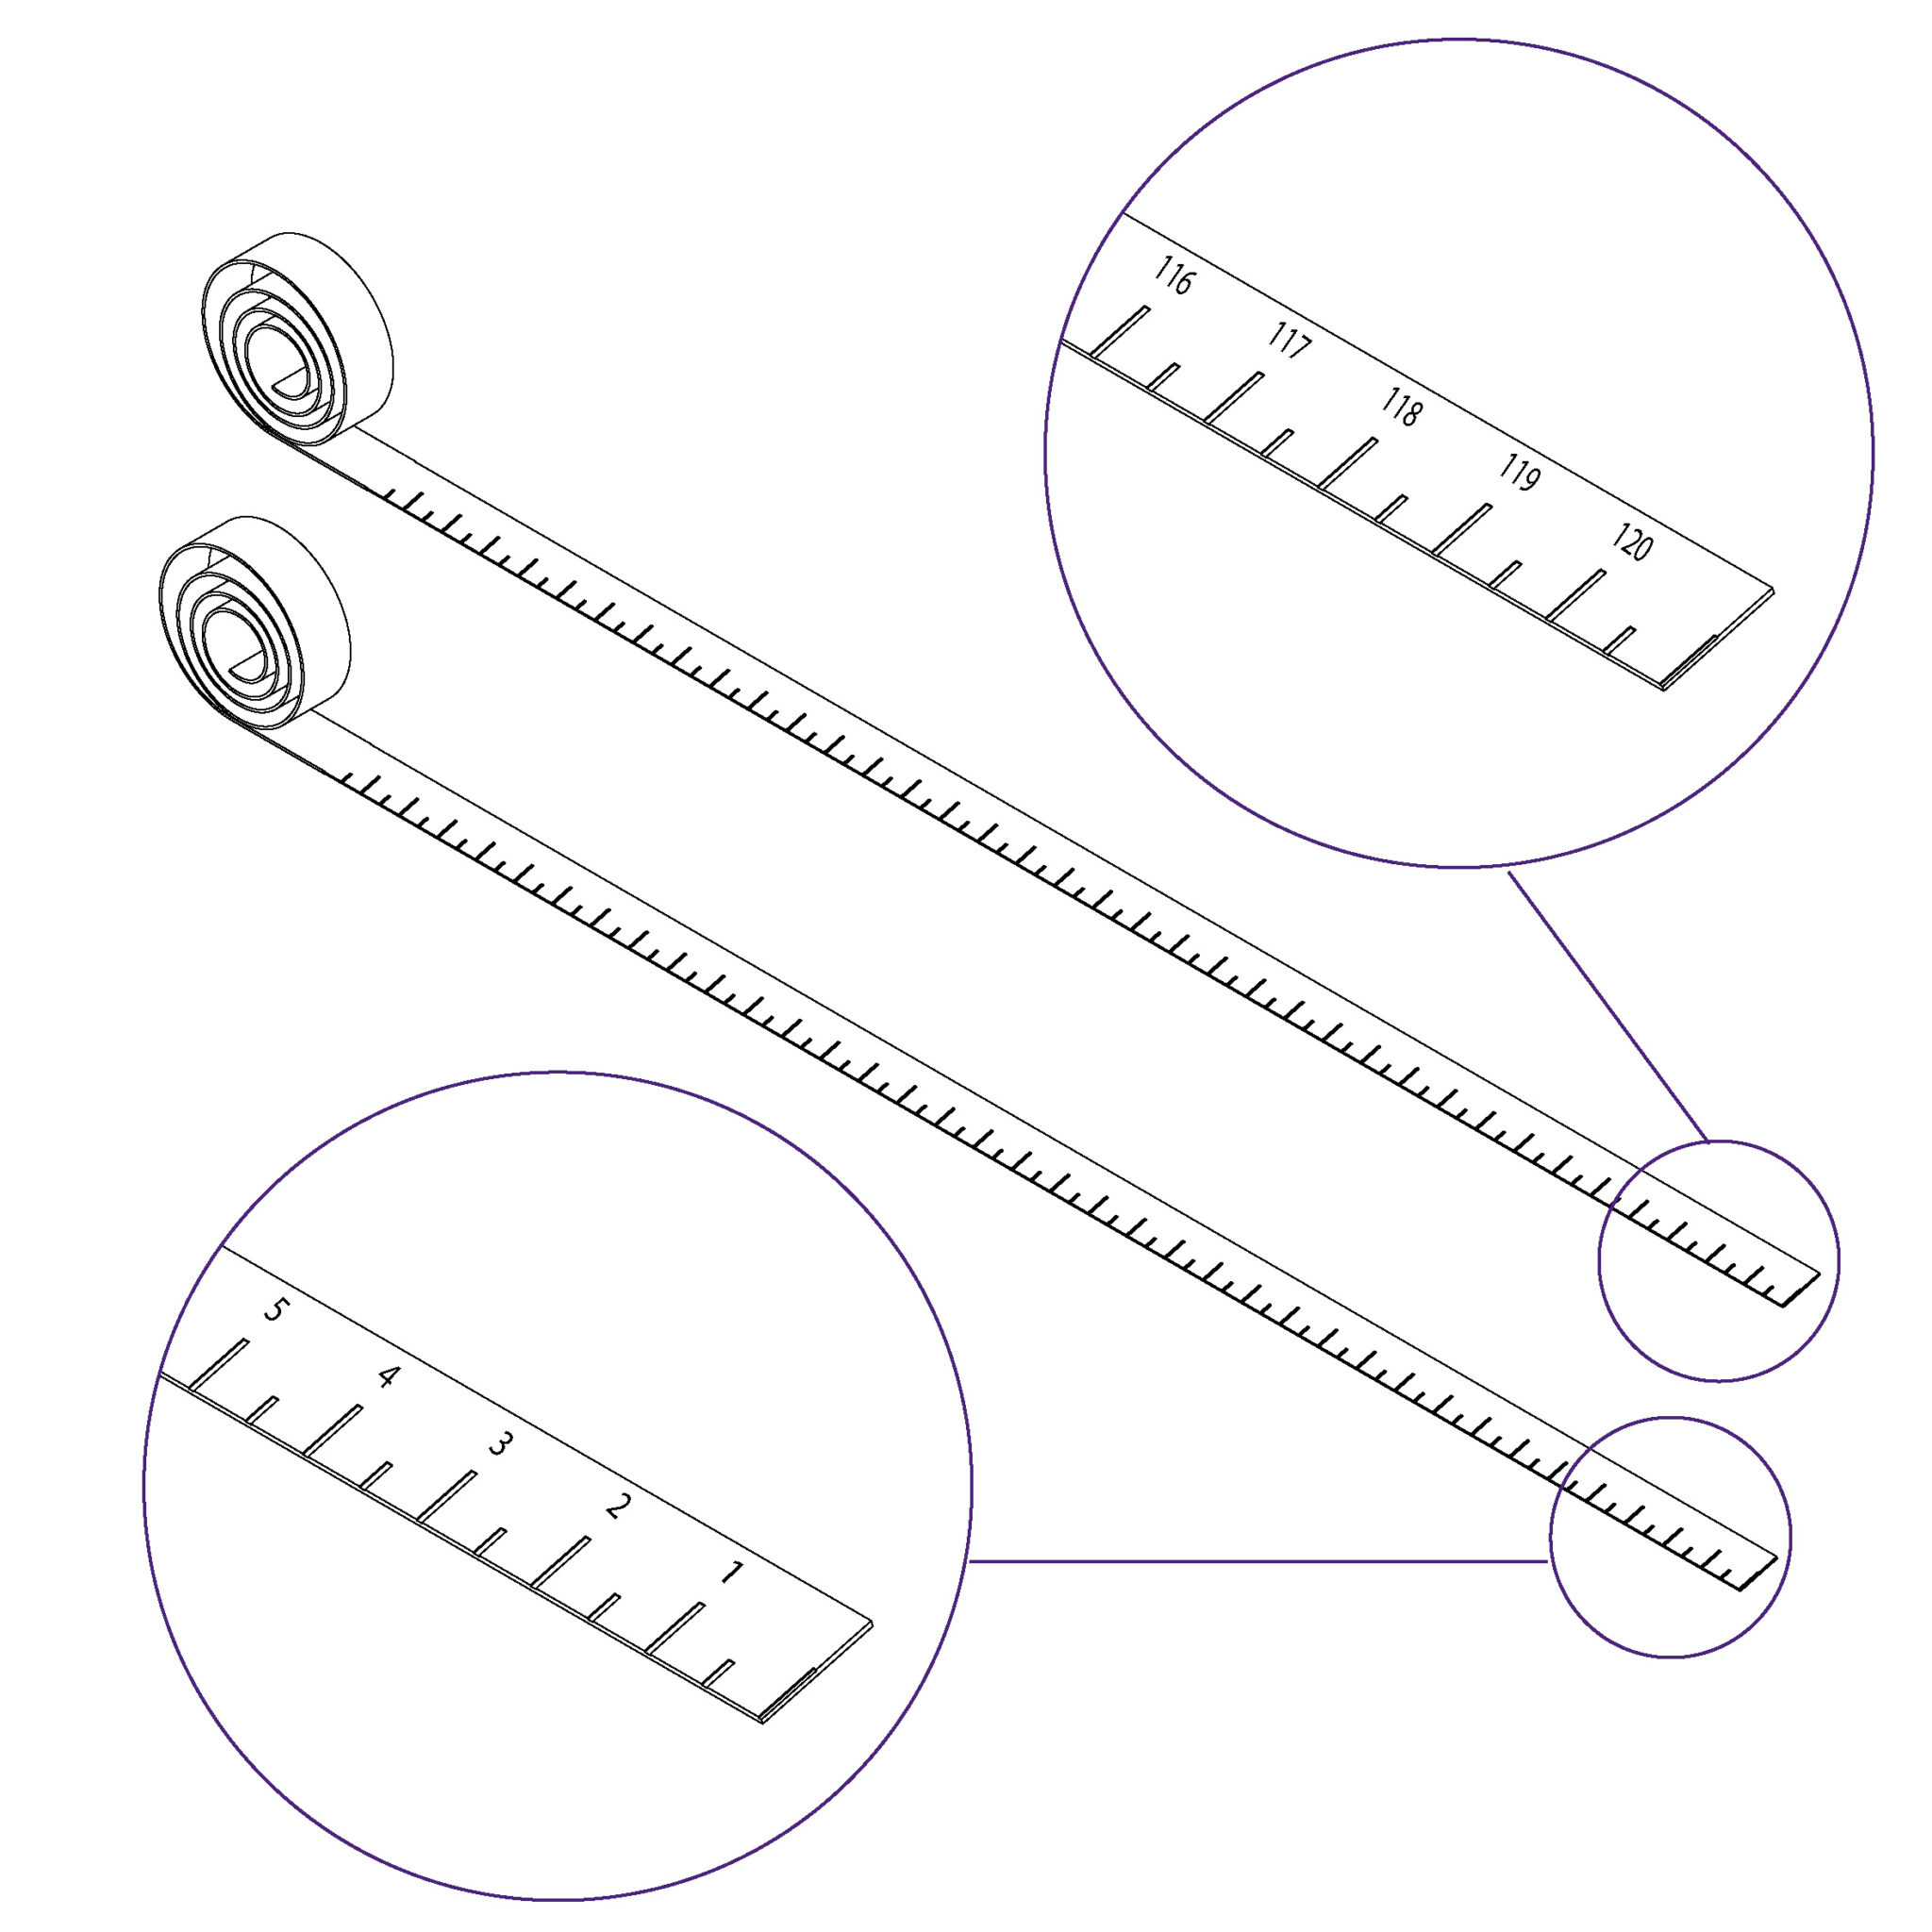
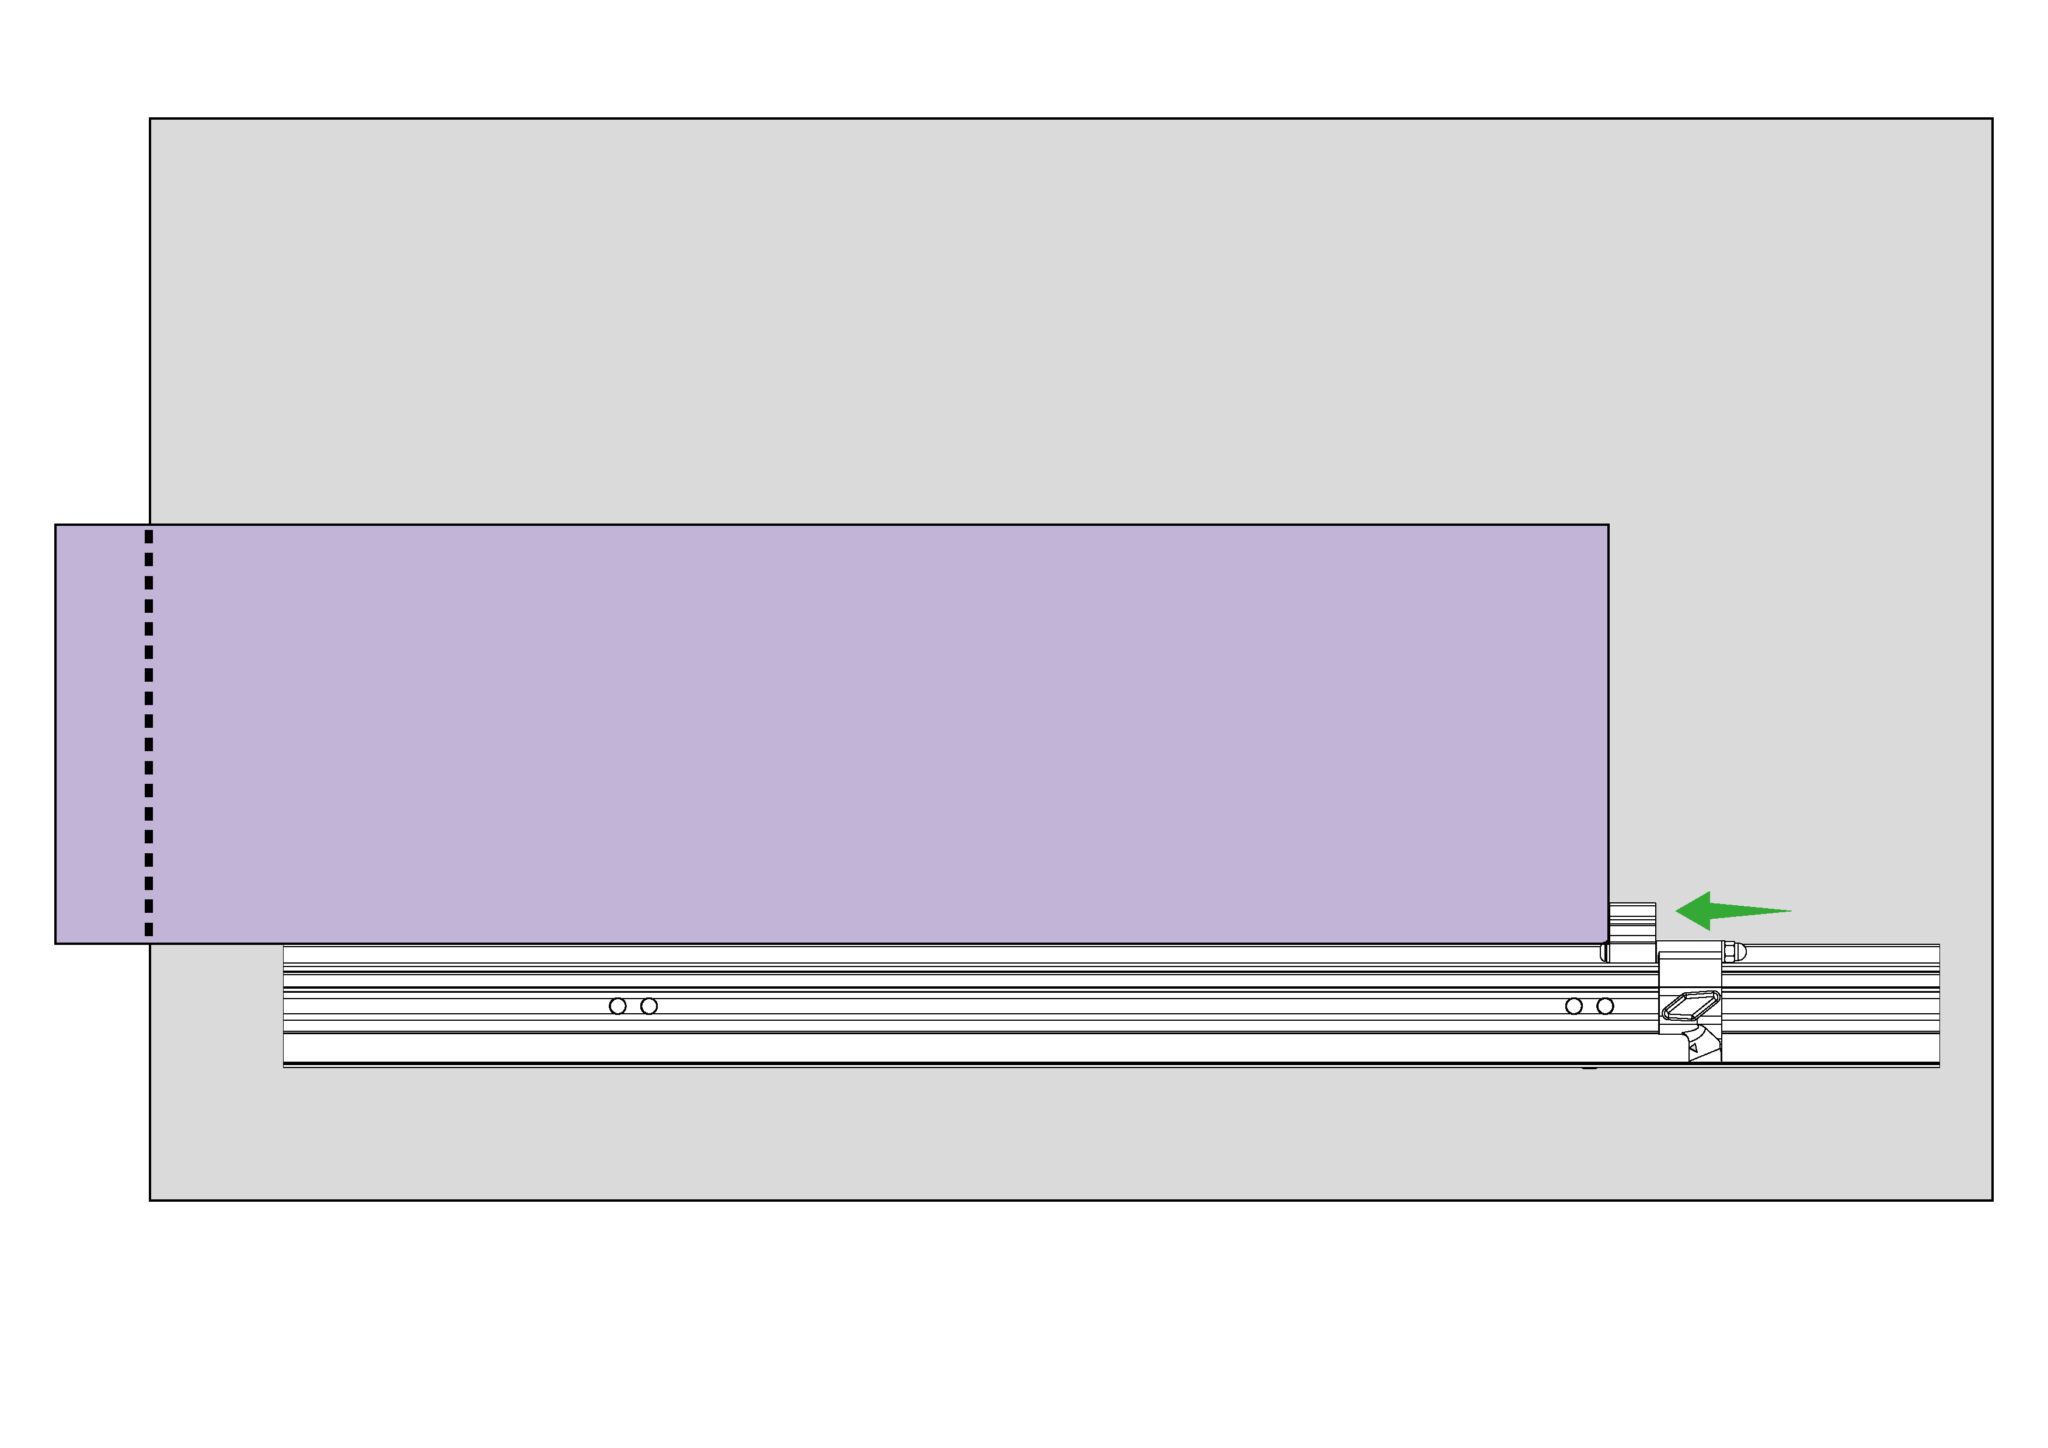
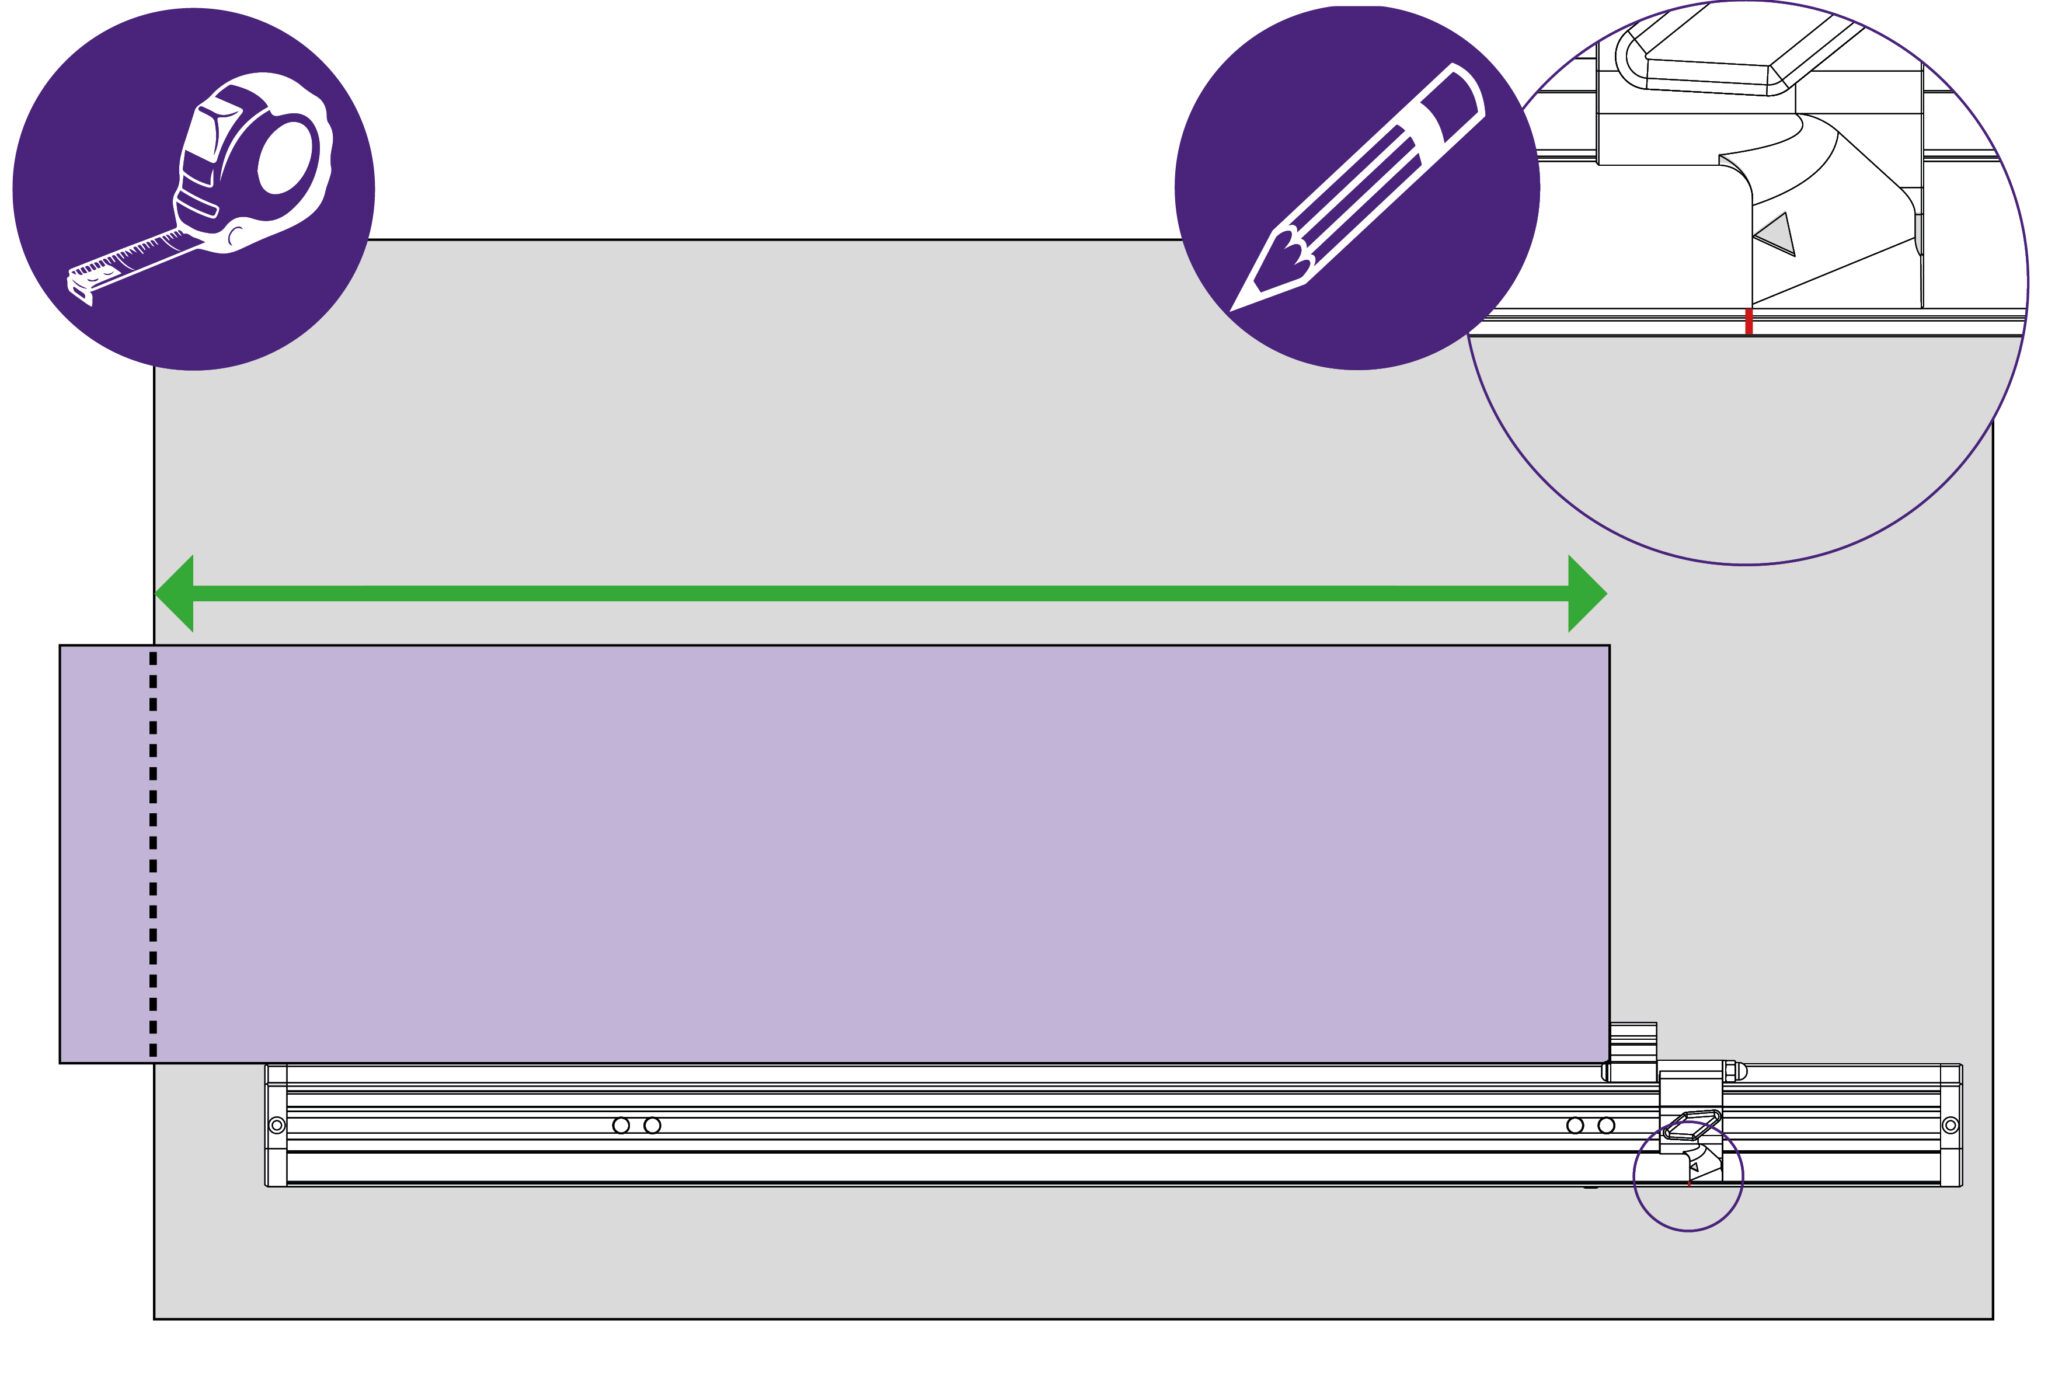
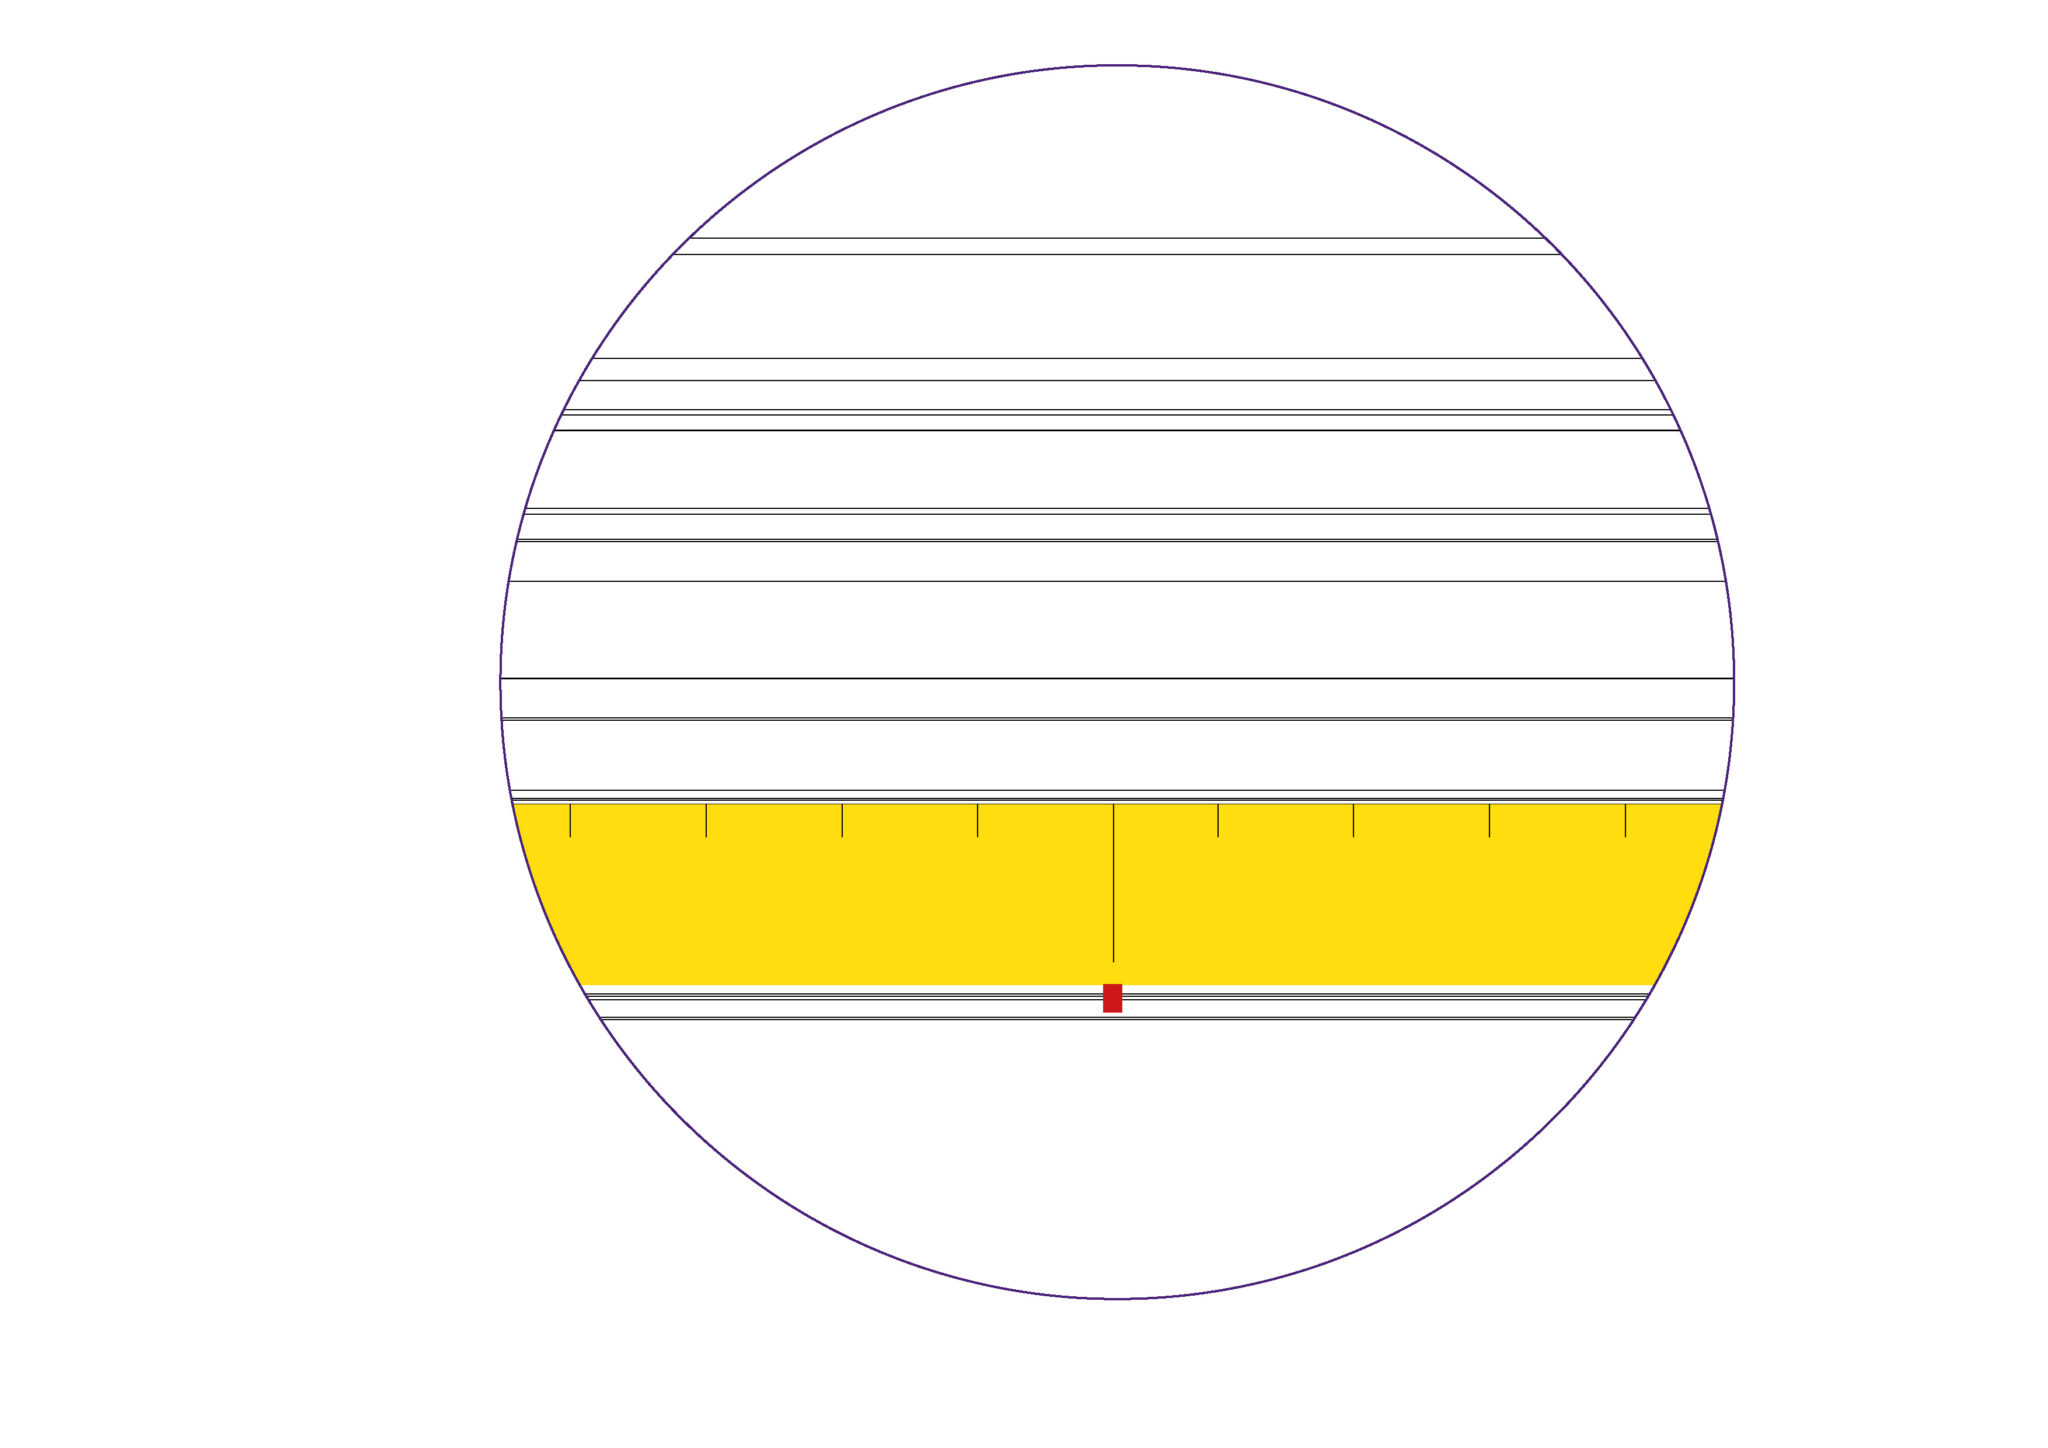
Select the measuring scale and remove around 15cms (6”) of the backing paper from one end. Position the measured dimension on the scale adjacent to the pencil mark. Hold in position and press down the end of the scale to stick it in place. Peel off the remainder of the backing paper and press firmly on the scale to fix it in position.
Check the scale measures accurately and make any fine adjustments by pressing down on the scale with finger and thumb and sliding
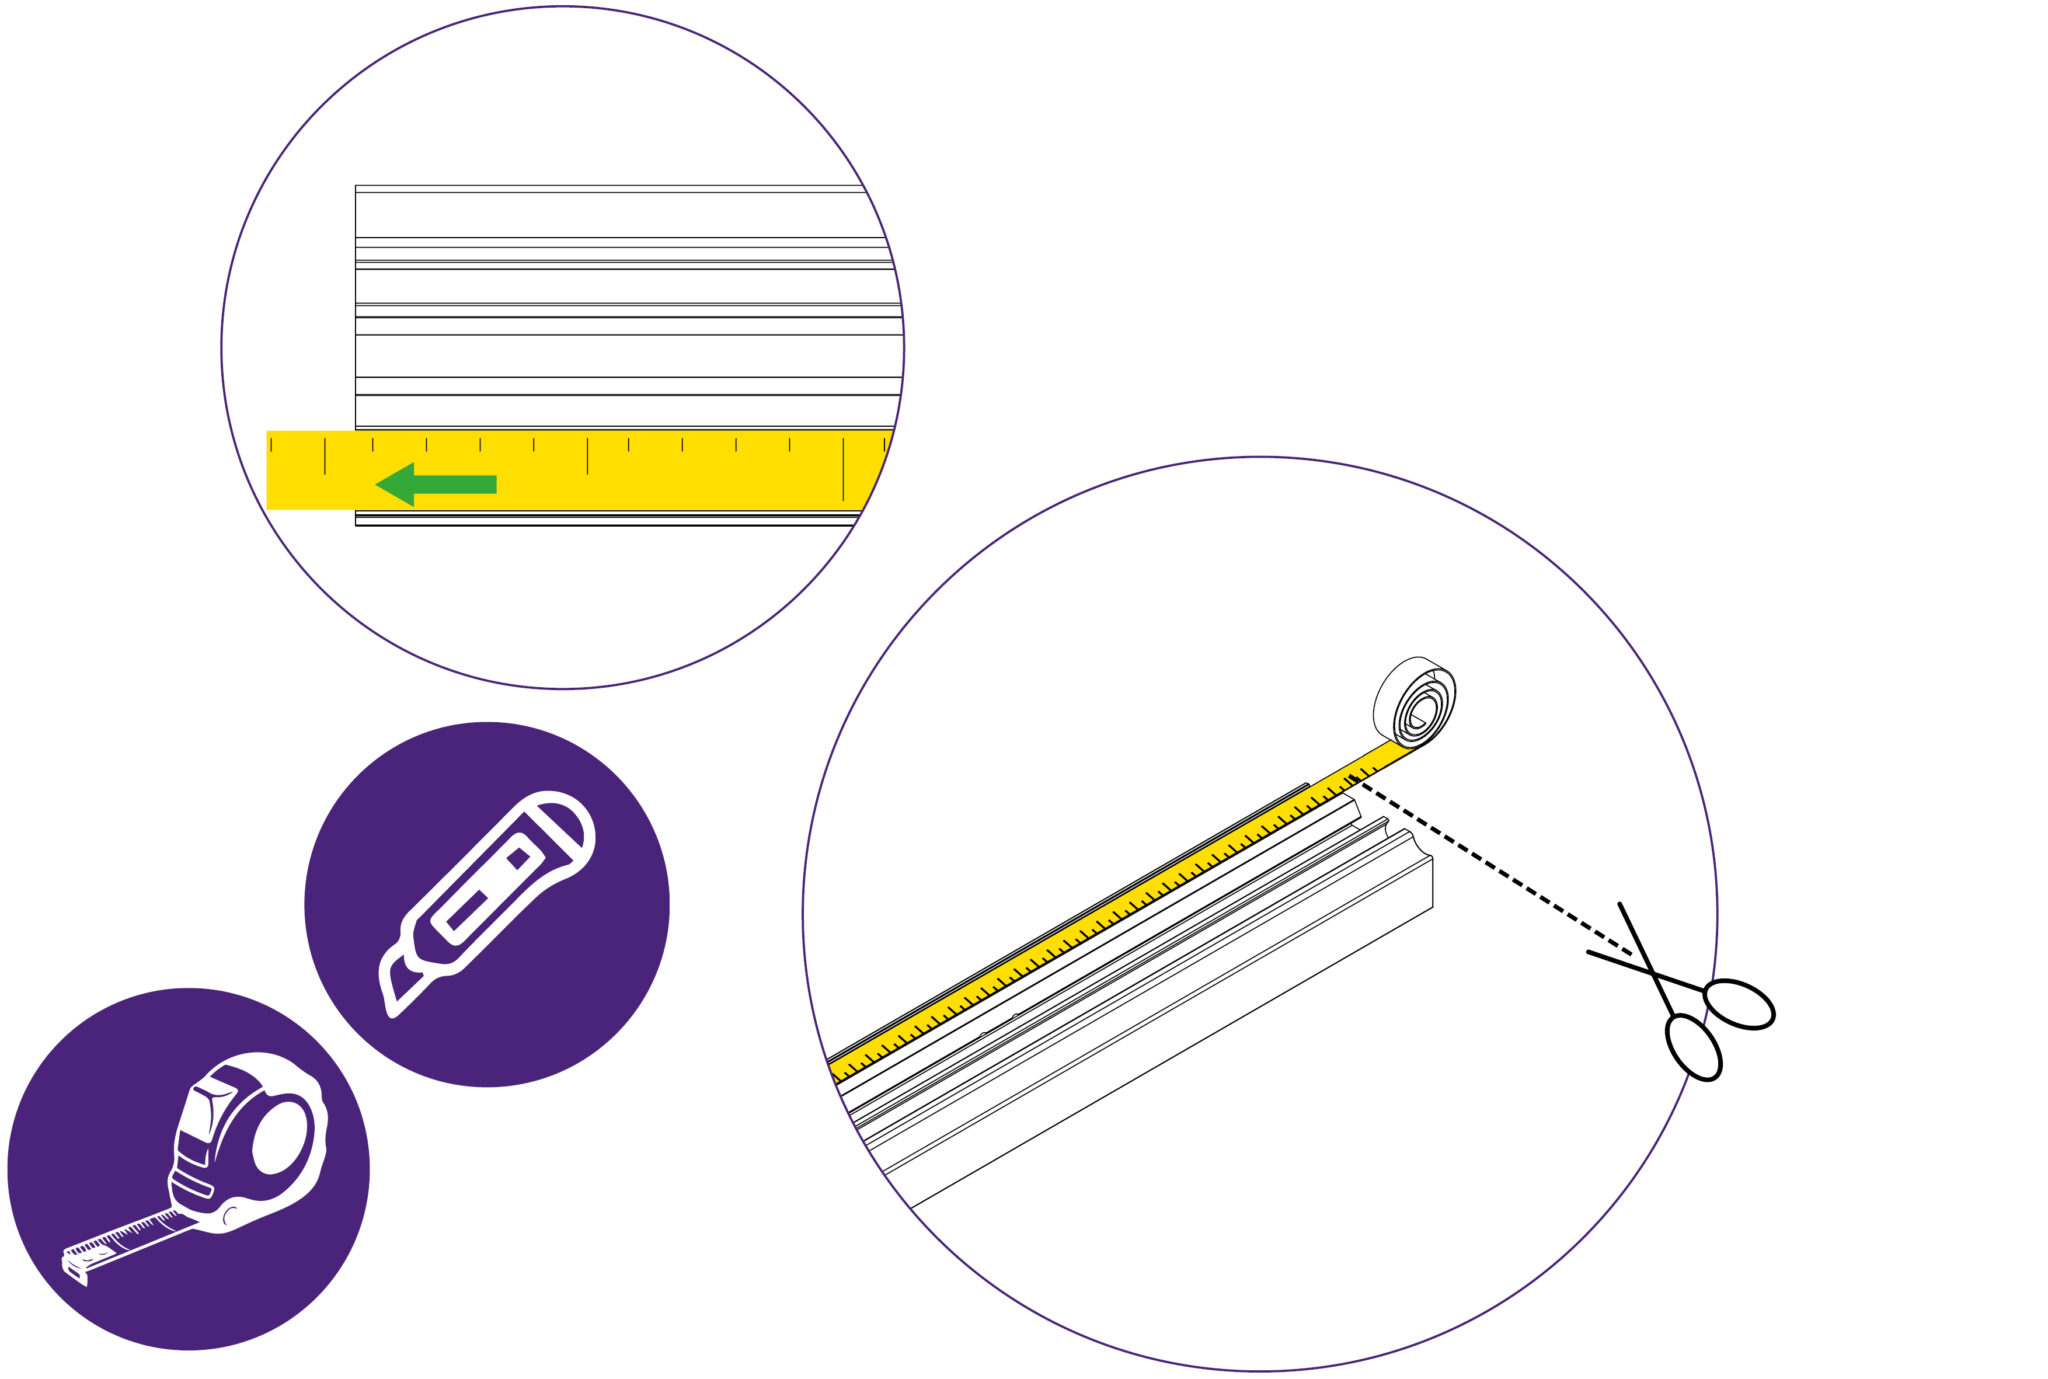
Once the scale sticker is firmly attached, slide the measuring scale out of the Material Guide to give easy access to the end of the measuring scale. Trim the excess using a craft knife.
Slide the measuring scale back into position, Check the scale measures accurately, and make any fine adjustments by pressing down on the scale with finger and thumb and sliding left or right.
If the Material Guide is being used as a 90 degree gauge on a cutting table the following test can be used to calibrate the squareness. You will need an easy to cut semi-rigid board (art board, grey board, thin PVC foamboard or similar) at least 60cms (24”) or larger will be required.
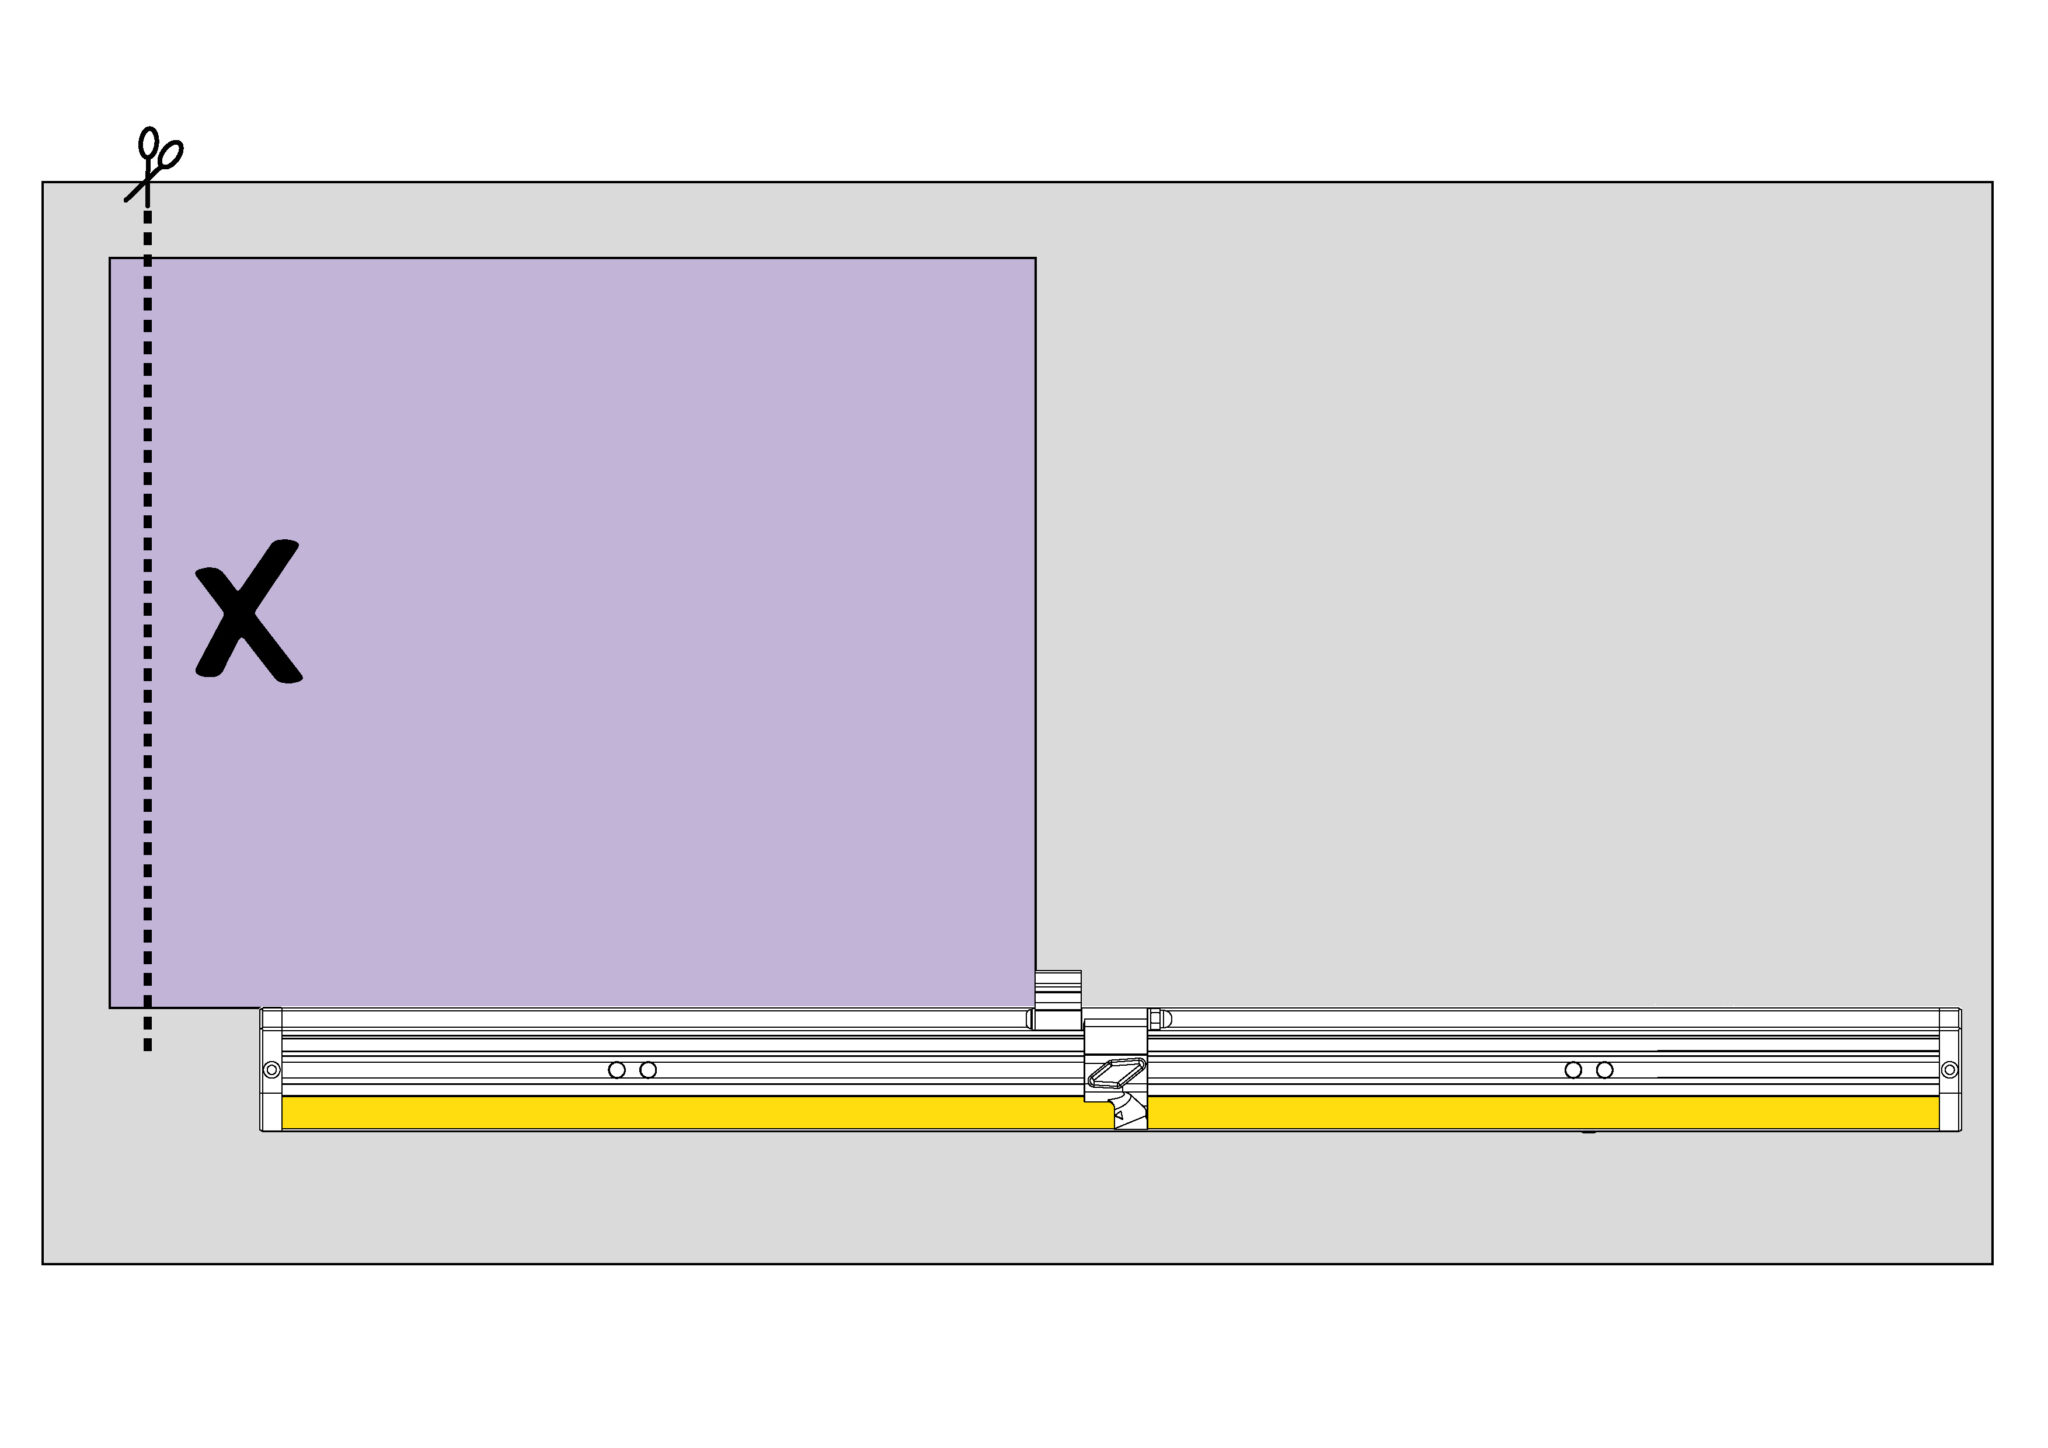
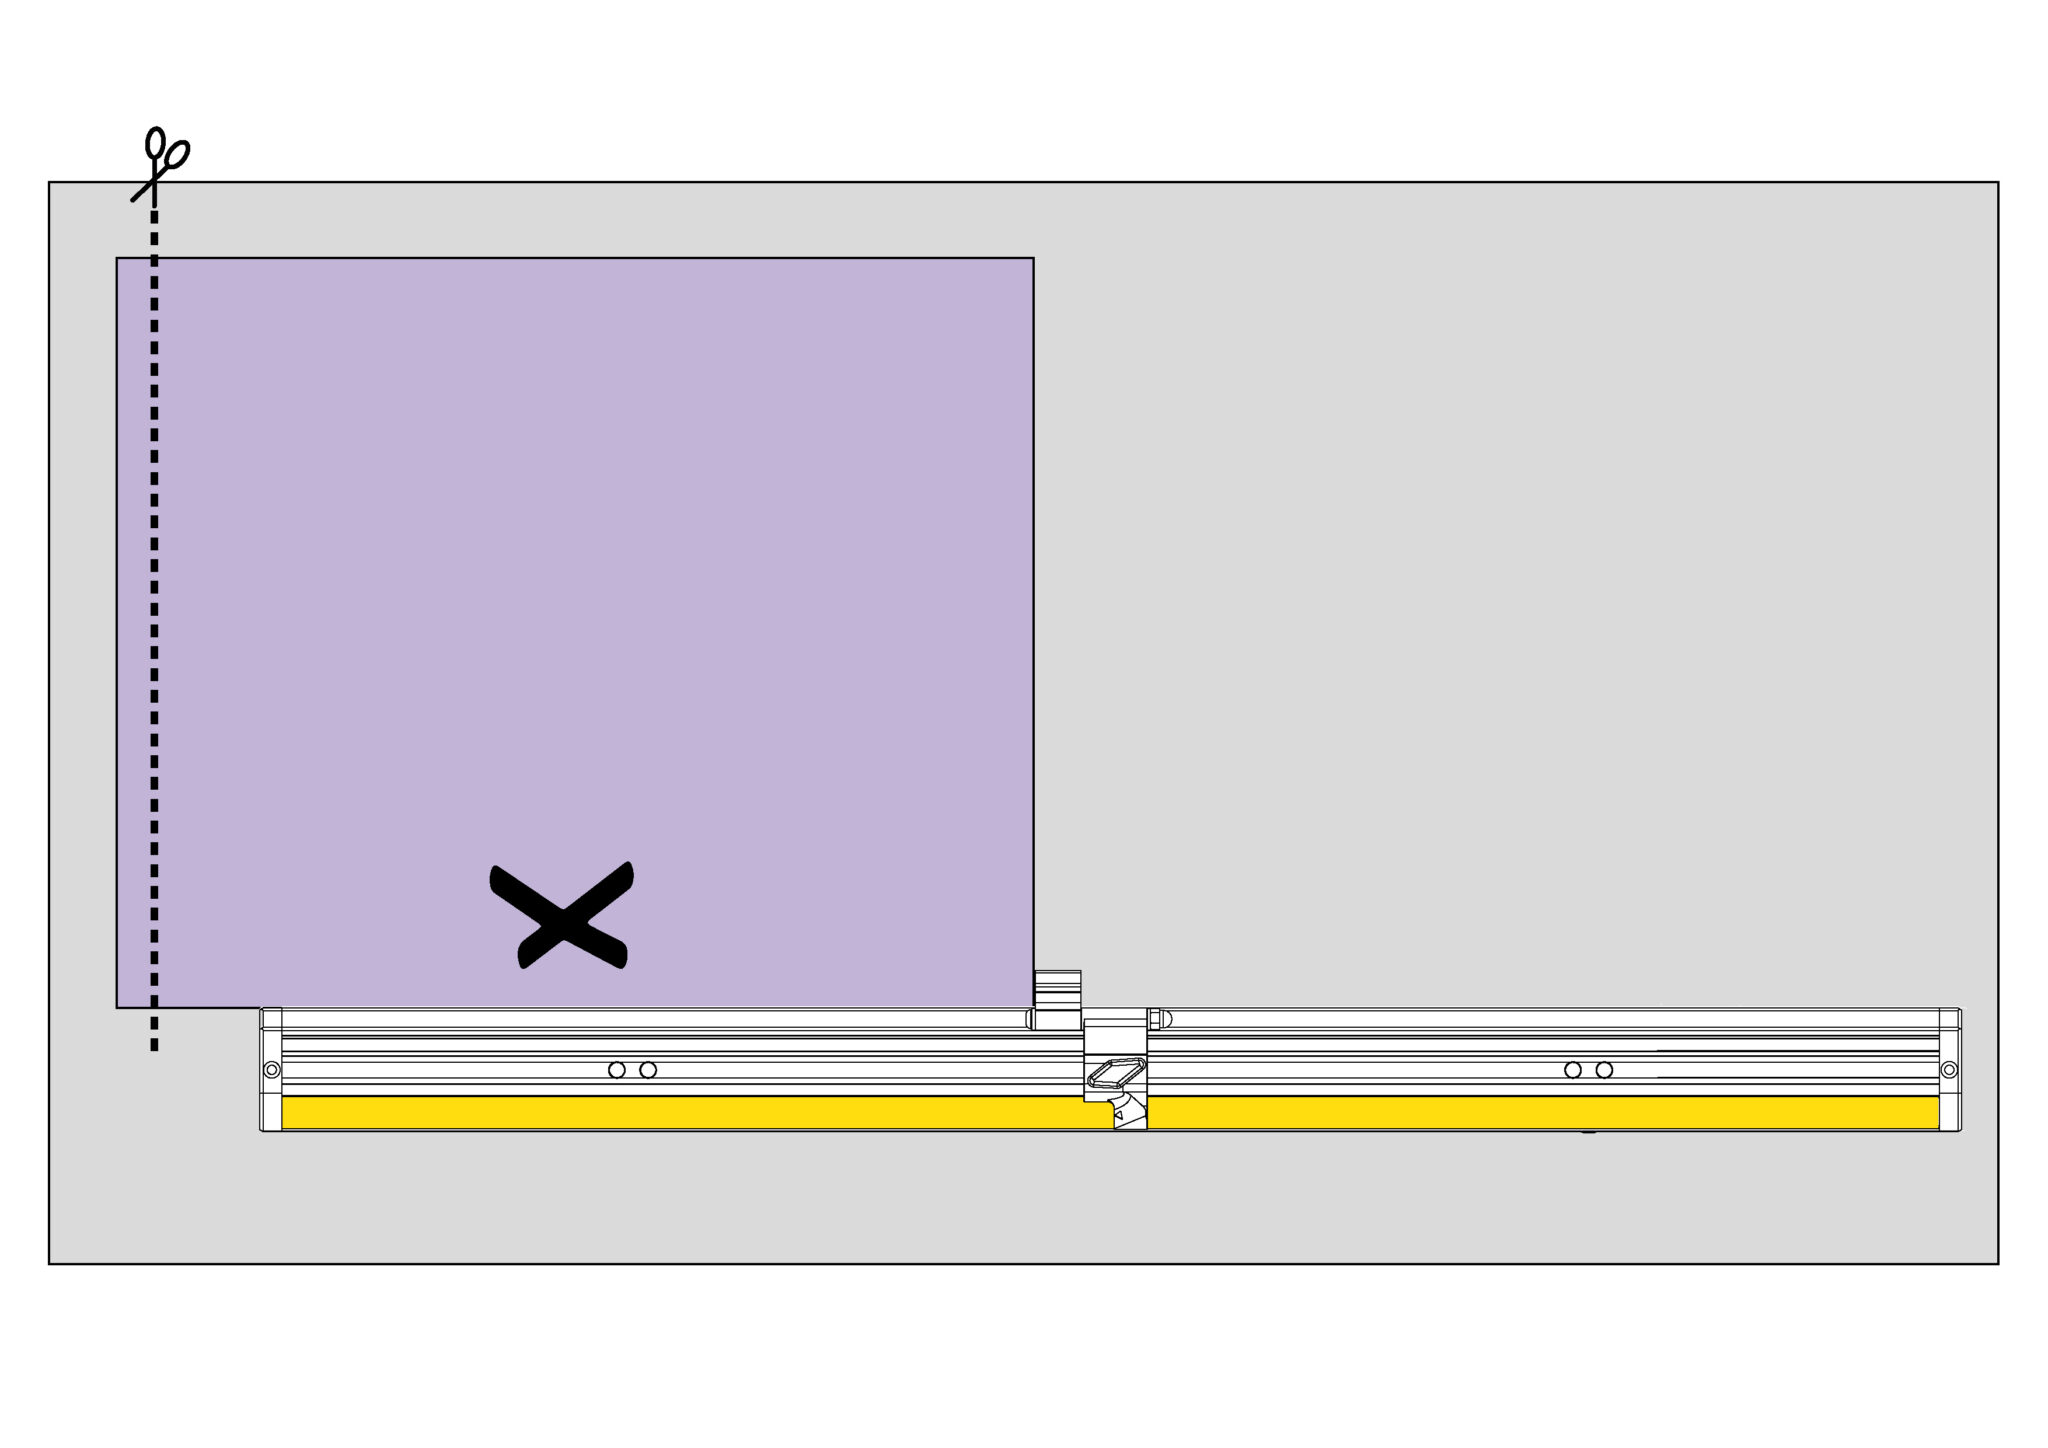
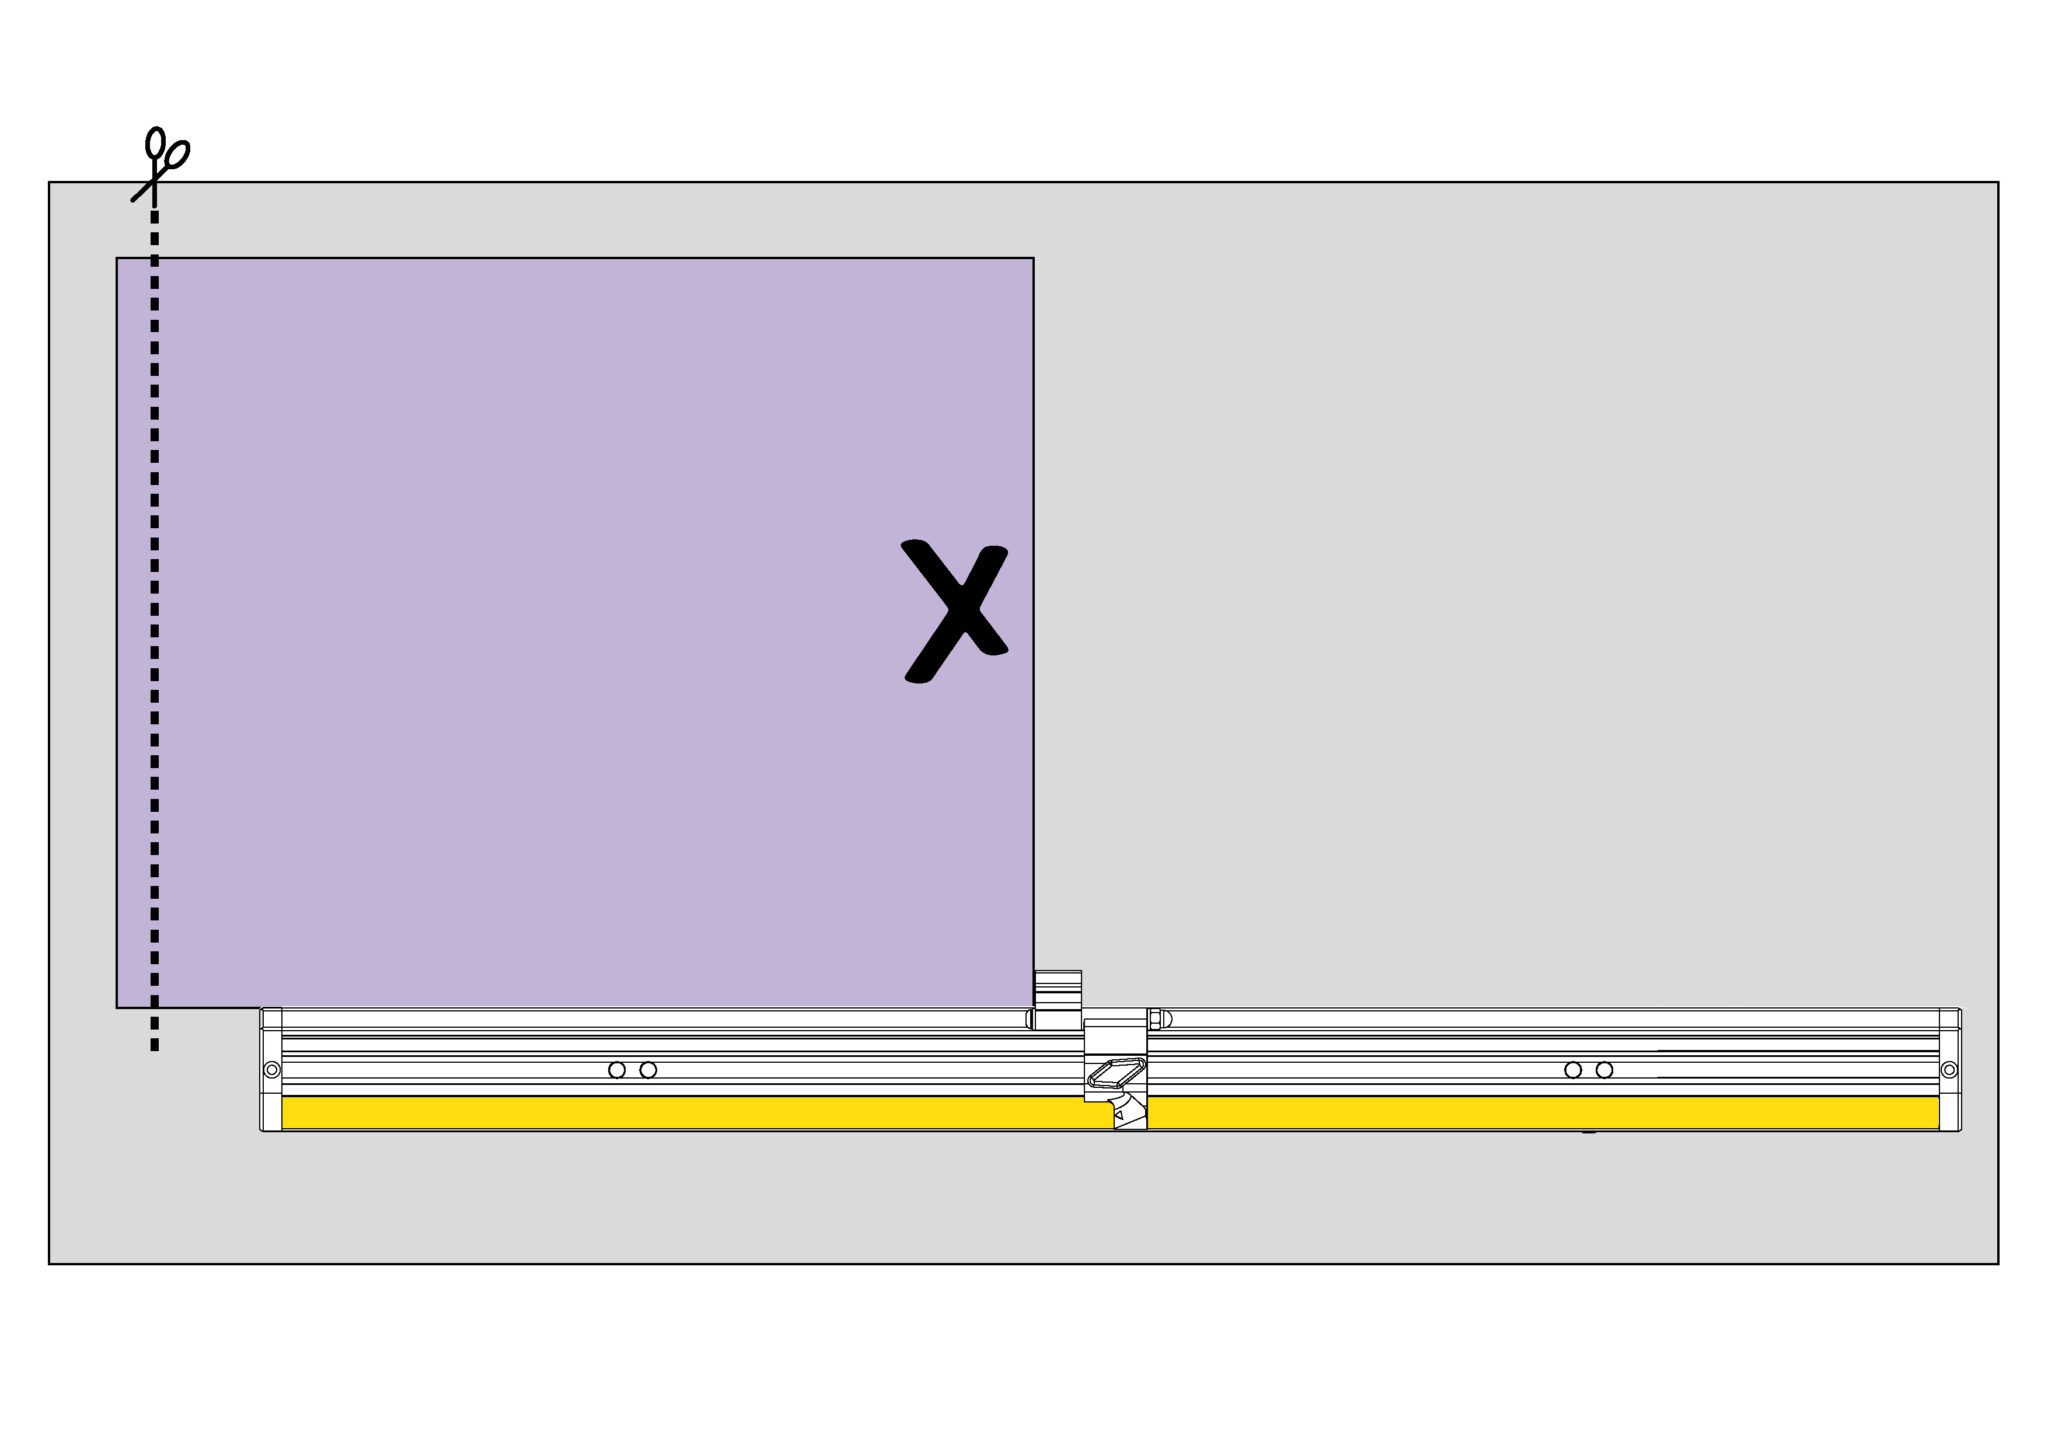
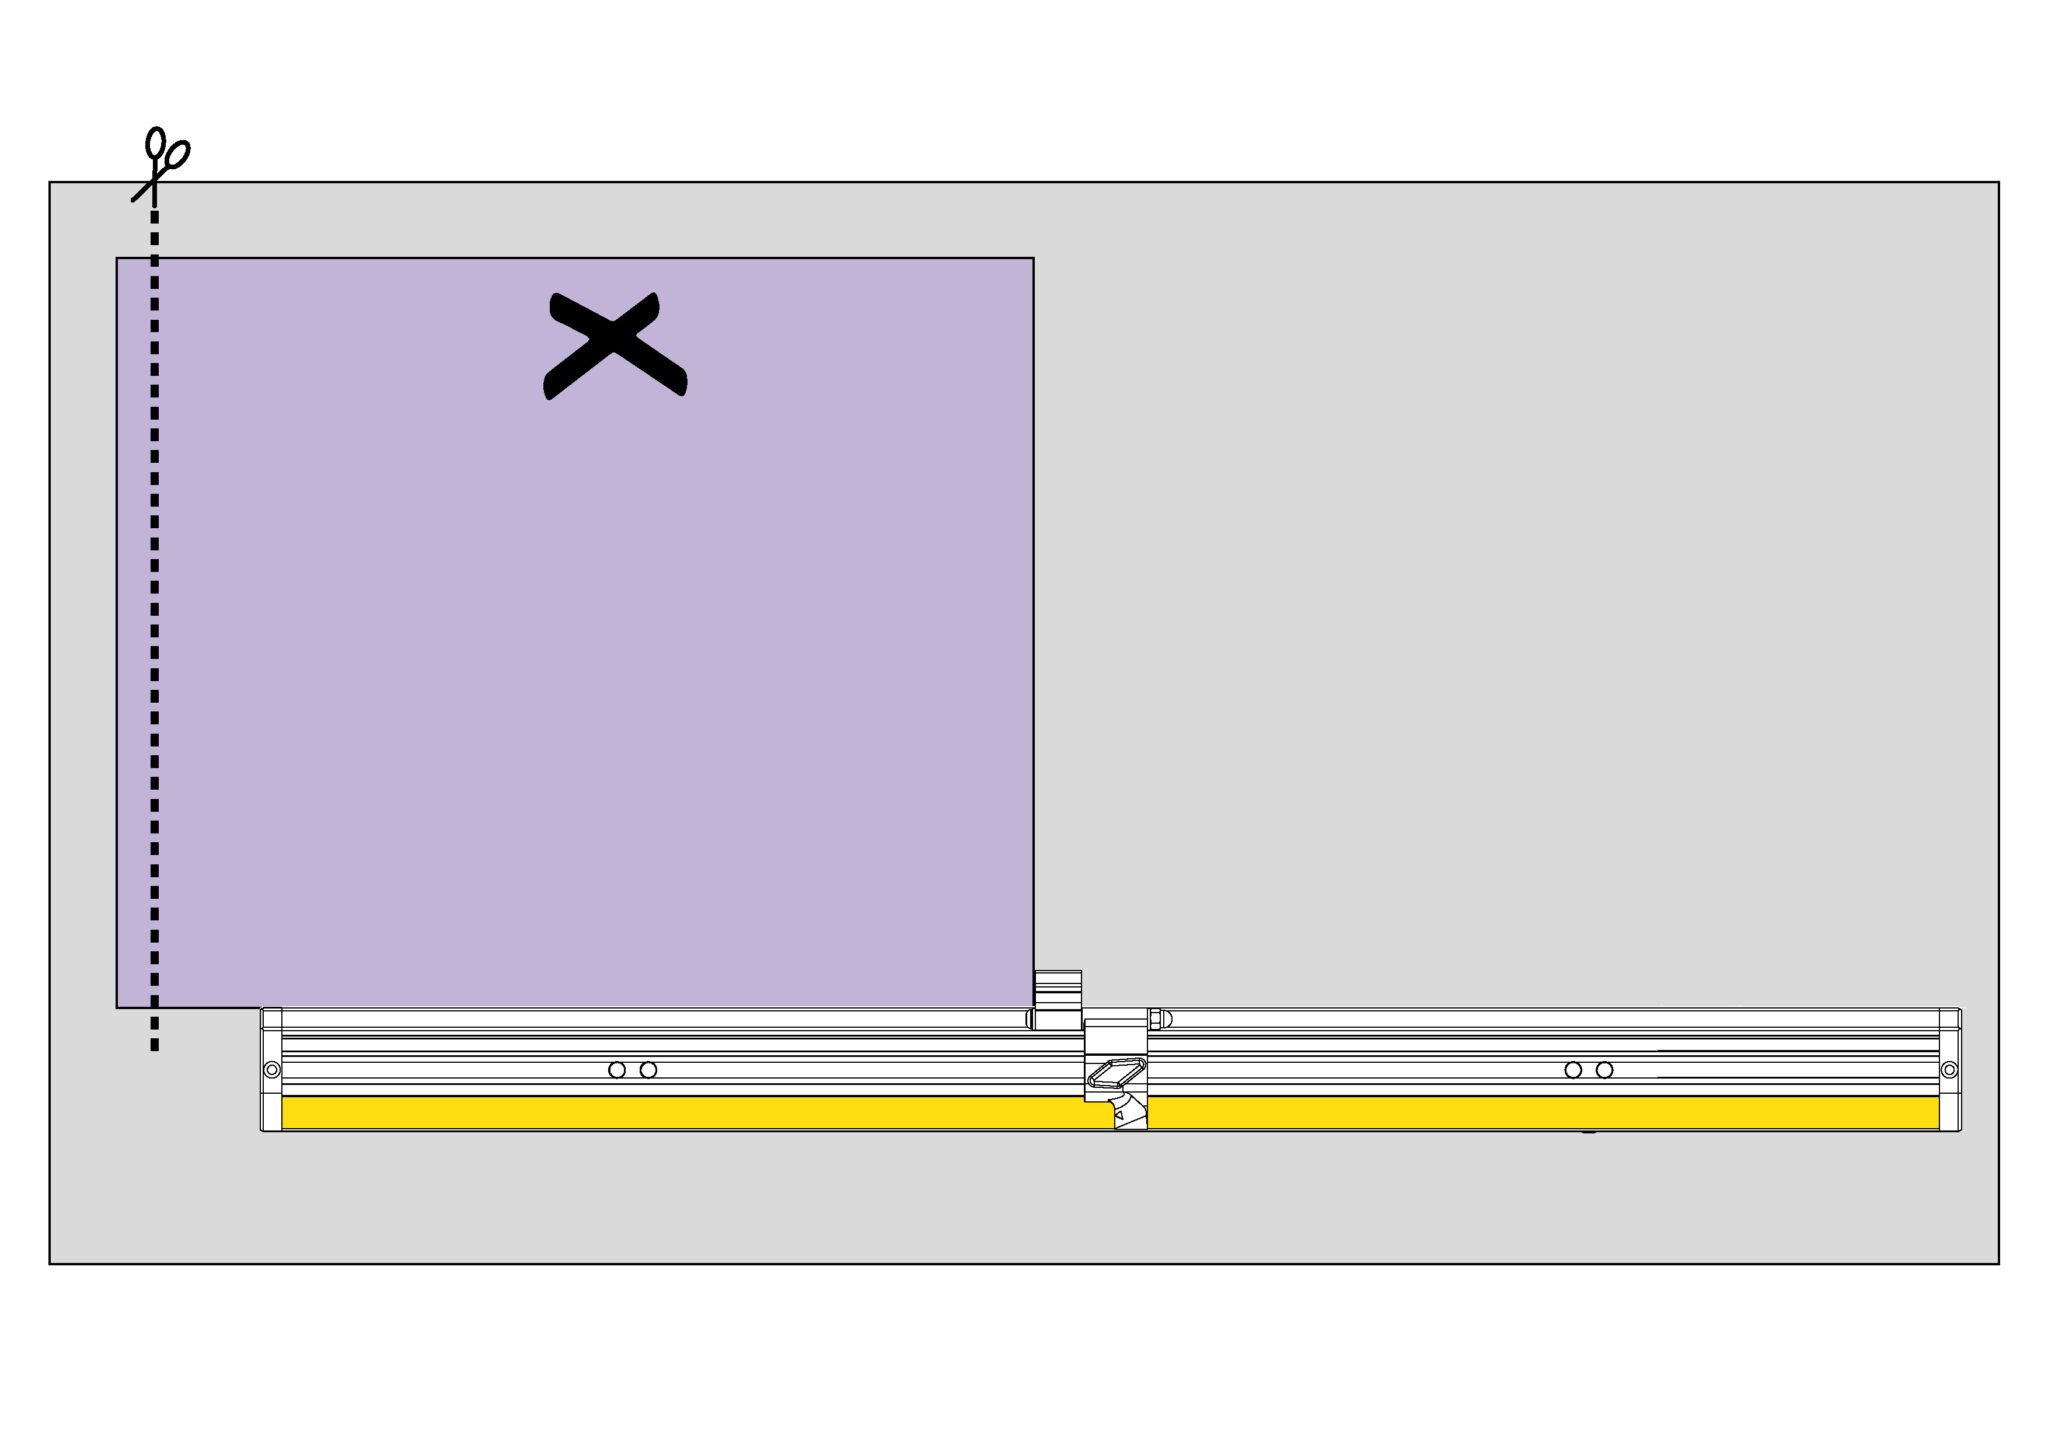
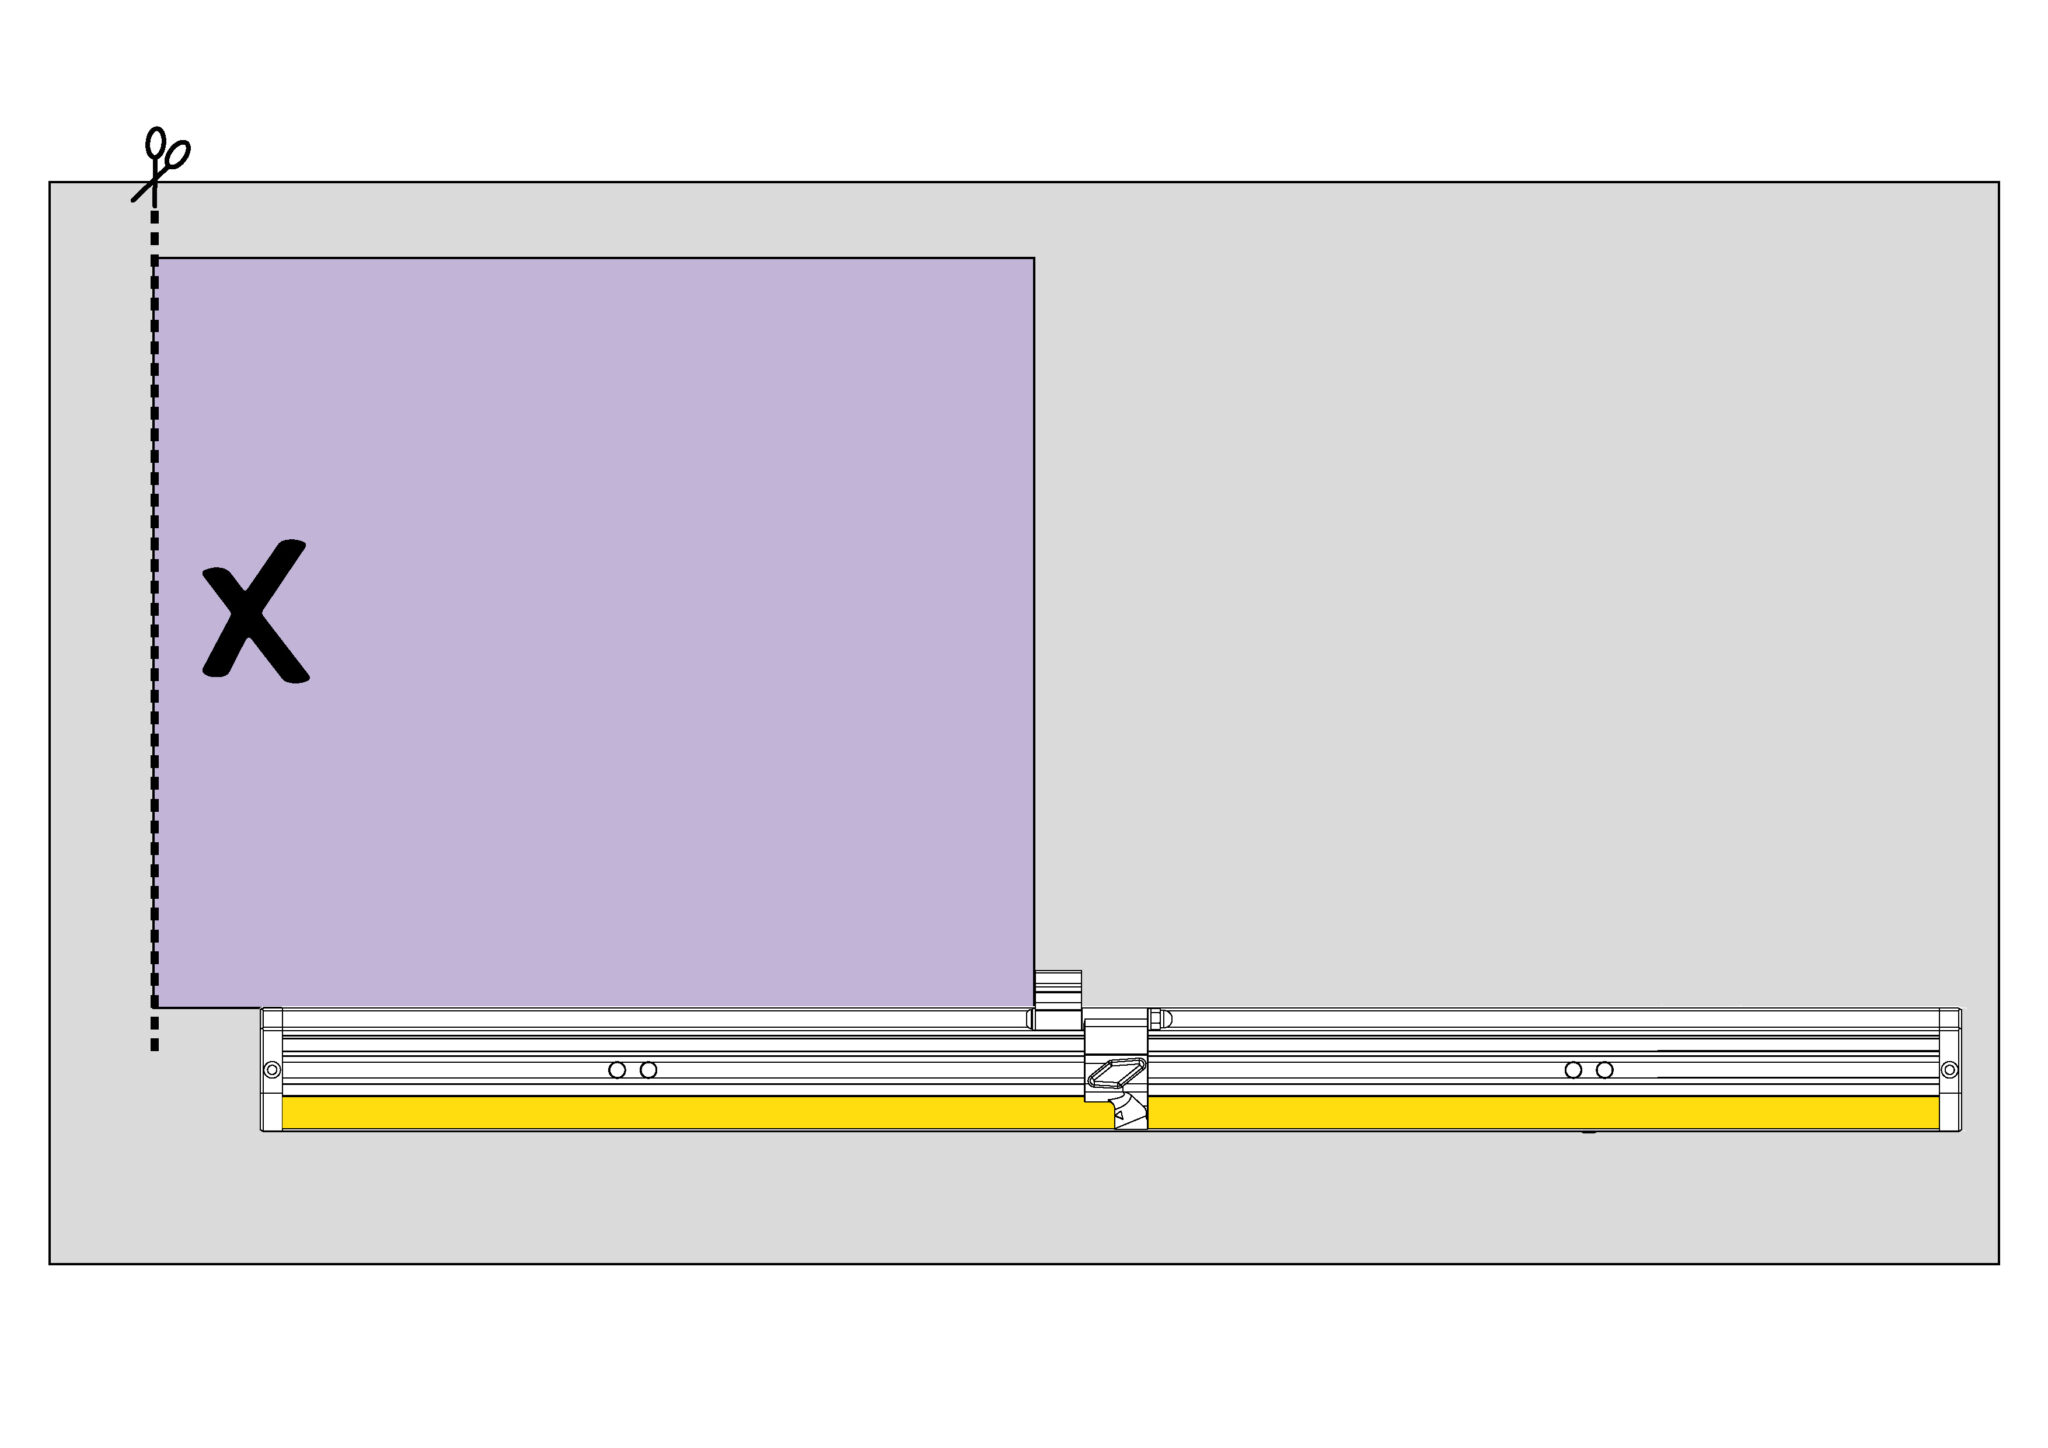
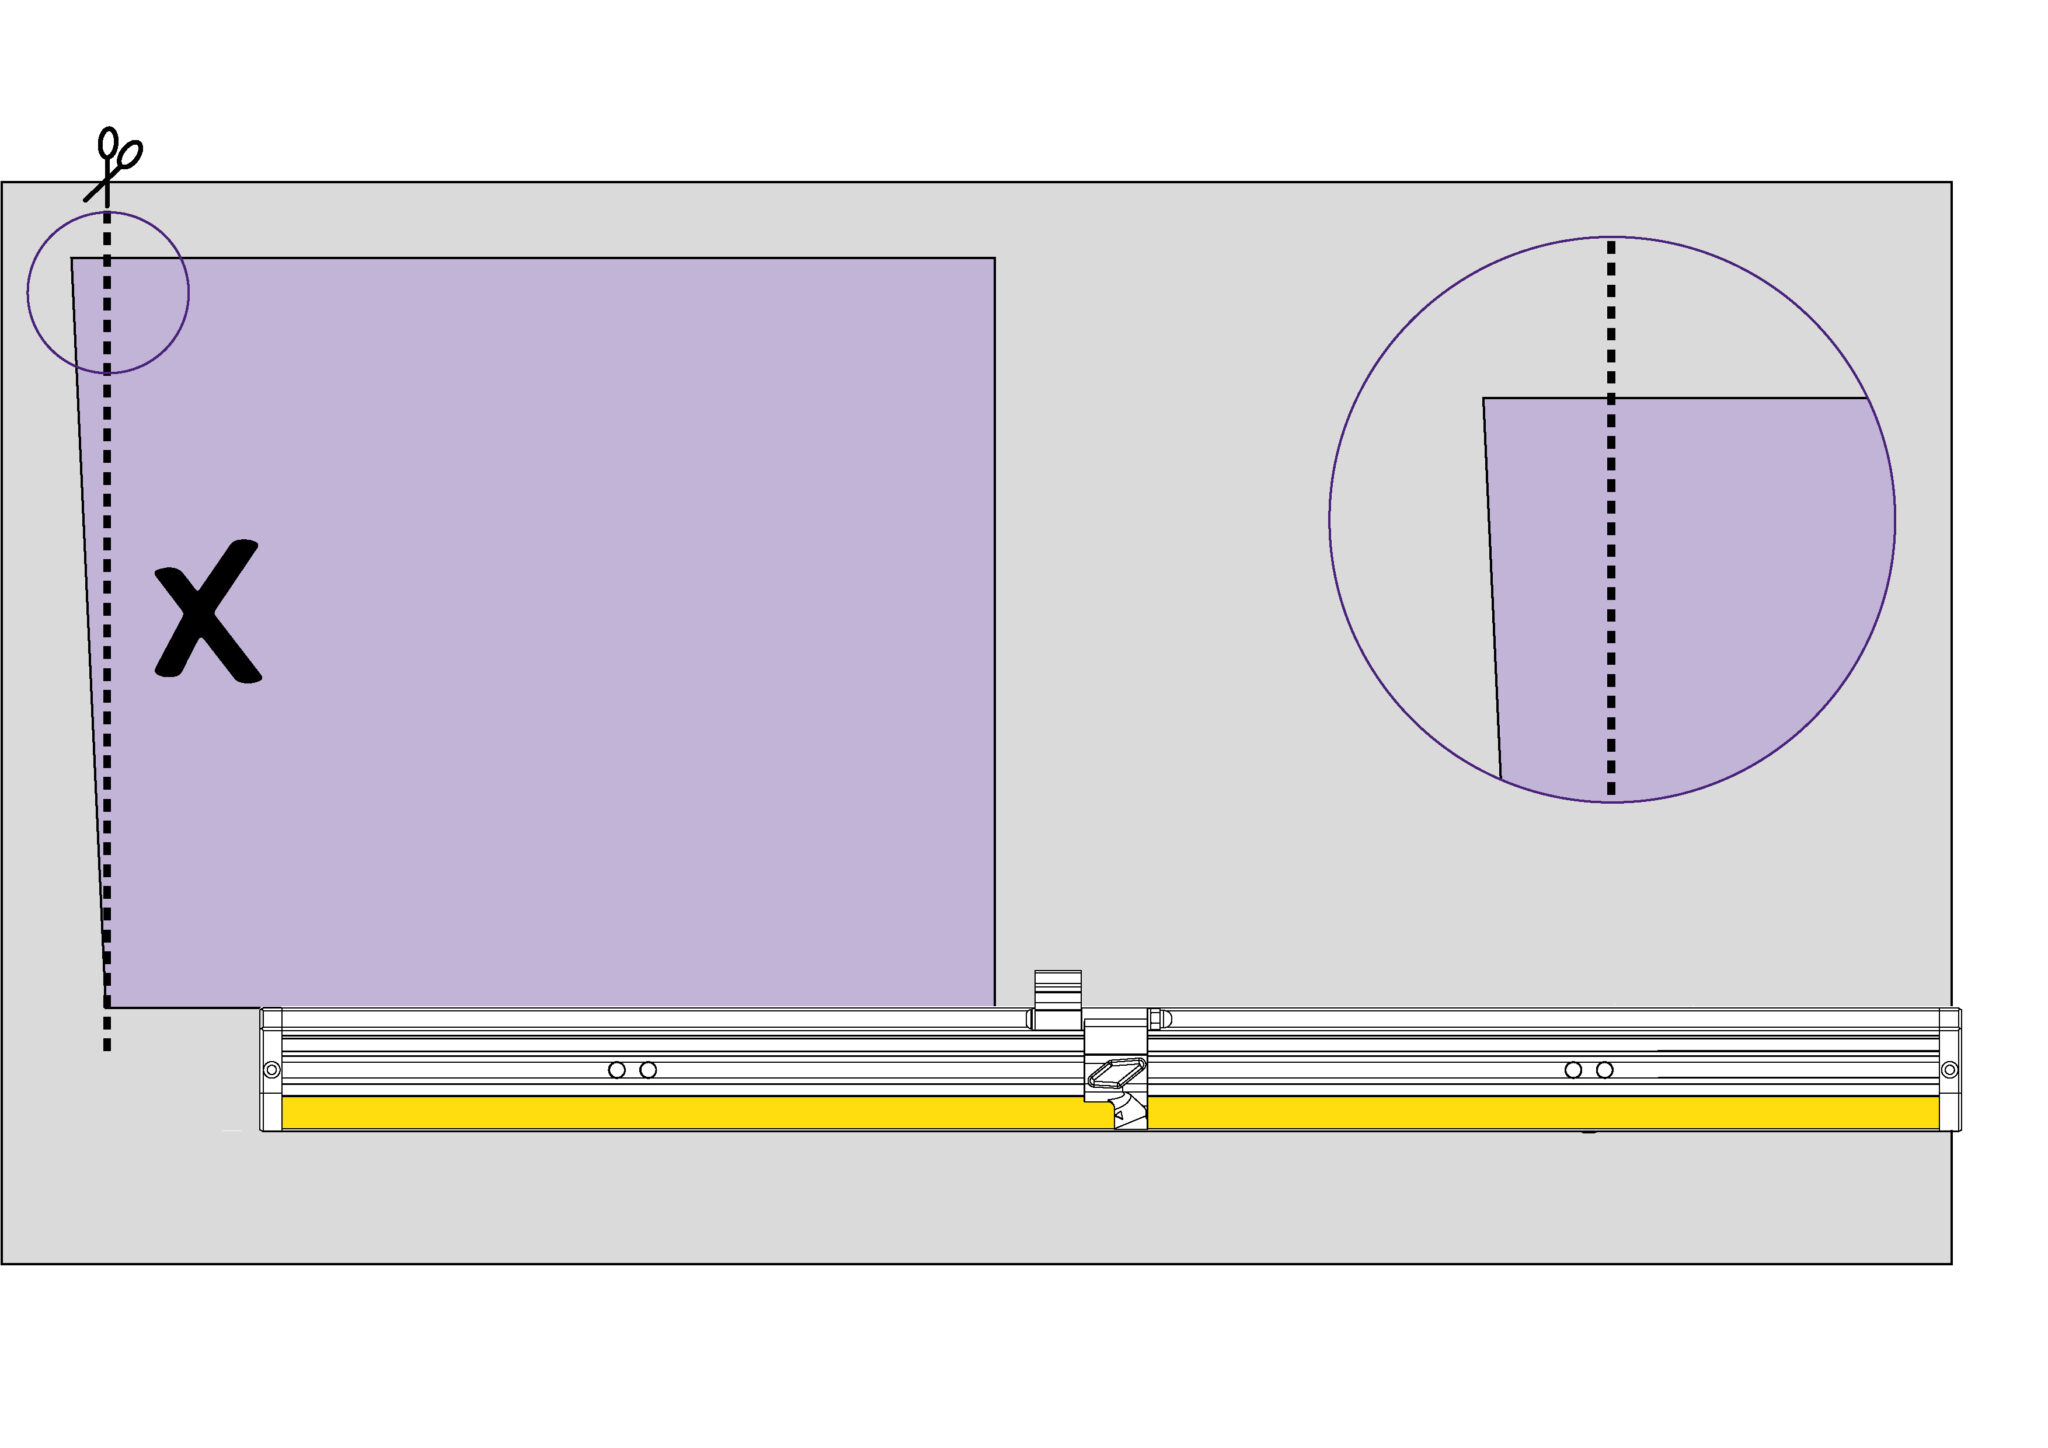
If not, edge X will show a discrepancy with the cut line that is FOUR TIMES THE ERROR. Remove the two screws in the plastic end caps if fitted and rotate the fine adjustment screws to remove a QUARTER of the discrepancy. Repeat the test and make further adjustments as necessary, insert the end fixing screws.
If the Material Guide is being used as a 90 degree gauge on a cutting table the following test can be used to calibrate the squareness. You will need an easy to cut semi-rigid board (art board, grey board, thin PVC foamboard or similar) at least 60cms (24”) or larger will be required.
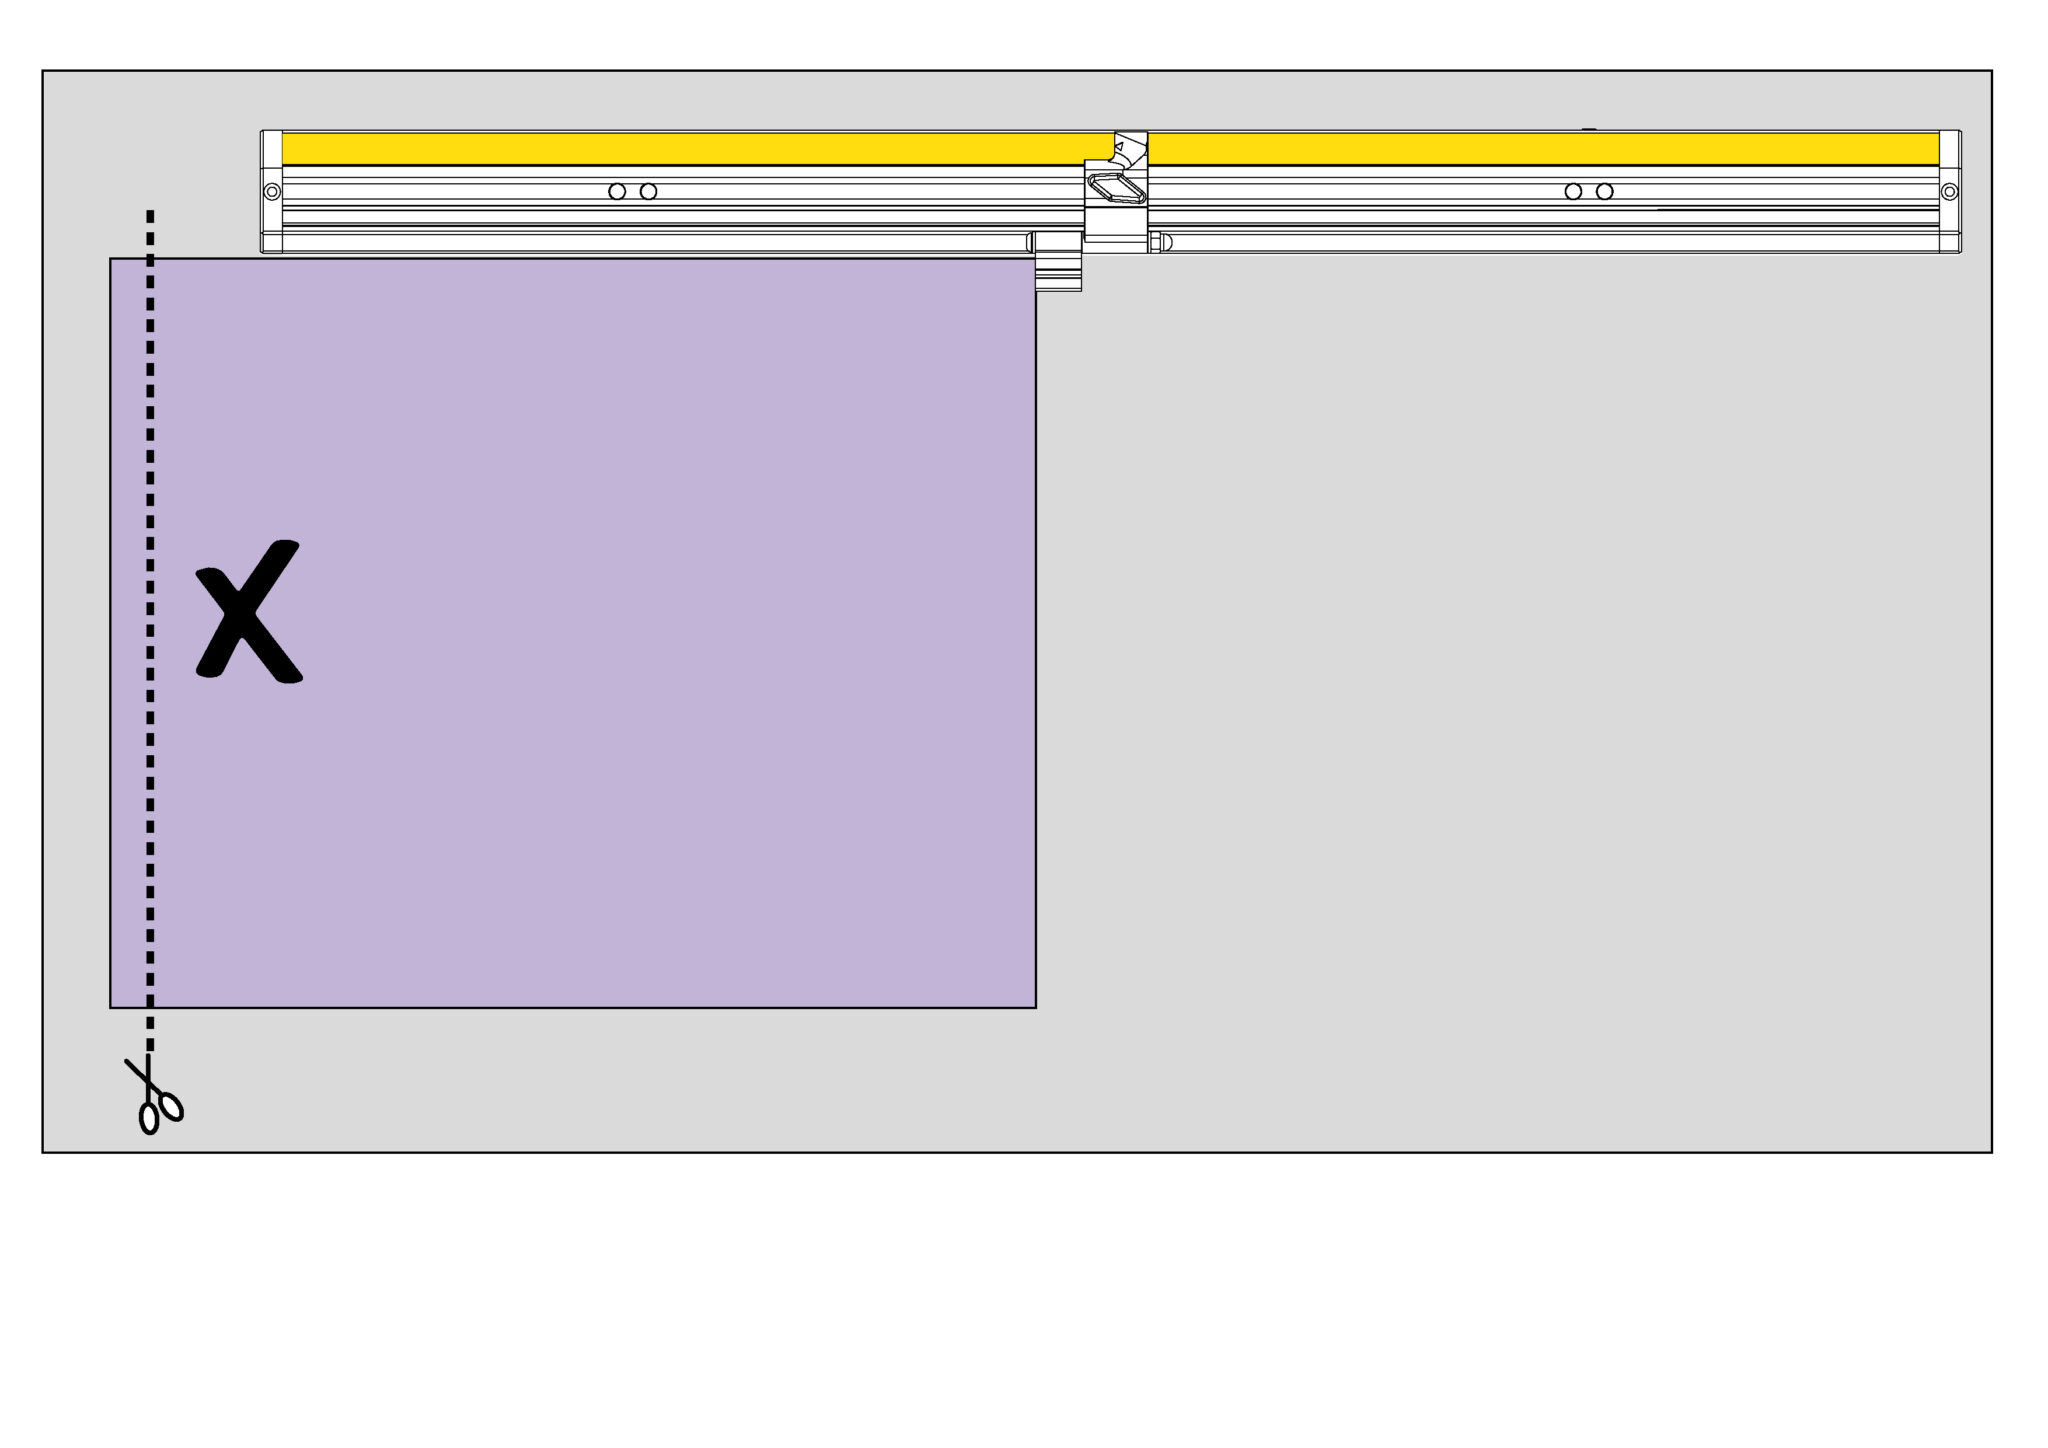
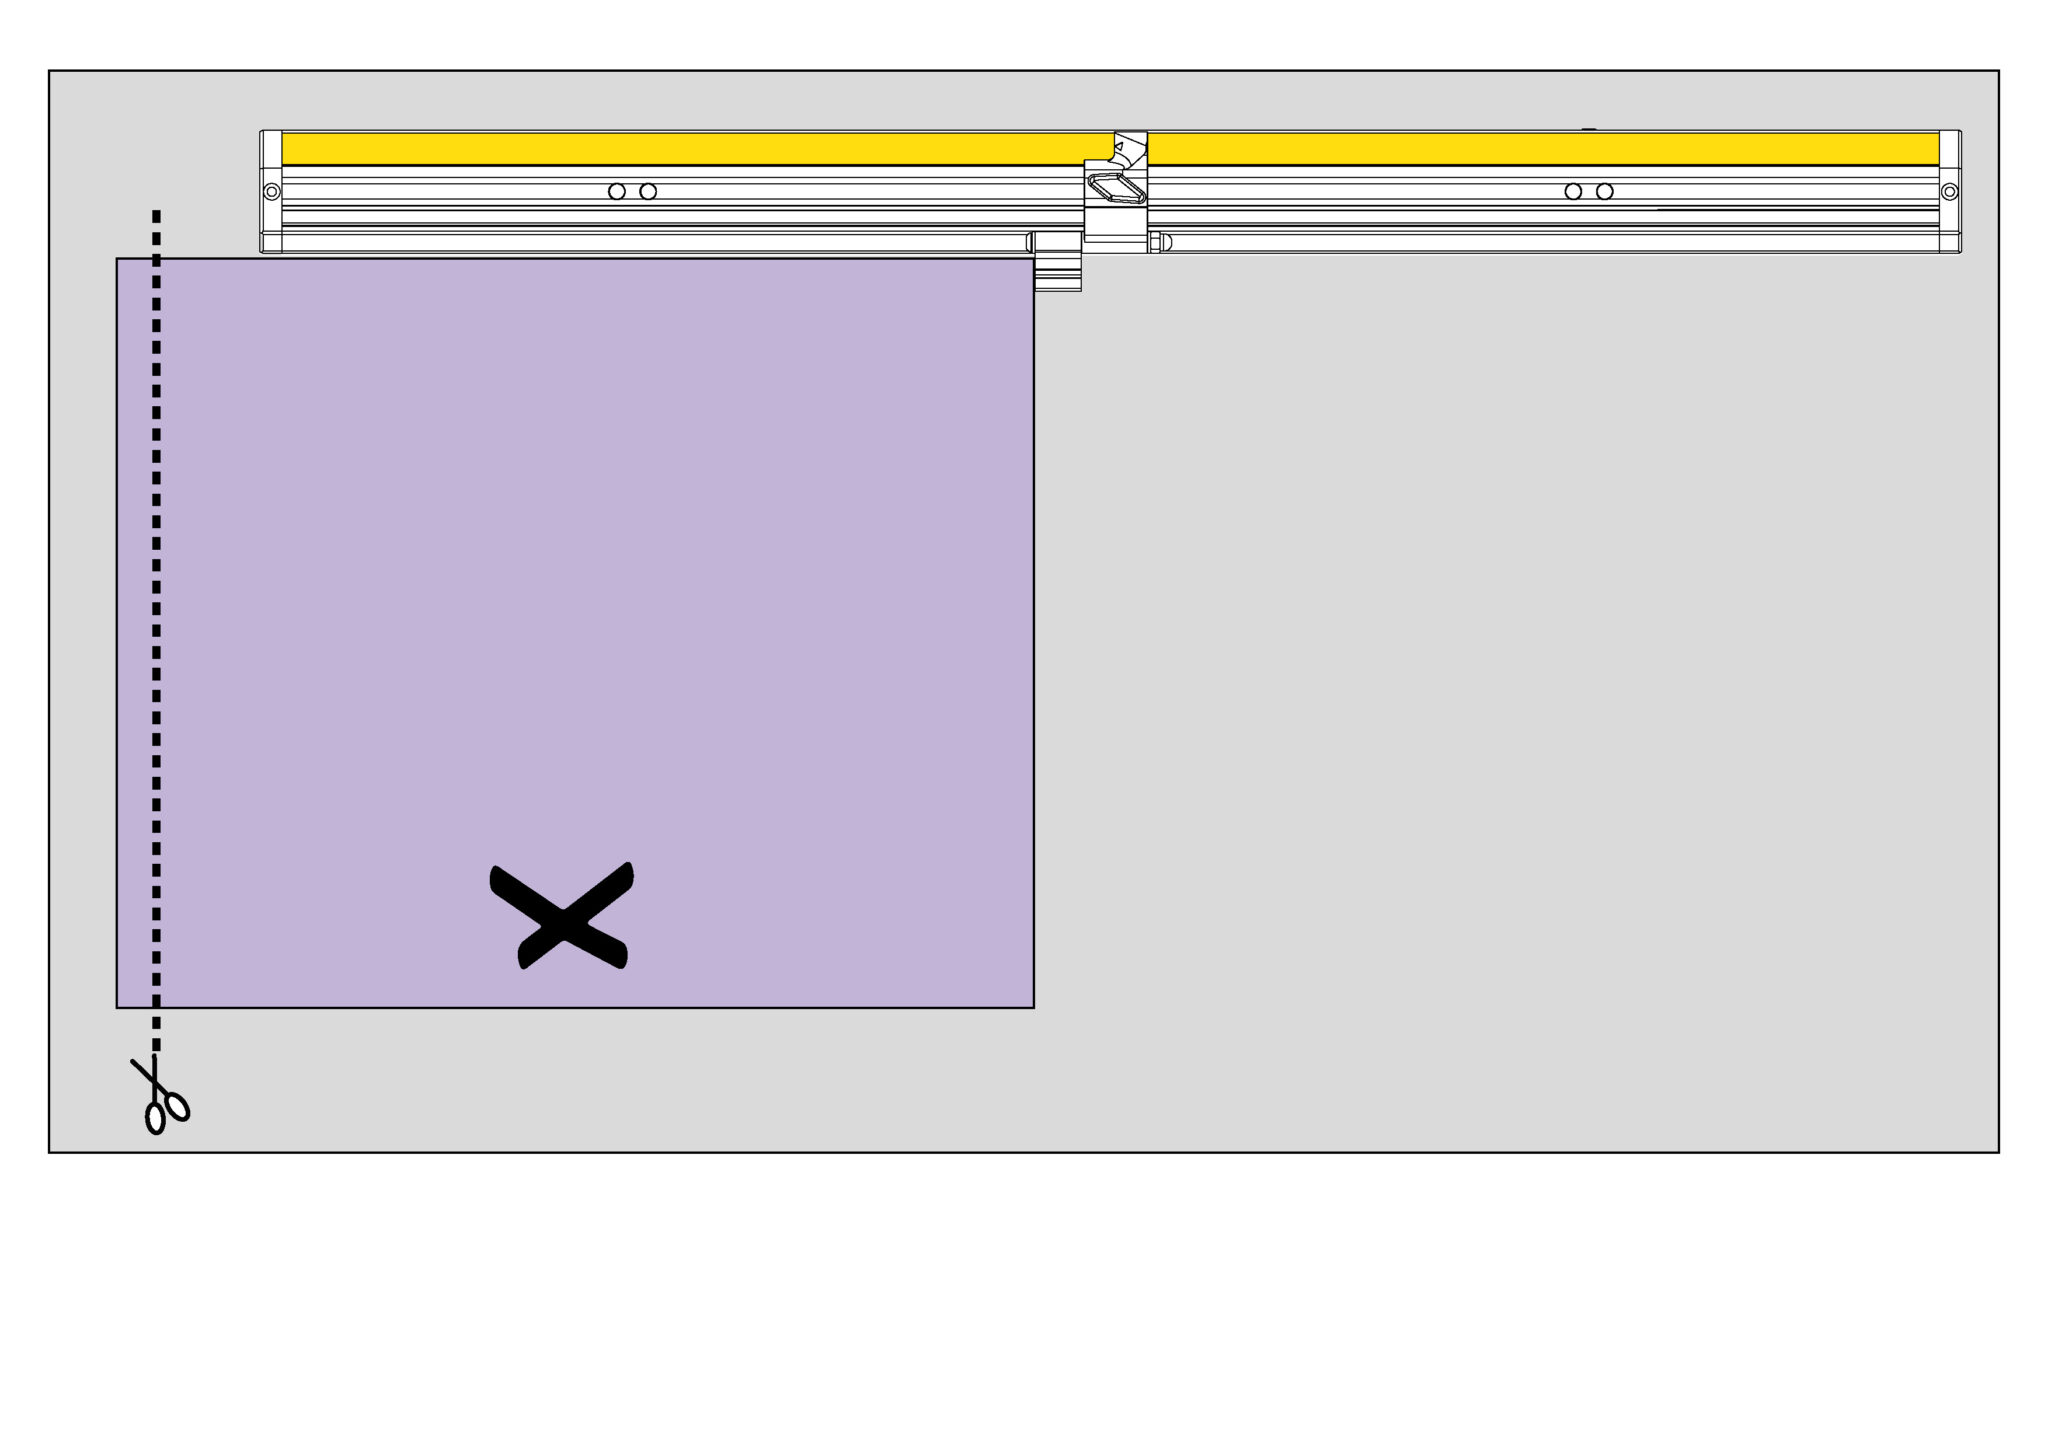
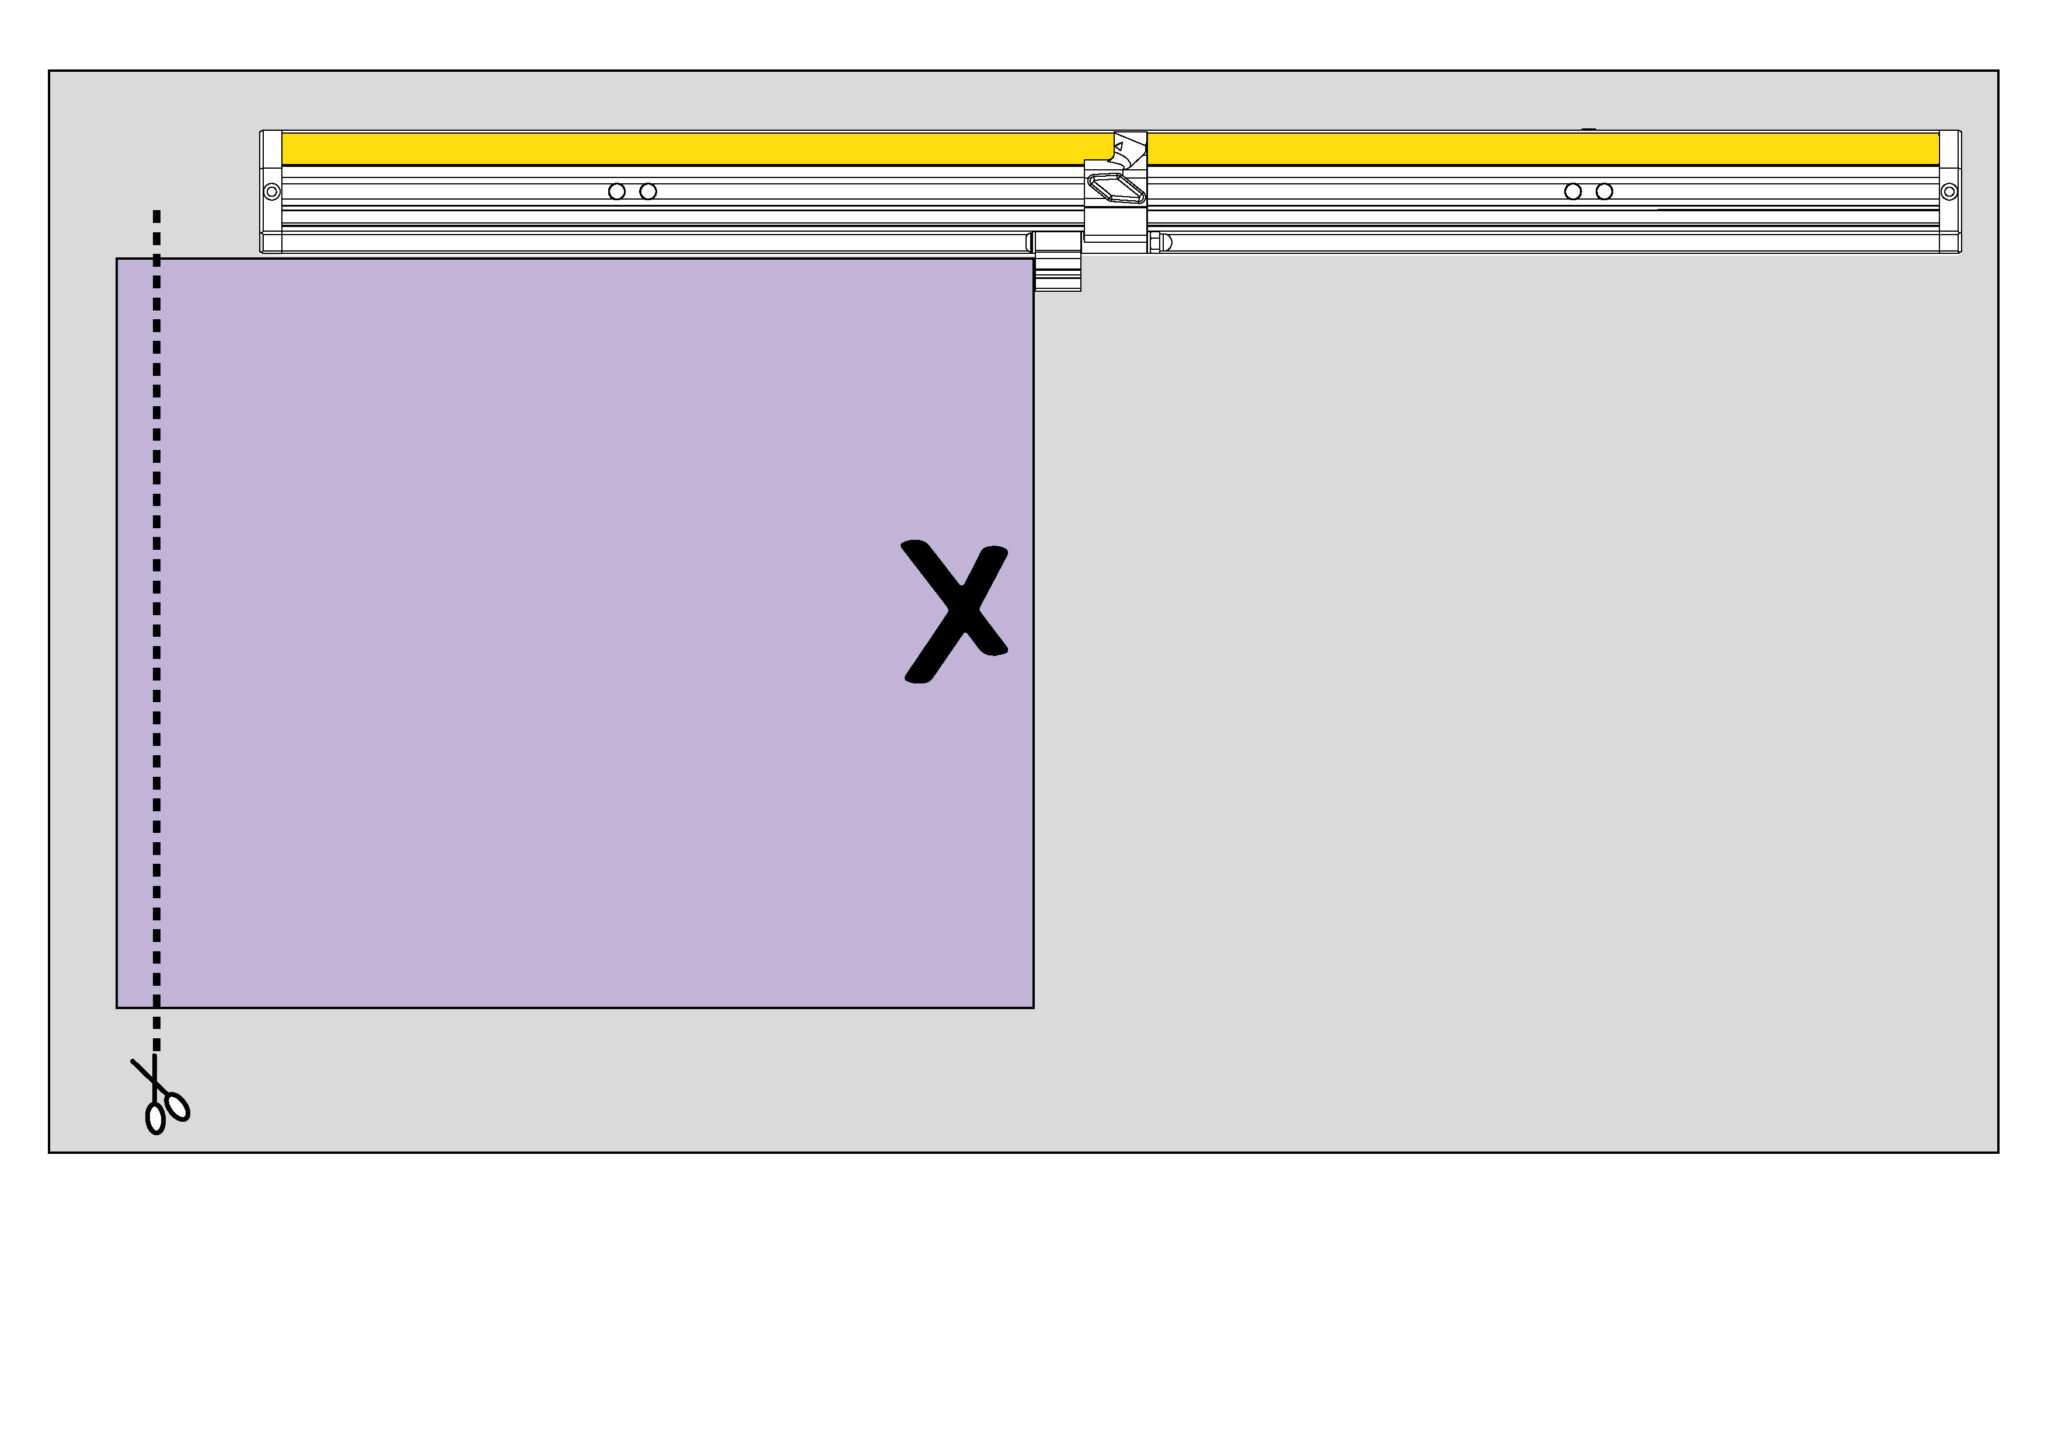
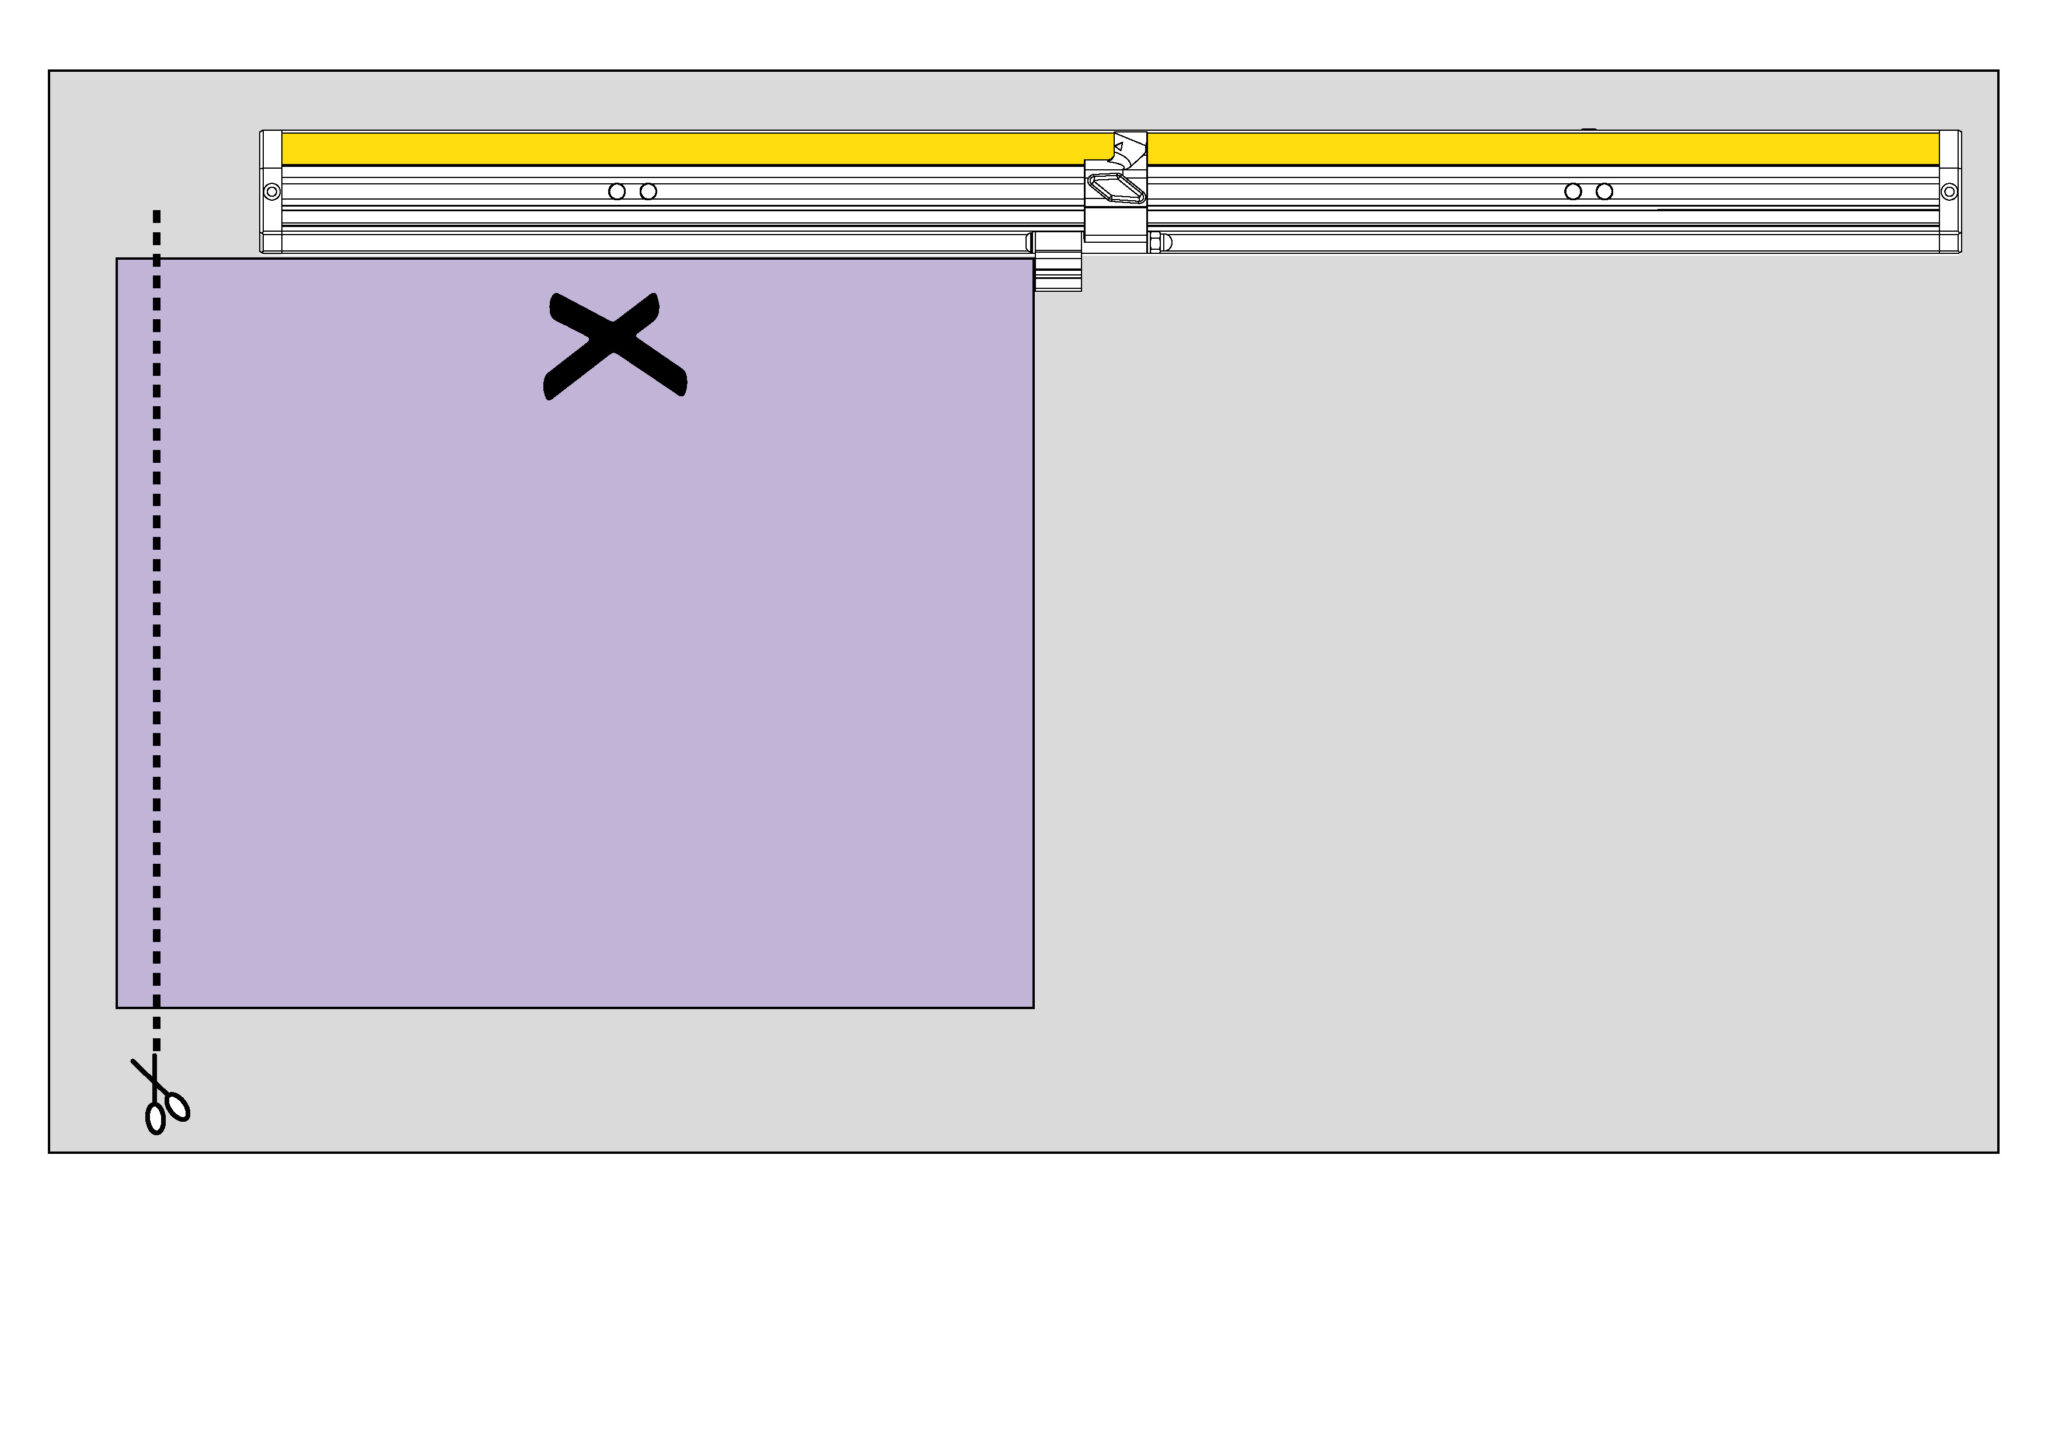
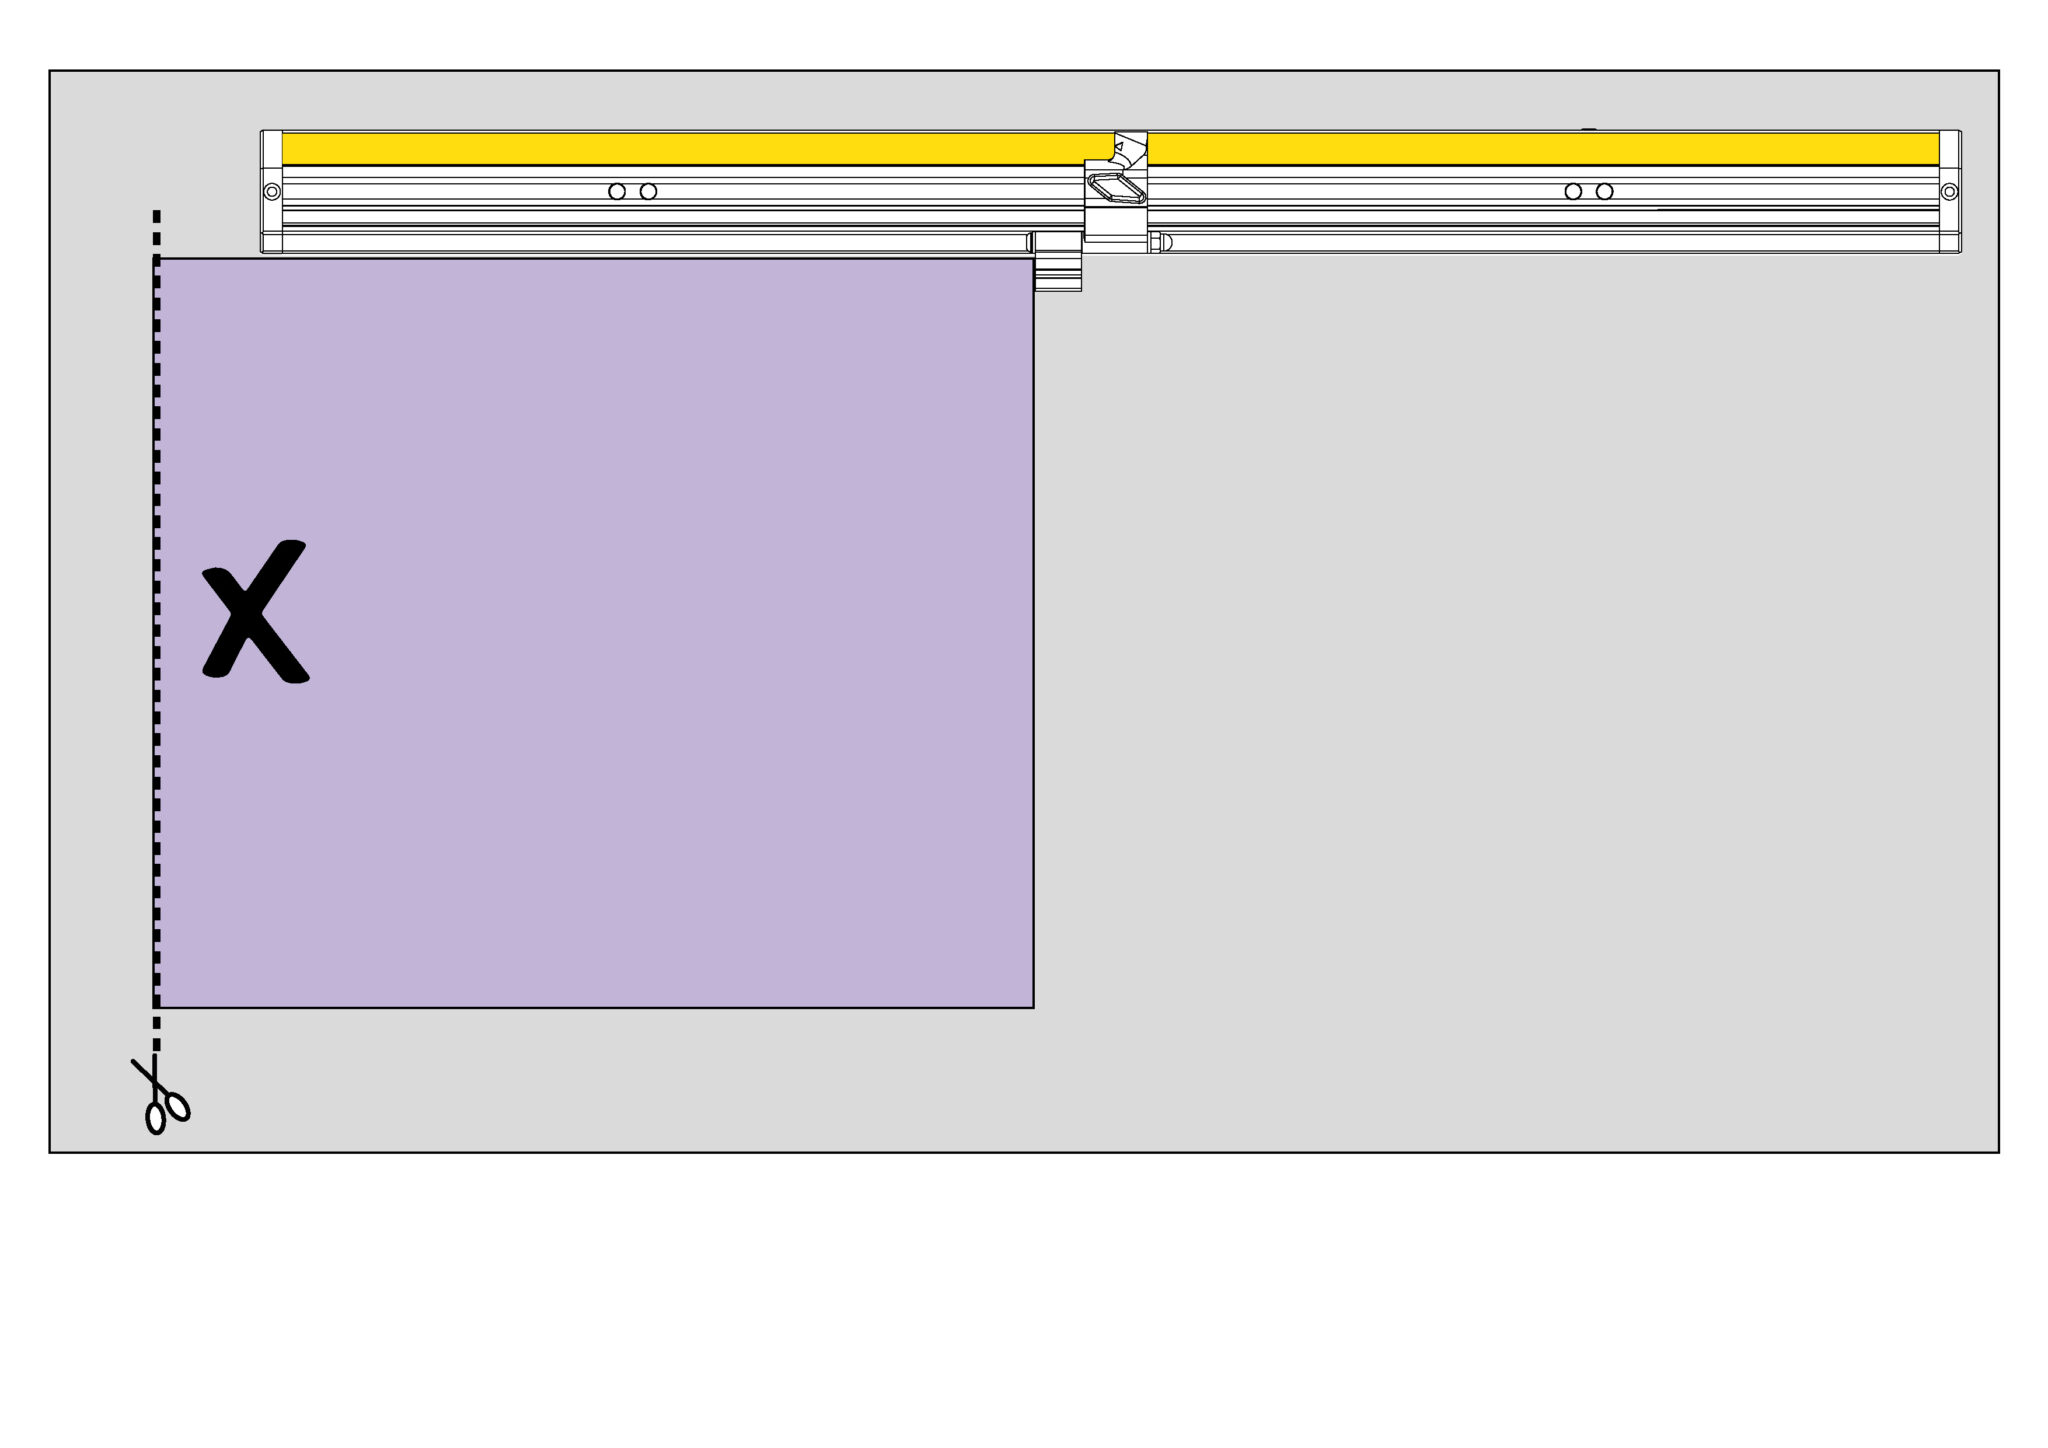
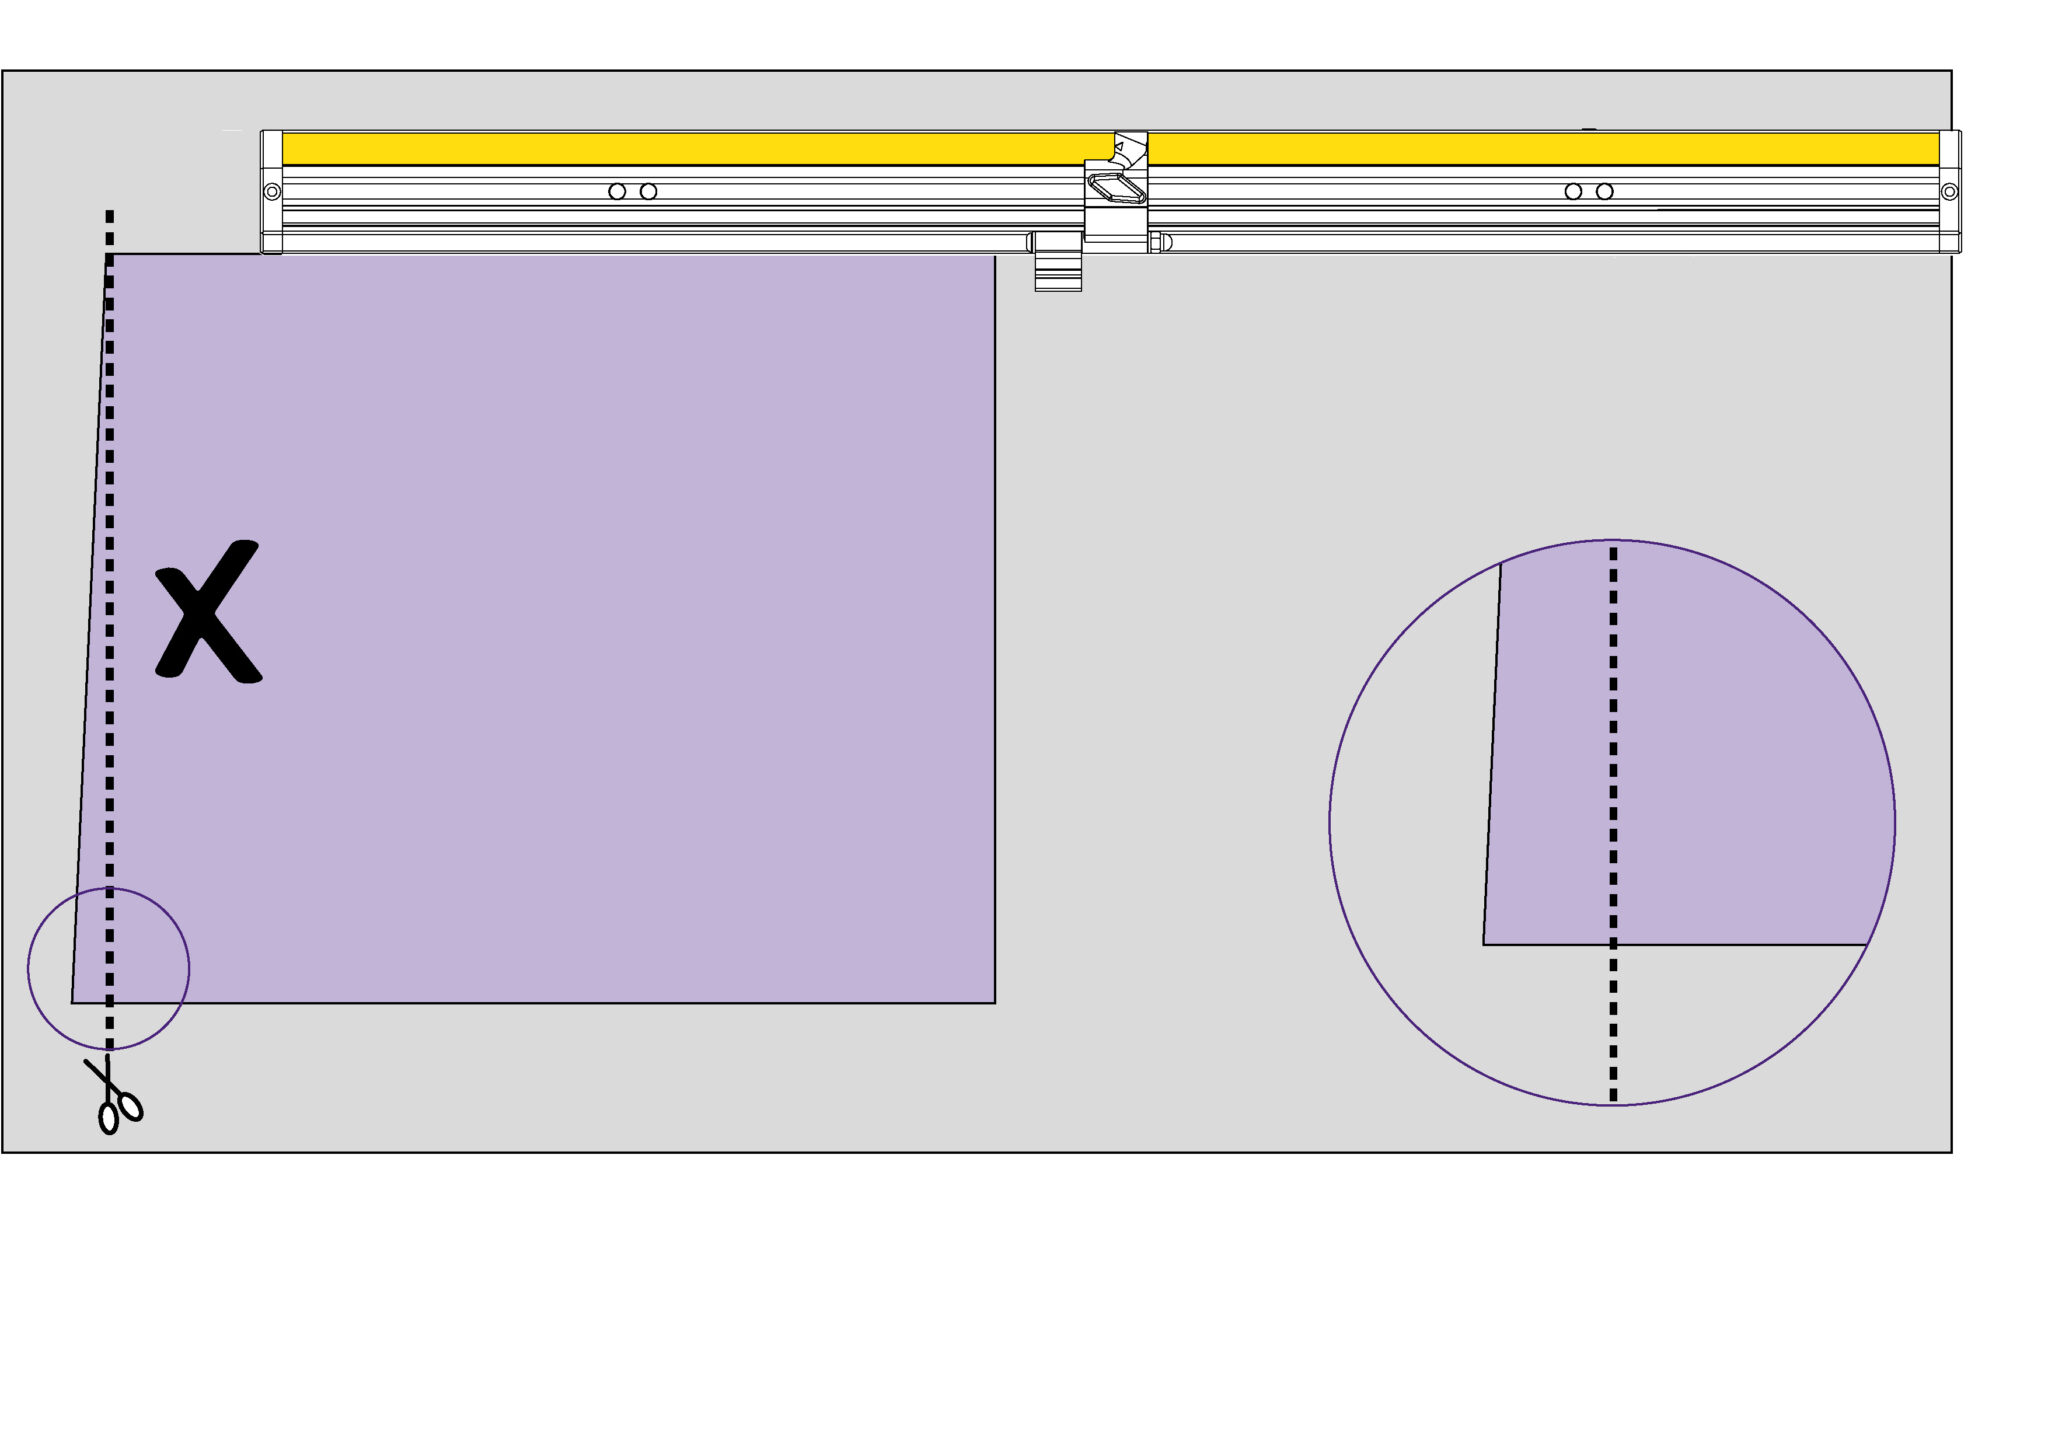
If not, edge X will show a discrepancy with the cut line that is FOUR TIMES THE ERROR. Remove the two screws in the plastic end caps if fitted and rotate the fine adjustment screws to remove a QUARTER of the discrepancy. Repeat the test and make further adjustments as necessary, insert the end fixing screws.
The Material Guide has been designed to work on any worksurface to assist with measuring and aligning rigid and semi-rigid materials. It can be used in conjunction with many Keencut cutters or most other situations where precise positioning of workpieces is required.
NOTE: The Material Guide can be installed on the left or the right-hand side of the worktop. The following diagrams show it on the right, but the process is the same for fitting on the left. The ‘Squaring check’ section covers both left and right installation.

Ⓒ Keencut 2026 | Baird Rd, Corby NN17 5ZA United Kingdom | Contact us
Created by DeType | Privacy | Website Disclaimer | Terms & Conditions


