
Evolution3 FreeHand User Guide – Creaser tool head
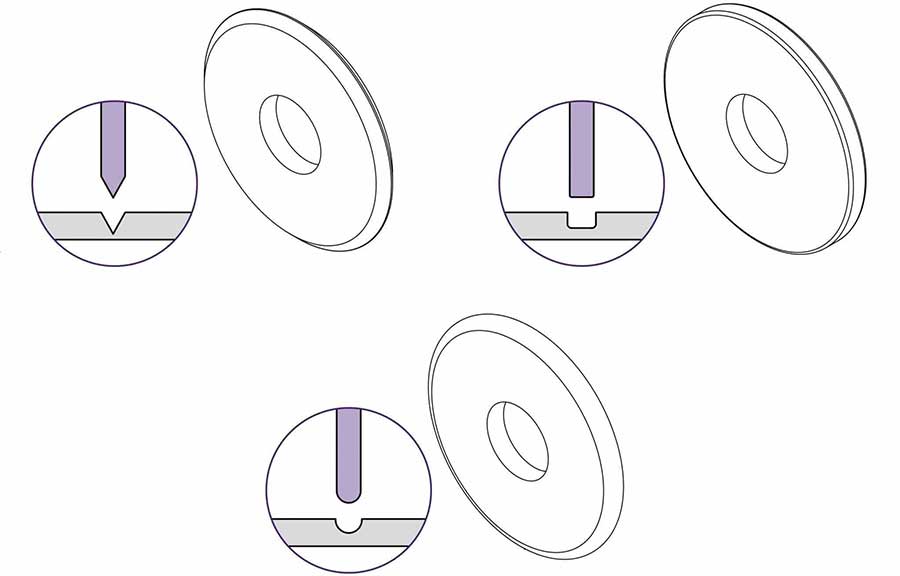
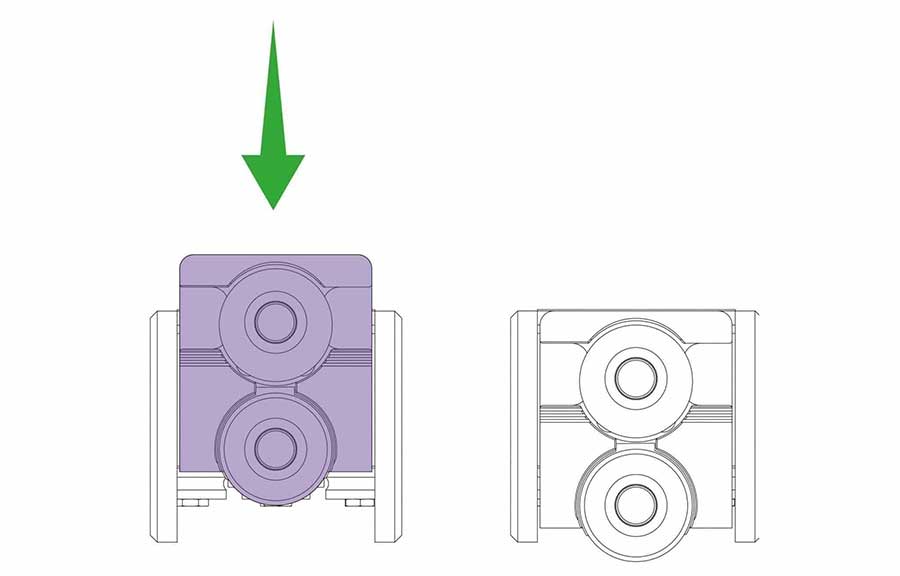
The three creasing wheels supplied with the Creaser tool head will each produce a different style of crease. Experiment on small samples of your material to see which gives best results.
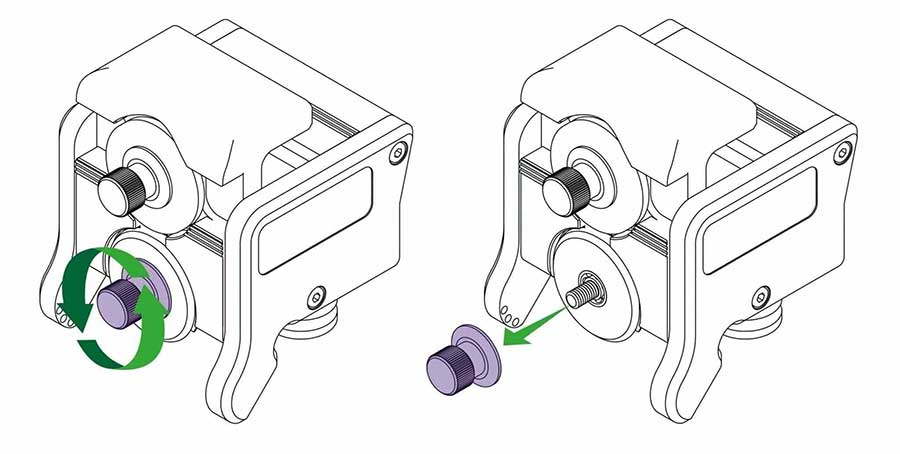
Remove the lower clamping knob.
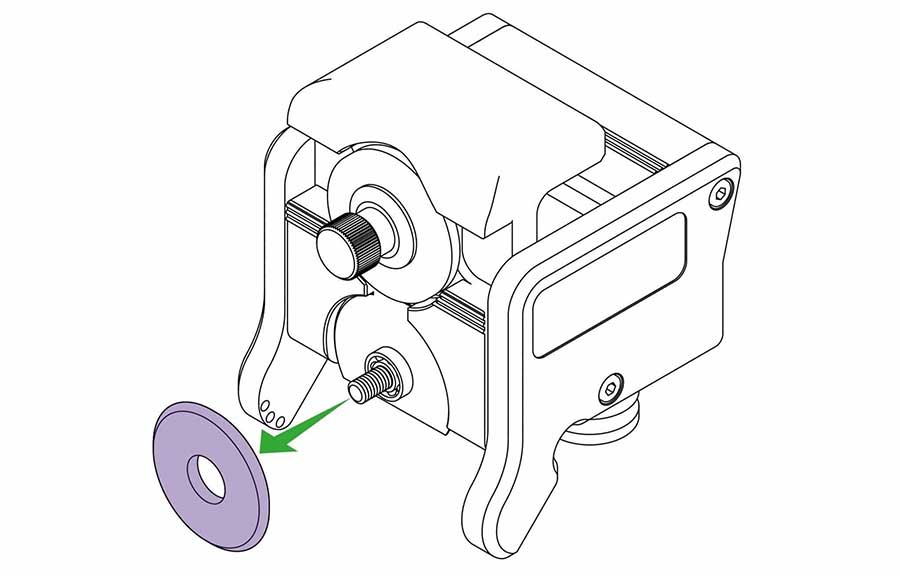
Remove the creasing wheel leaving the bearing and clear plastic shim in place.

Remove the upper clamping knob.
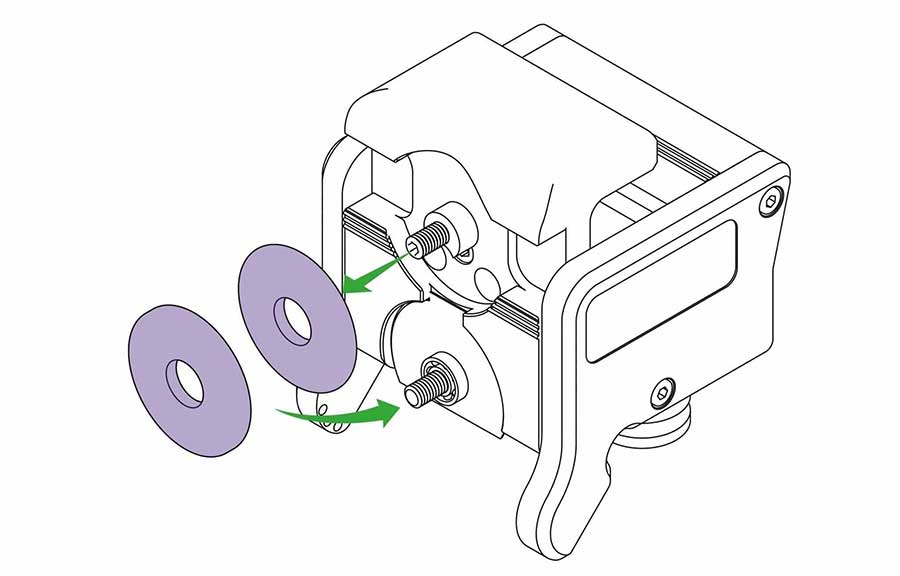
Choose the creasing wheel you would like to use and exchange it with the lower wheel. Replace both clamping knobs.
IMPORTANT: You must use a cutting mat for any cutting, creasing, or scoring process to prevent damage to the work surface.
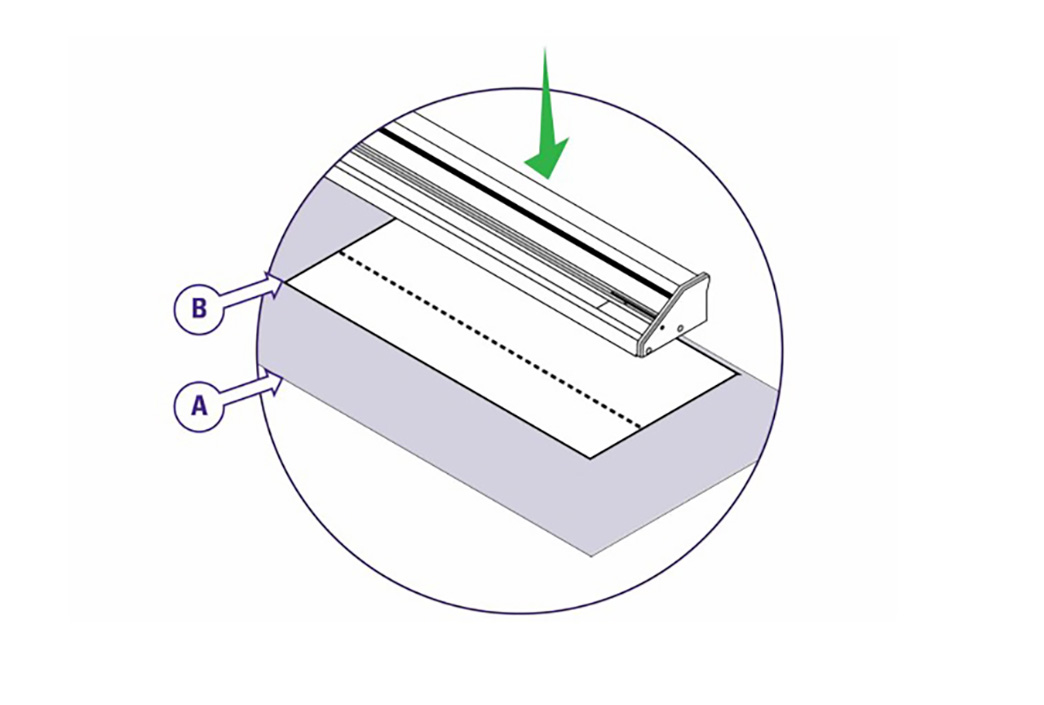
Place the cutting mat (A) on the work surface then the material to be cut (B) making sure the whole length of the cut line is over the cutting mat. Place the FreeHand on the material near to the cutline.
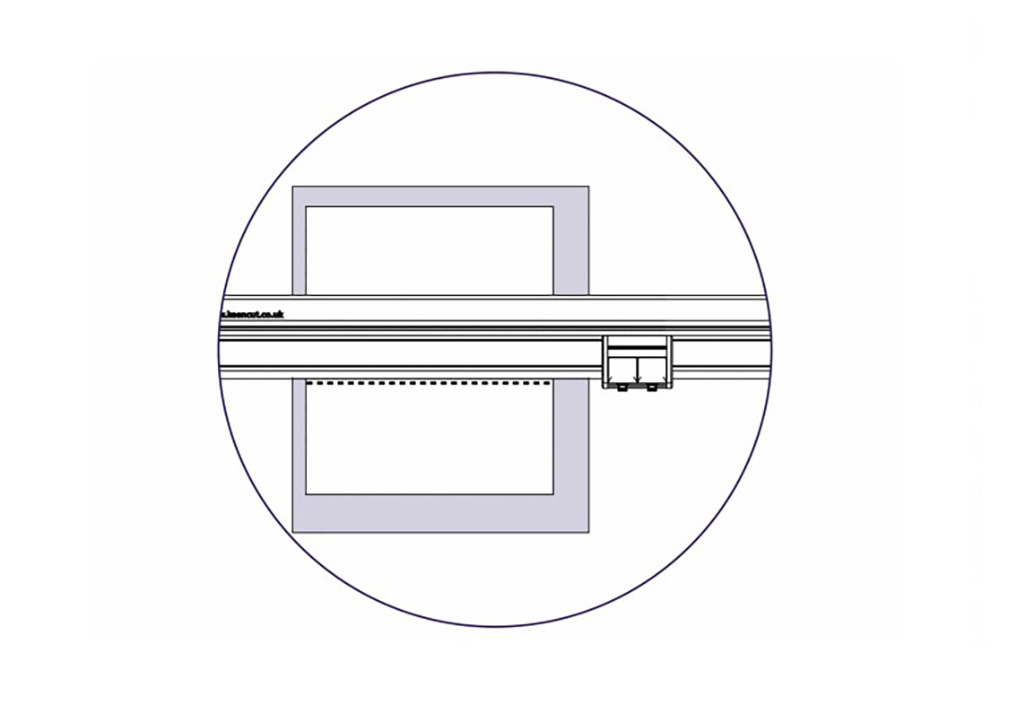
Lift and move one end of the cutter so the sightline strip (clear plastic strip running along cutting edge of the FreeHand) aligns with the cut line, then repeat at the other end. Look down vertically and check the sightline strip aligns with the cut line before making the cut.
Align your material in the machine, apply downward pressure to the wheel holder and move the cutting head along to create the crease line. Adjust the hand pressure and number of strokes accordingly, you can crease in either direction.
The three creasing wheels supplied with the Creaser tool head will each produce a different style of crease. Experiment on small samples of your material to see which gives best results.
Remove the lower clamping knob.
Remove the creasing wheel leaving the bearing and clear plastic shim in place.
Remove the upper clamping knob.
Choose the creasing wheel you would like to use and exchange it with the lower wheel. Replace both clamping knobs.
IMPORTANT: You must use a cutting mat for any cutting, creasing, or scoring process to prevent damage to the work surface.
Place the cutting mat (A) on the work surface then the material to be cut (B) making sure the whole length of the cut line is over the cutting mat. Place the FreeHand on the material near to the cutline.
Lift and move one end of the cutter so the sightline strip (clear plastic strip running along cutting edge of the FreeHand) aligns with the cut line, then repeat at the other end. Look down vertically and check the sightline strip aligns with the cut line before making the cut.
Align your material in the machine, apply downward pressure to the wheel holder and move the cutting head along to create the crease line. Adjust the hand pressure and number of strokes accordingly, you can crease in either direction.
Ⓒ Keencut 2020 | Baird Rd, Corby NN17 5ZA United Kingdom | Contact us
Created by DeType | Privacy | Website Disclaimer | Terms & Conditions