
Replacing the silicon cords under the SteelTrak clamp
Before you start
Before starting any work, check the machine is firmly fixed to the wall or freestanding leg and that you have the following equipment:
- A set of steps high enough to reach the top of the machine
- 6mm Allen key (hex key)
Please note: this procedure is only relevant for the ST165 and ST210
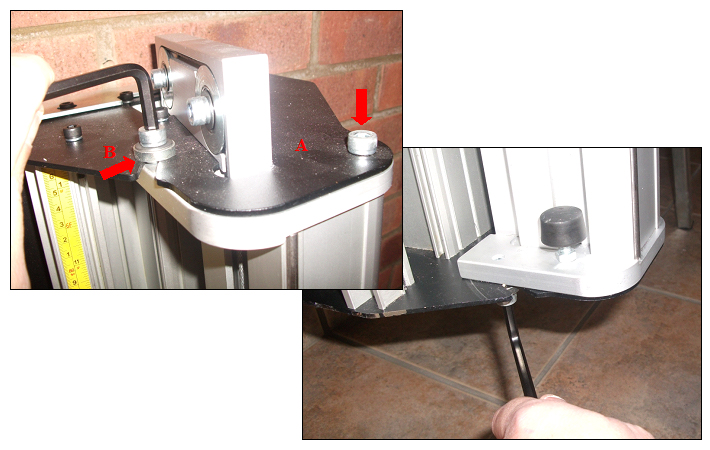
1. Prepare to place the slideway into its maintenance position
Loosen the two screws using the 6mm Allen key (hex key) on the top plate (A) of the machine, as indicated. The left hand one needs to be undone enough for the flanged washer (B) to be lifted clear of the top plate, or it can be entirely removed if you prefer but do not remove the other screw. Repeat this at the bottom end of the machine.
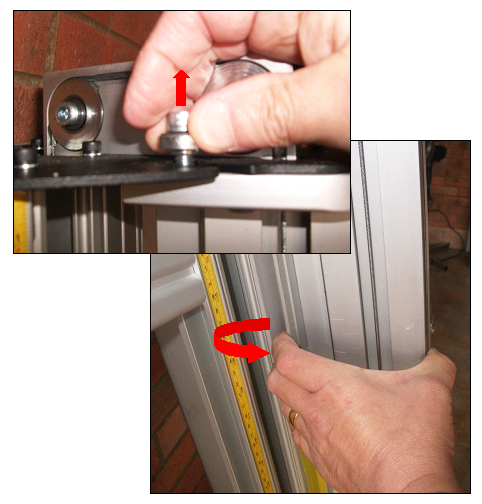
2. Twist slideway into maintenance position
Lifting the flanged washer clear with one hand, take hold of the slideway and twist it out as shown. Once the flanged washer is clear of the top plate it can be released. It is normal to feel the balance weight cord working against you, please see step 3 on how to deal with this.
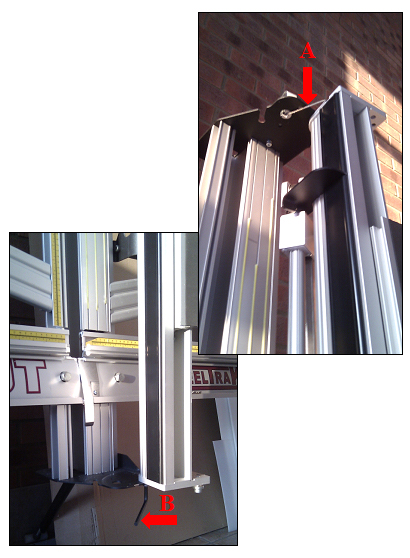
3. Hold slideway in maintenance position
You will feel the balance weight cord (A) working against you and try to twist the slideway back, open the slideway carefully and watch that the balance weight cord (A) does not become trapped. Tighten the bottom Allen screw (B), as shown, to hold the slideway open in the maintenance position.
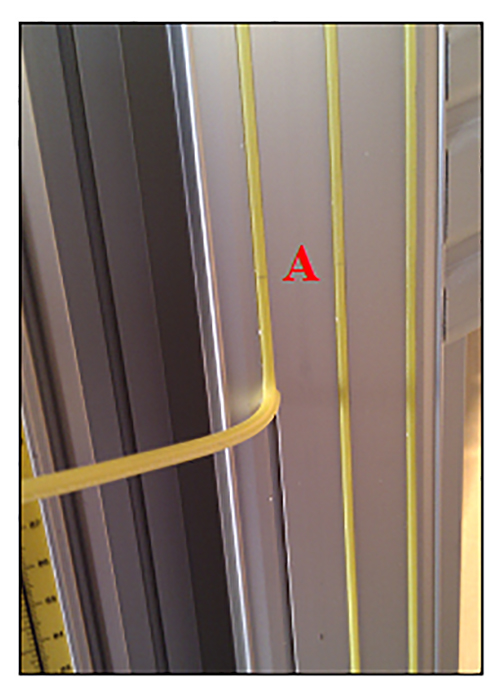
4. Remove old silicon cord
Pull out the old silicon cord or remove the silicon tape if it is an older version of SteelTrak. Clean the aluminium surface of the spine (A) to remove all dirt, or adhesive if silicon tape has been removed.
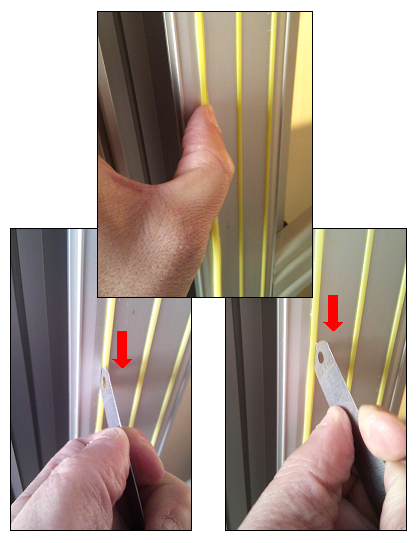
5. Replace silicon cord
Lay the replacement cord over the groove at the top end of the machine and push it into the groove with your thumb. Work your way down the cord, pushing it in with your thumb, or a small hard roller can be used. Avoid stretching the cord while pushing it into the groove.
The cord may not go perfectly into the groove, so using the curved end of a steel ruler, or some other similar thin curved object, run it down each side of the cord pushing it fully into the groove.
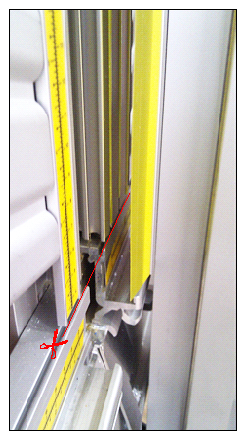
6. Trim excess cord and return slideway
Trim the cord off at the bottom end of the groove as shown, do not leave any loose ends as it could affect the clamping. Clean the surface of the cords and the spine to remove any dirt.
Finally, reverse the procedure in steps 1 to 3 to return the machine back to its operating position and carefully check the cutting head runs up and down the full length of the slideway.
Ⓒ Keencut 2020 | Baird Rd, Corby NN17 5ZA United Kingdom | Contact us
Created by DeType | Privacy | Website Disclaimer | Terms & Conditions