
How to change the SteelTrak multi-cutter turret
Before you start
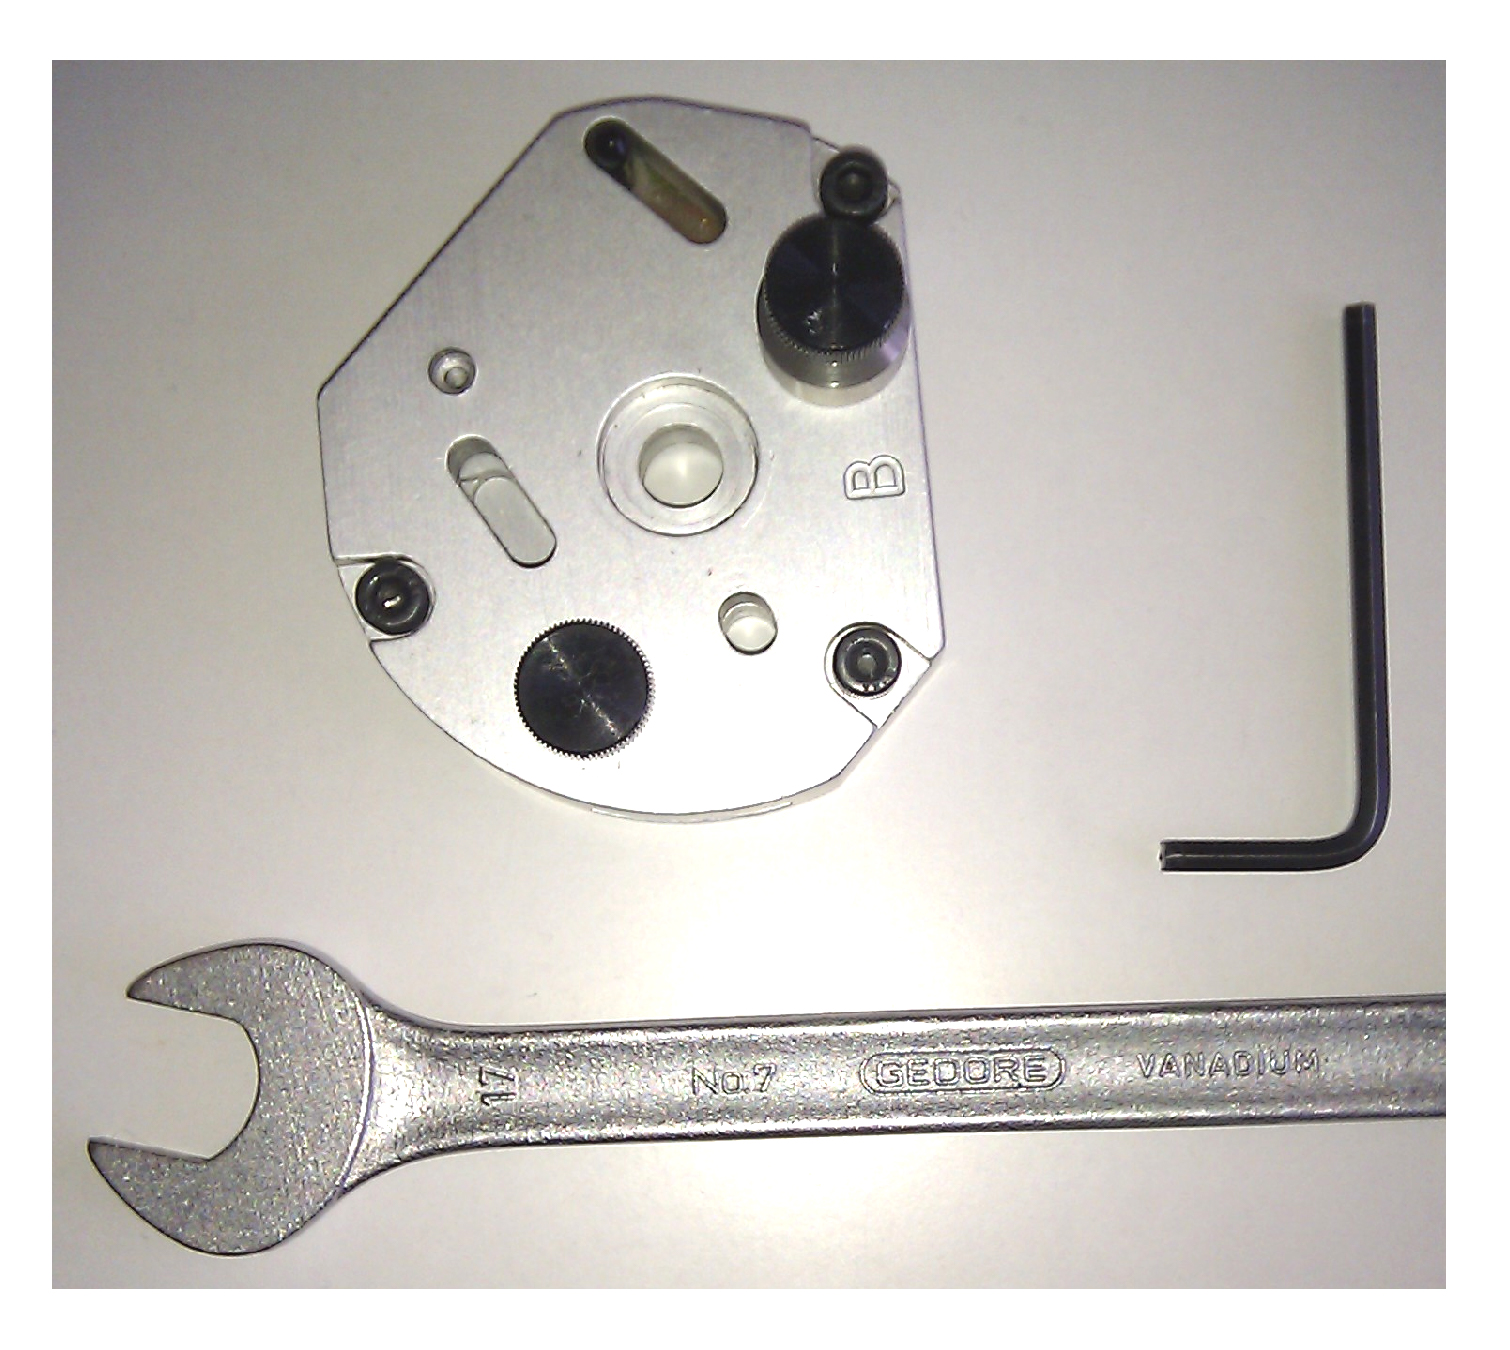
Before starting any work, check the machine is firmly fixed to the wall or freestanding leg and that you have the following equipment:
- 4mm Allen (hex) key
- 17mm open ended spanner/wrench
Please note: this procedure is the same whether the turret is being updated, or exchanged like for like.
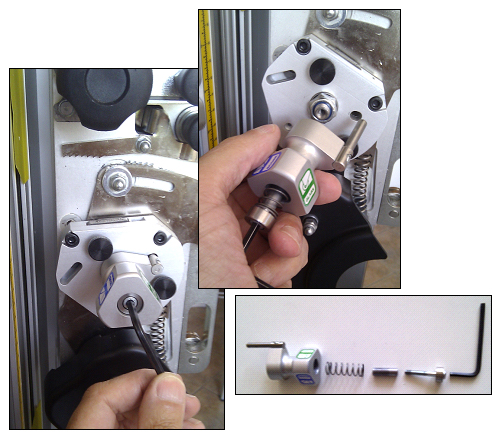
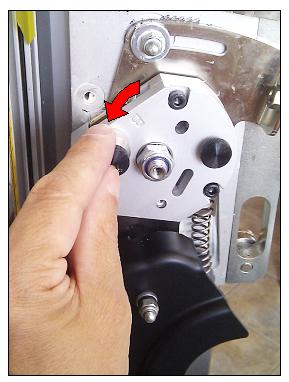
1. Remove the turret handle
Using the 4mm Allen (hex) key, remove the screw and associated parts from the centre of the turret handle. Remove the handle and place carefully to one side.
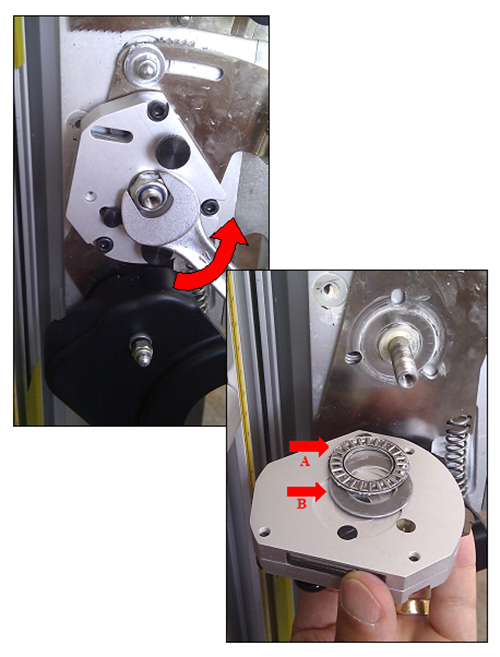
2. Remove the turret
Using the 17mm spanner/wrench, remove the turret locking nut. Pull the turret from its shaft and be careful to retain the thrust washer and thrust bearing.

3. Replace the thrust bearing
Clean the thrust washer, thrust bearing and the bearing seating around the shaft, then lubricate with petroleum jelly or white grease (zinc oxide, lithium, etc). Place the thrust bearing in position then the thrust washer, the grease will help to keep them in position.
4. Prepare and refit the turret
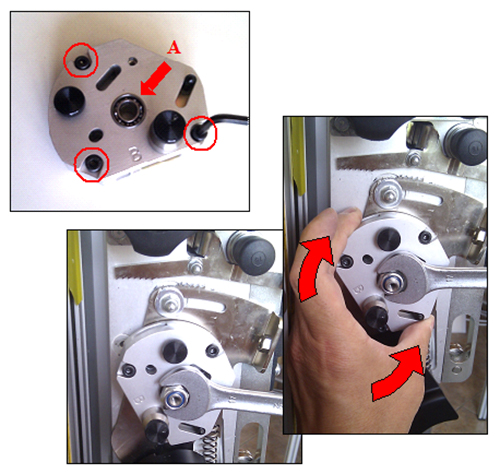
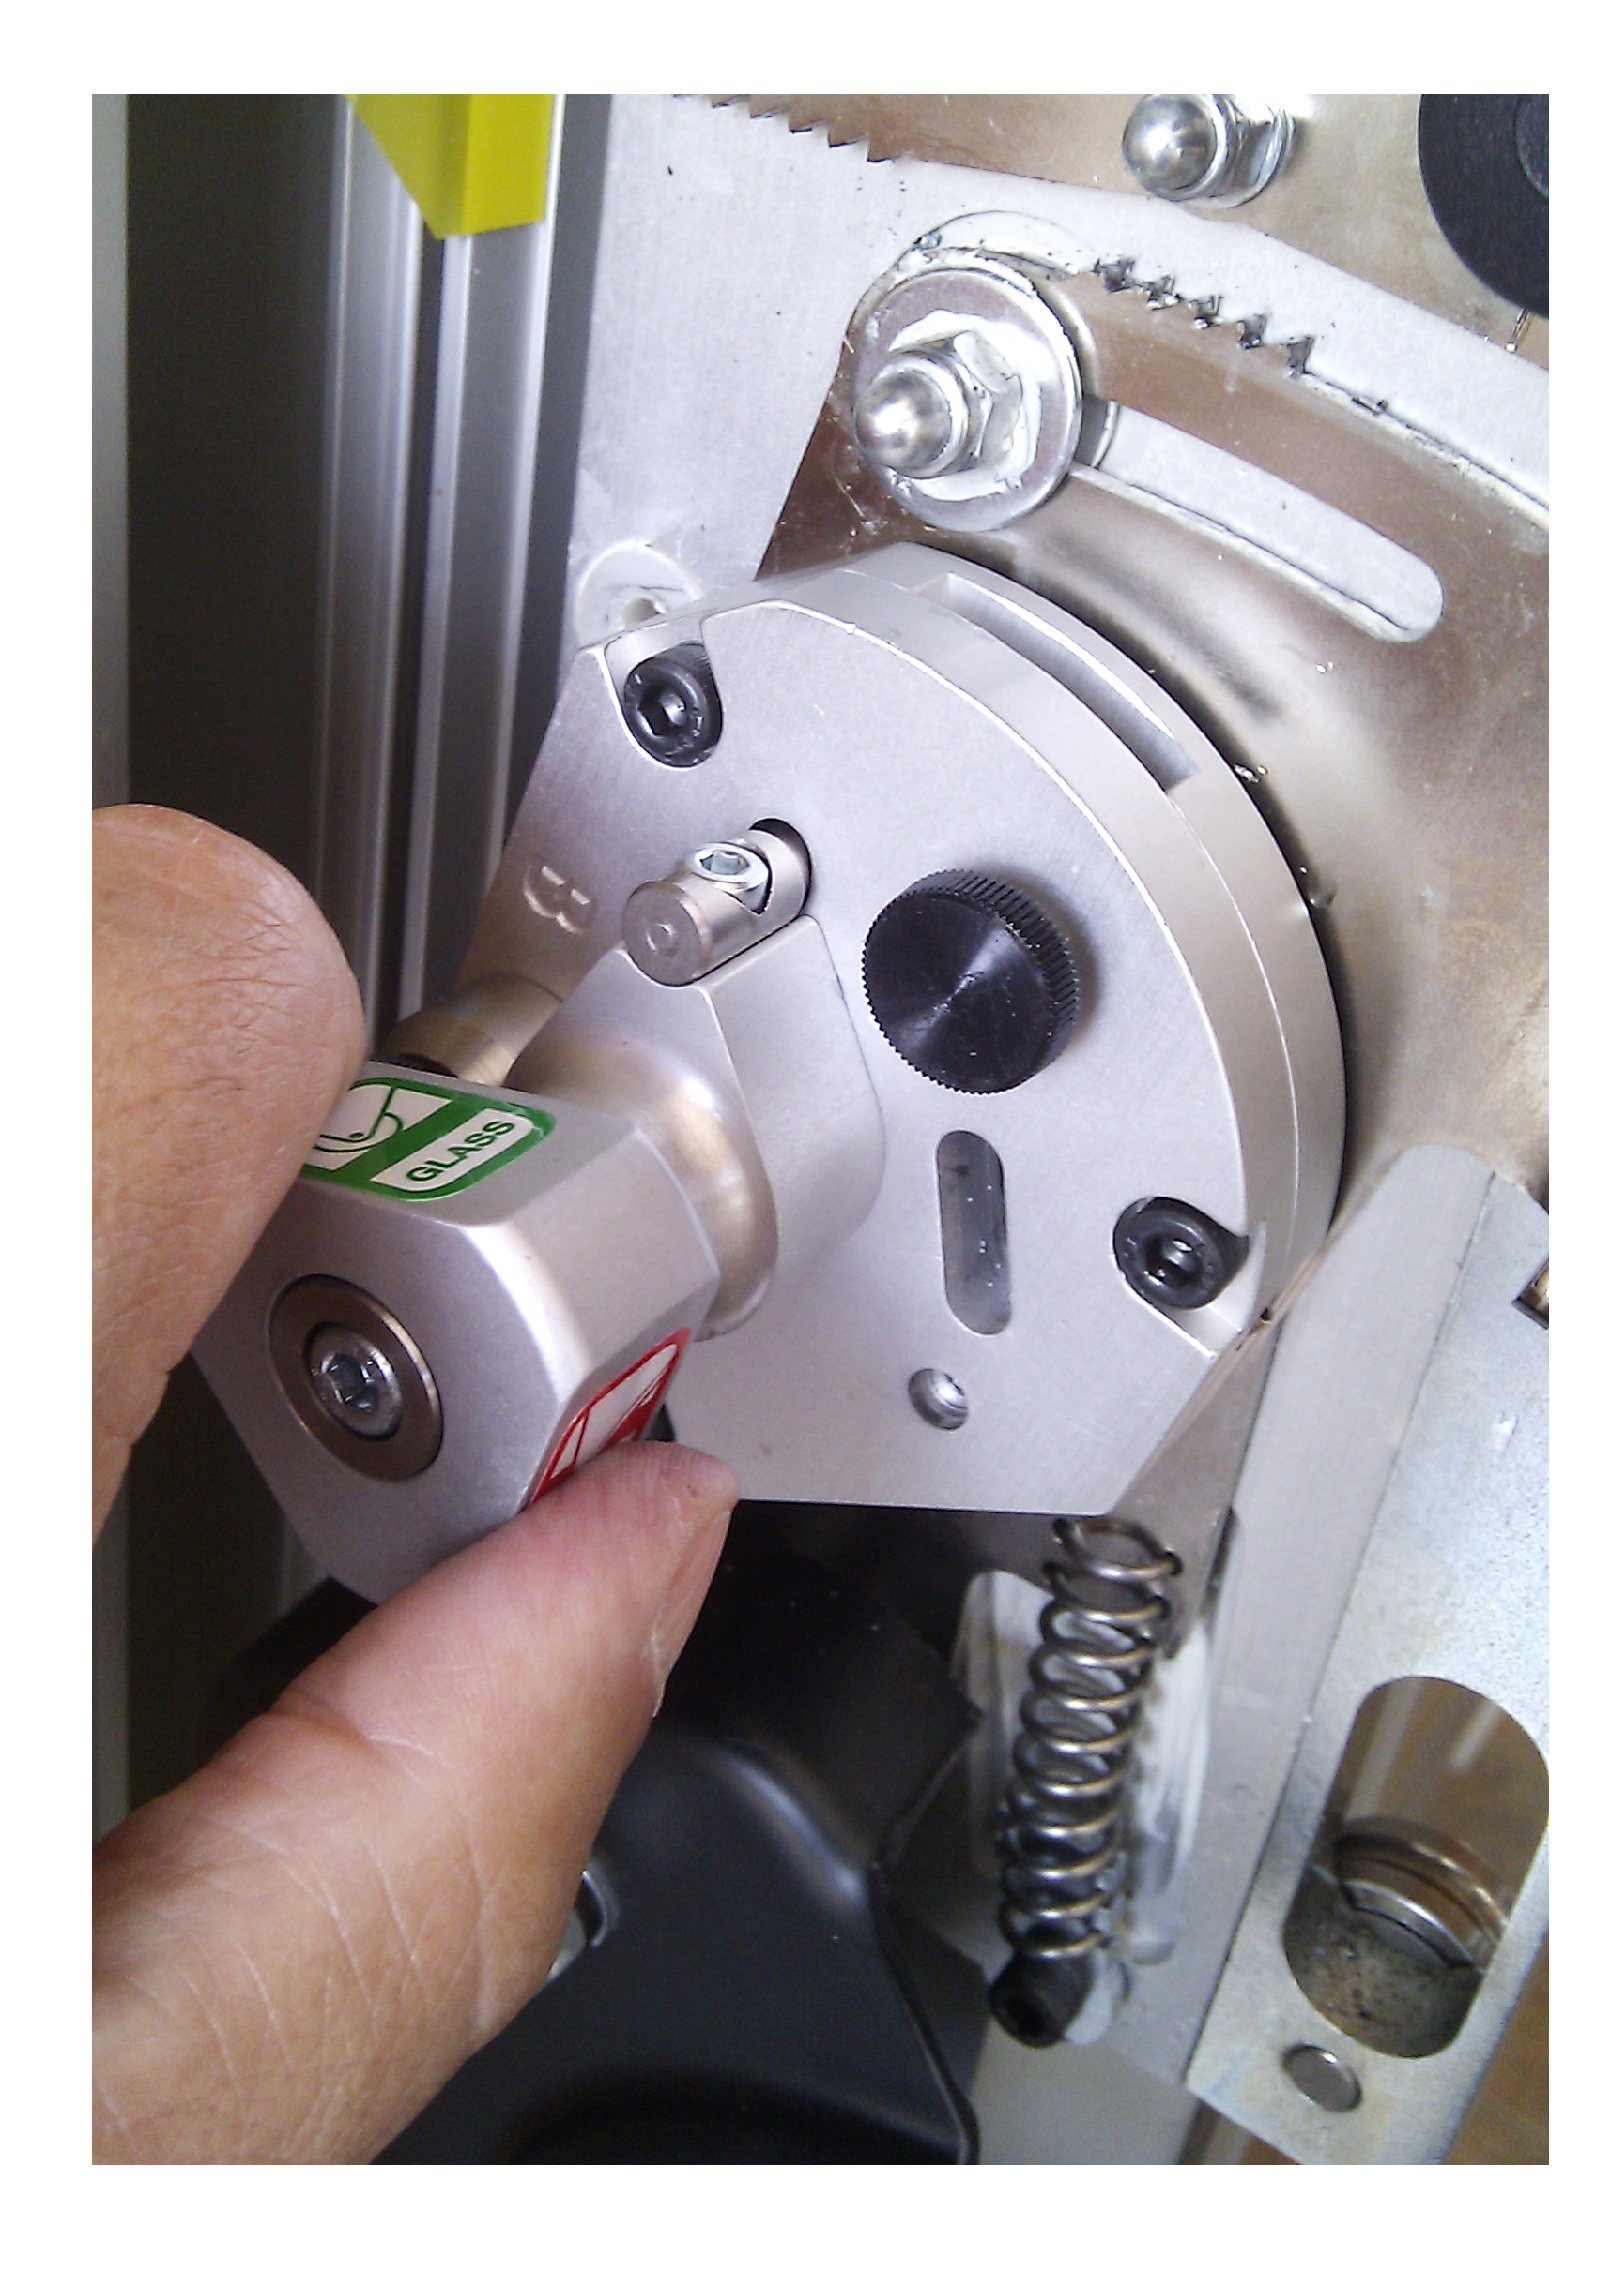
Using the 4mm Allen (hex) key, loosen each of the three screws circled in red on the replacement turret by approximately 1/2 turn. Place the turret on the shaft and hold in place to ensure the thrust bearing does not move out of position. Ensure the radial bearing (A) is located correctly, then fit the nut and do it up with the 17mm Spanner/wrench but do not tighten.
Using your left hand, hold the turret and rock it back and forth and gradually tighten the nut until the rocking disappears.
5. Test the turret is revolving freely
Try spinning the turret. It should be revolve freely, if not the nut may be too tight. When adjusting the nut always check after that the turret does not rock. Do not over tighten the bearing as this may cause damage.
6. Refit the turret handle
Replace the turret handle followed by the spring, tube, cap and screw, then tighten in position using the 4mm Allen (hex) key. Pull out and rotate the turret handle and check it locks in all three positions. Finally, loosen both knobs circled in green, by two turns then tighten all three turret screws circled in red.

7. Final checks
Try rocking the turret again as described in part 4 and if there is any looseness, adjust the nut. This can be done without removing the turret handle again. Simply pull it out and the spanner/wrench should fit underneath onto the nut. Rotate to all three positions and ensure the turret locks positively in each one .
Ⓒ Keencut 2020 | Baird Rd, Corby NN17 5ZA United Kingdom | Contact us
Created by DeType | Privacy | Website Disclaimer | Terms & Conditions