
Worktop Material Guide Installation Manual – Squaring check
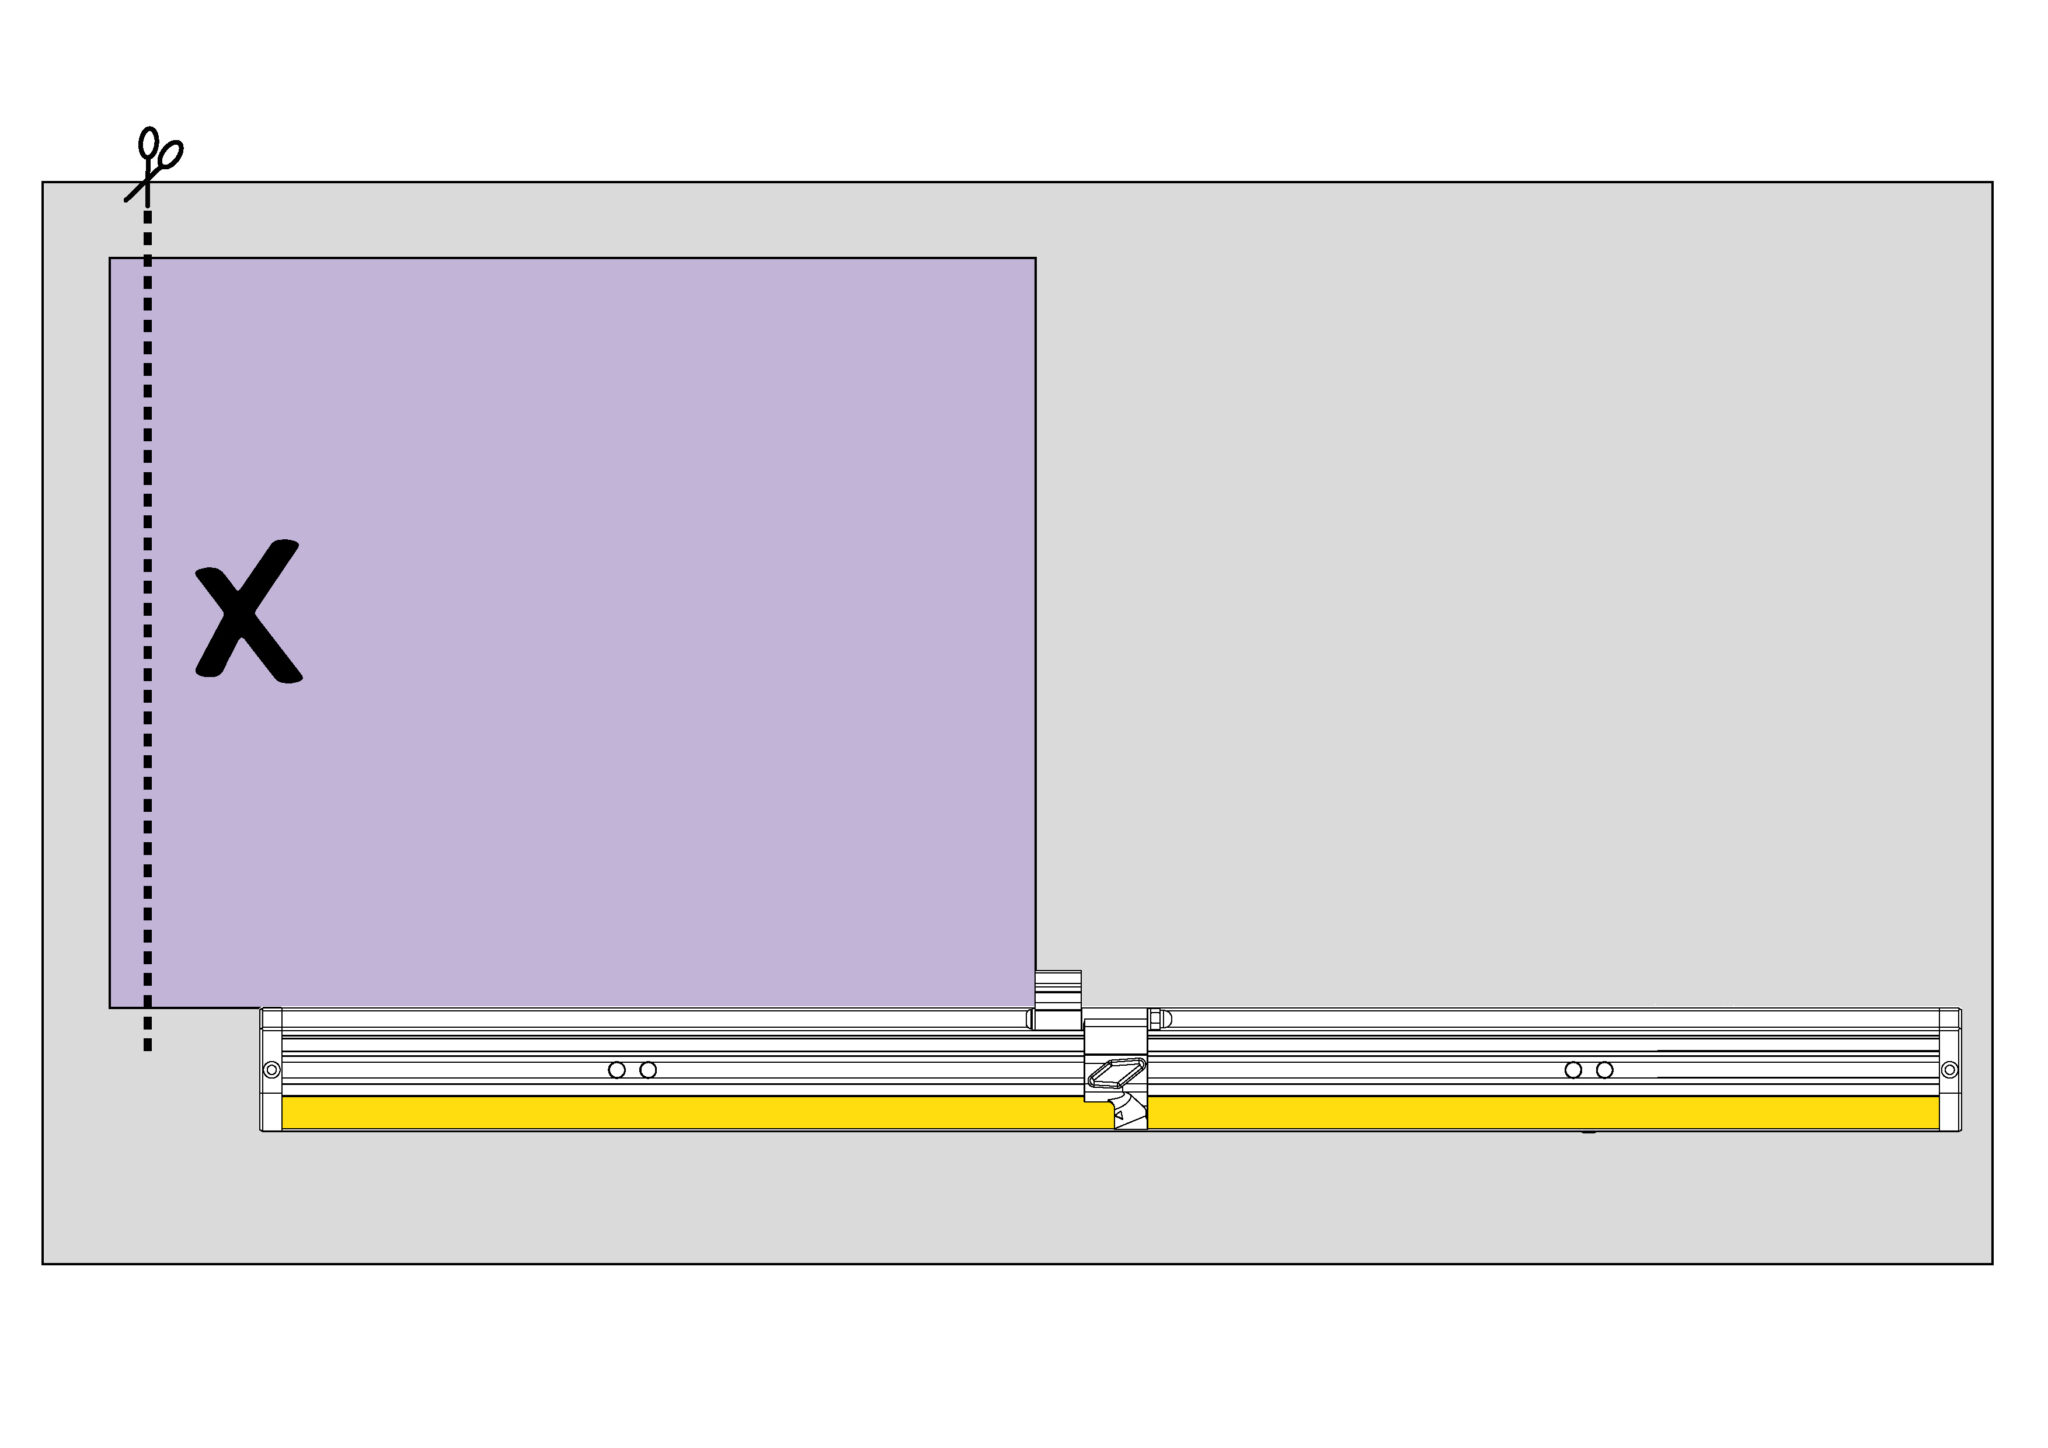
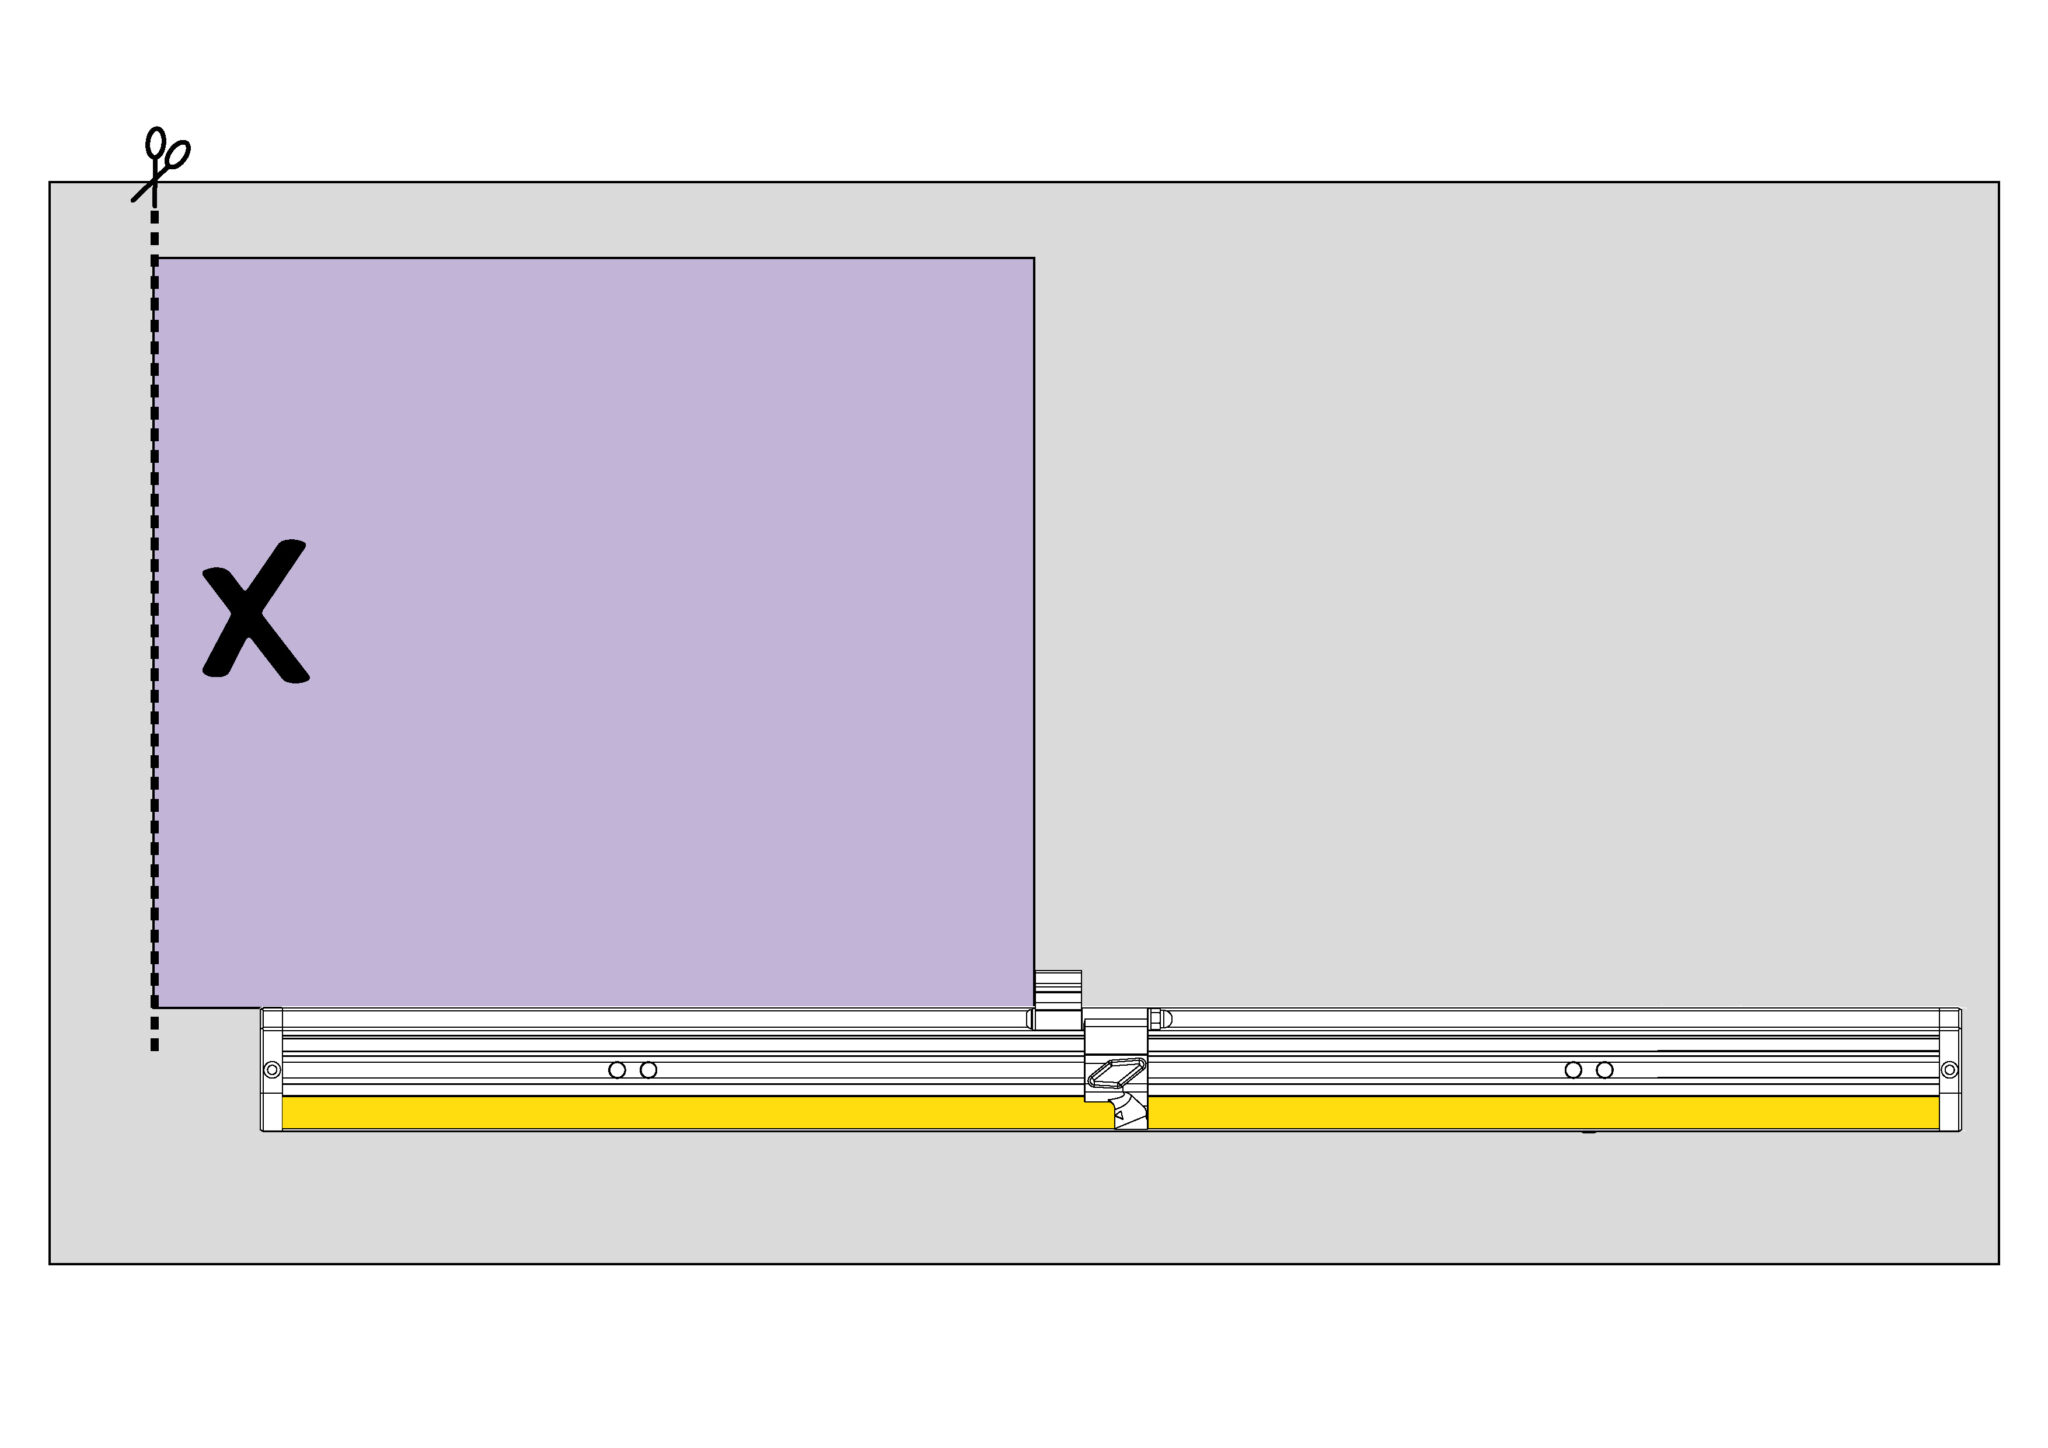
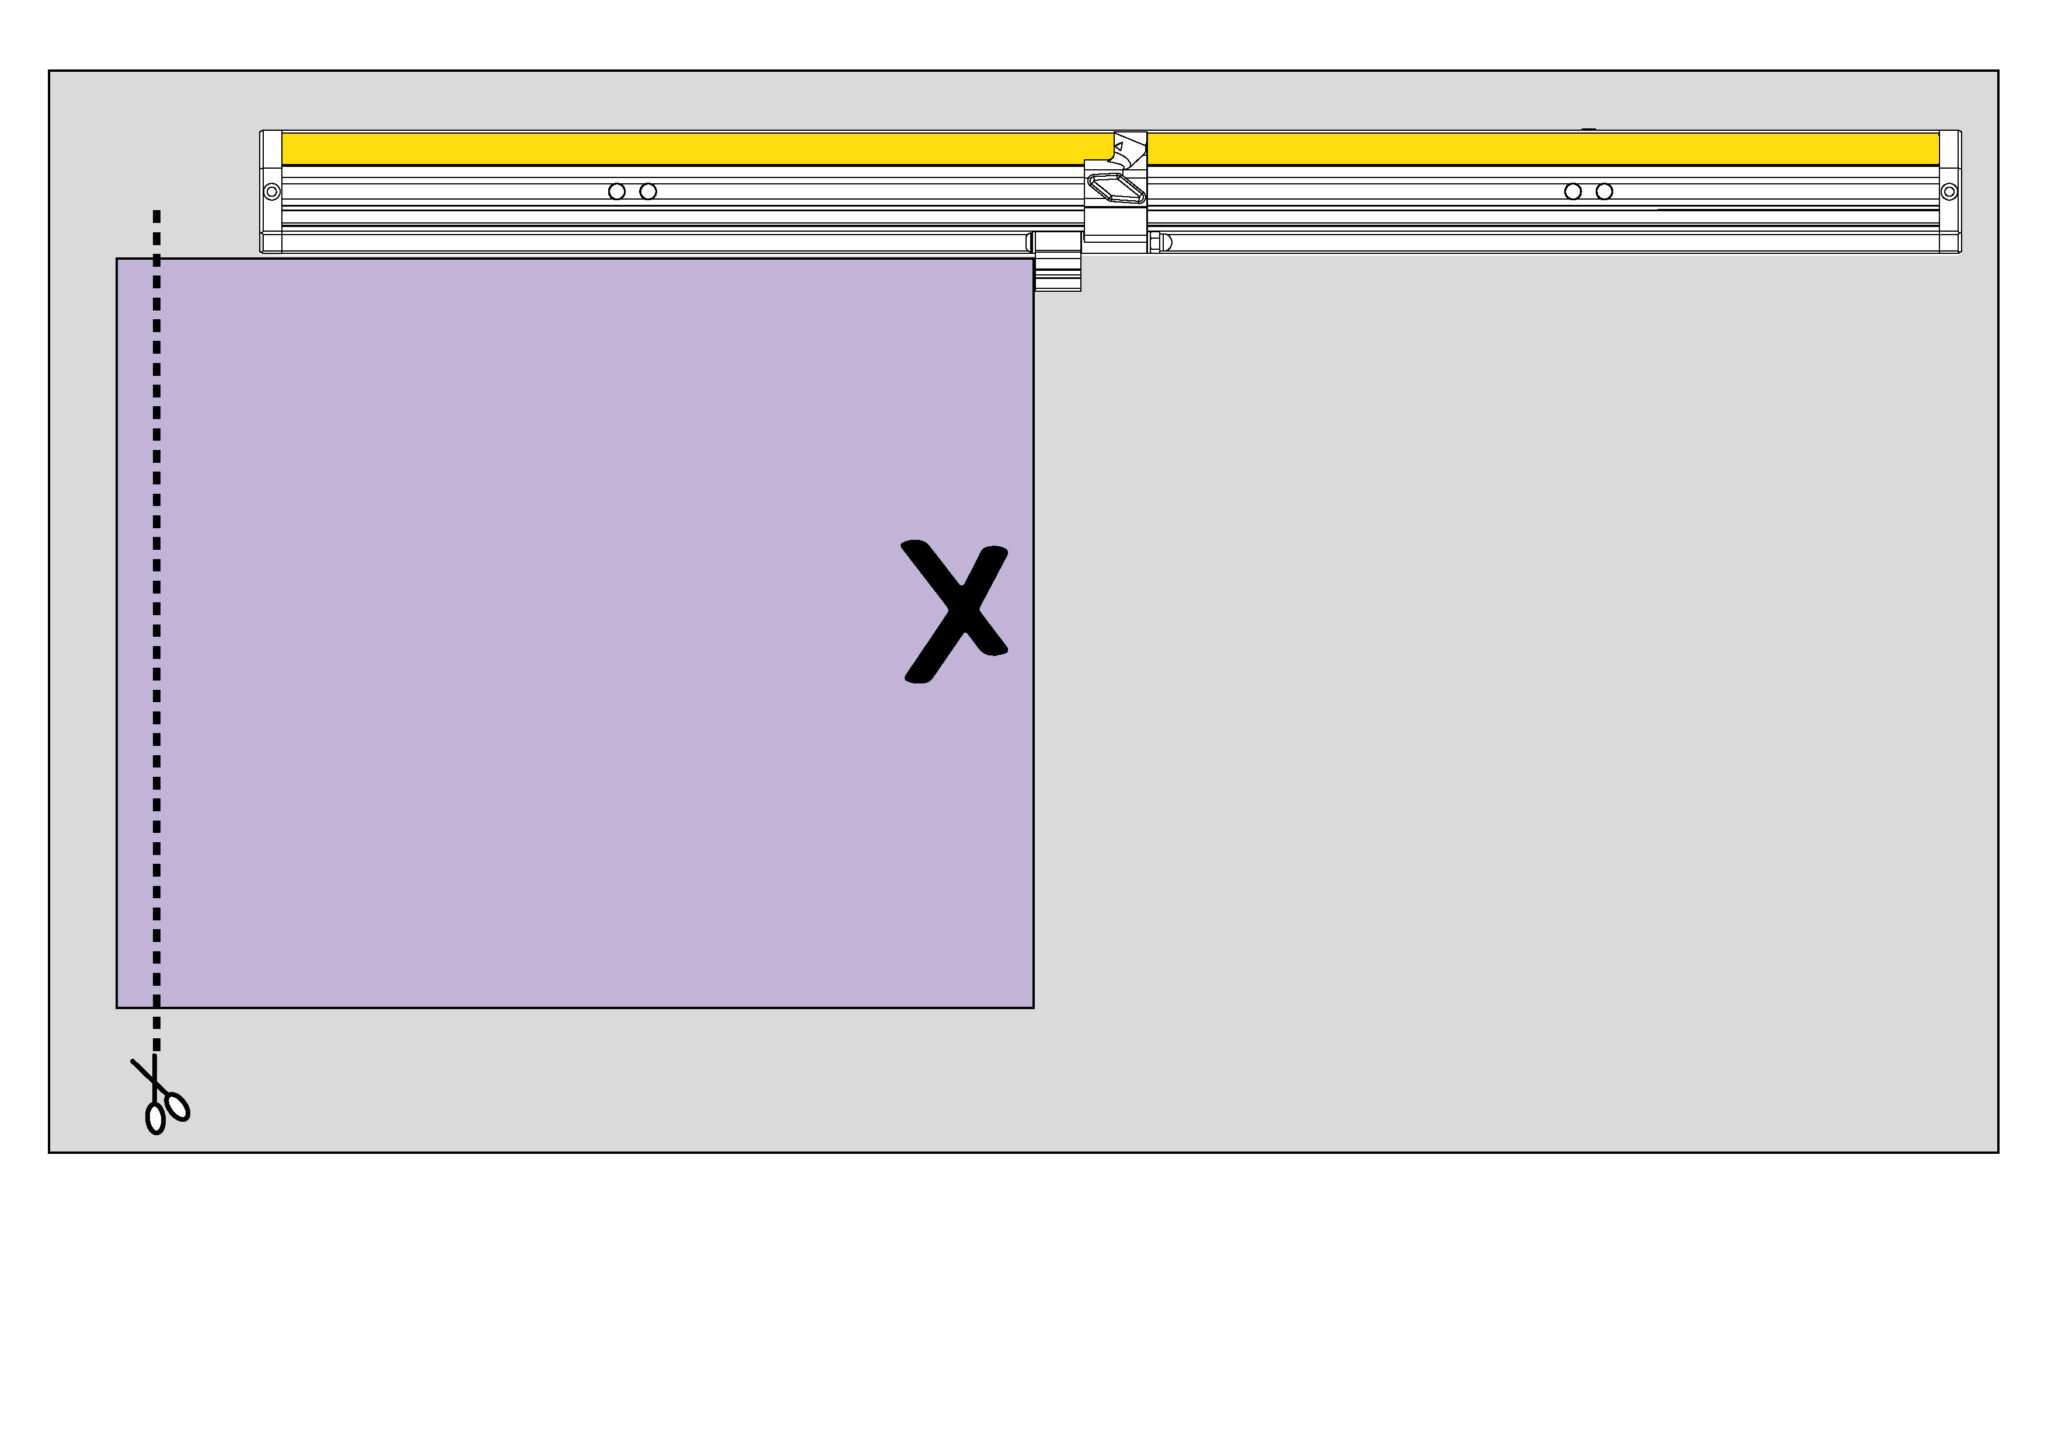
Place the board on the cutter as if to trim approximately 6mm (1/4”) from the edge, place the side of the board firmly against the Material Guide. Use the pencil to mark the edge being trimmed with a ‘X’.
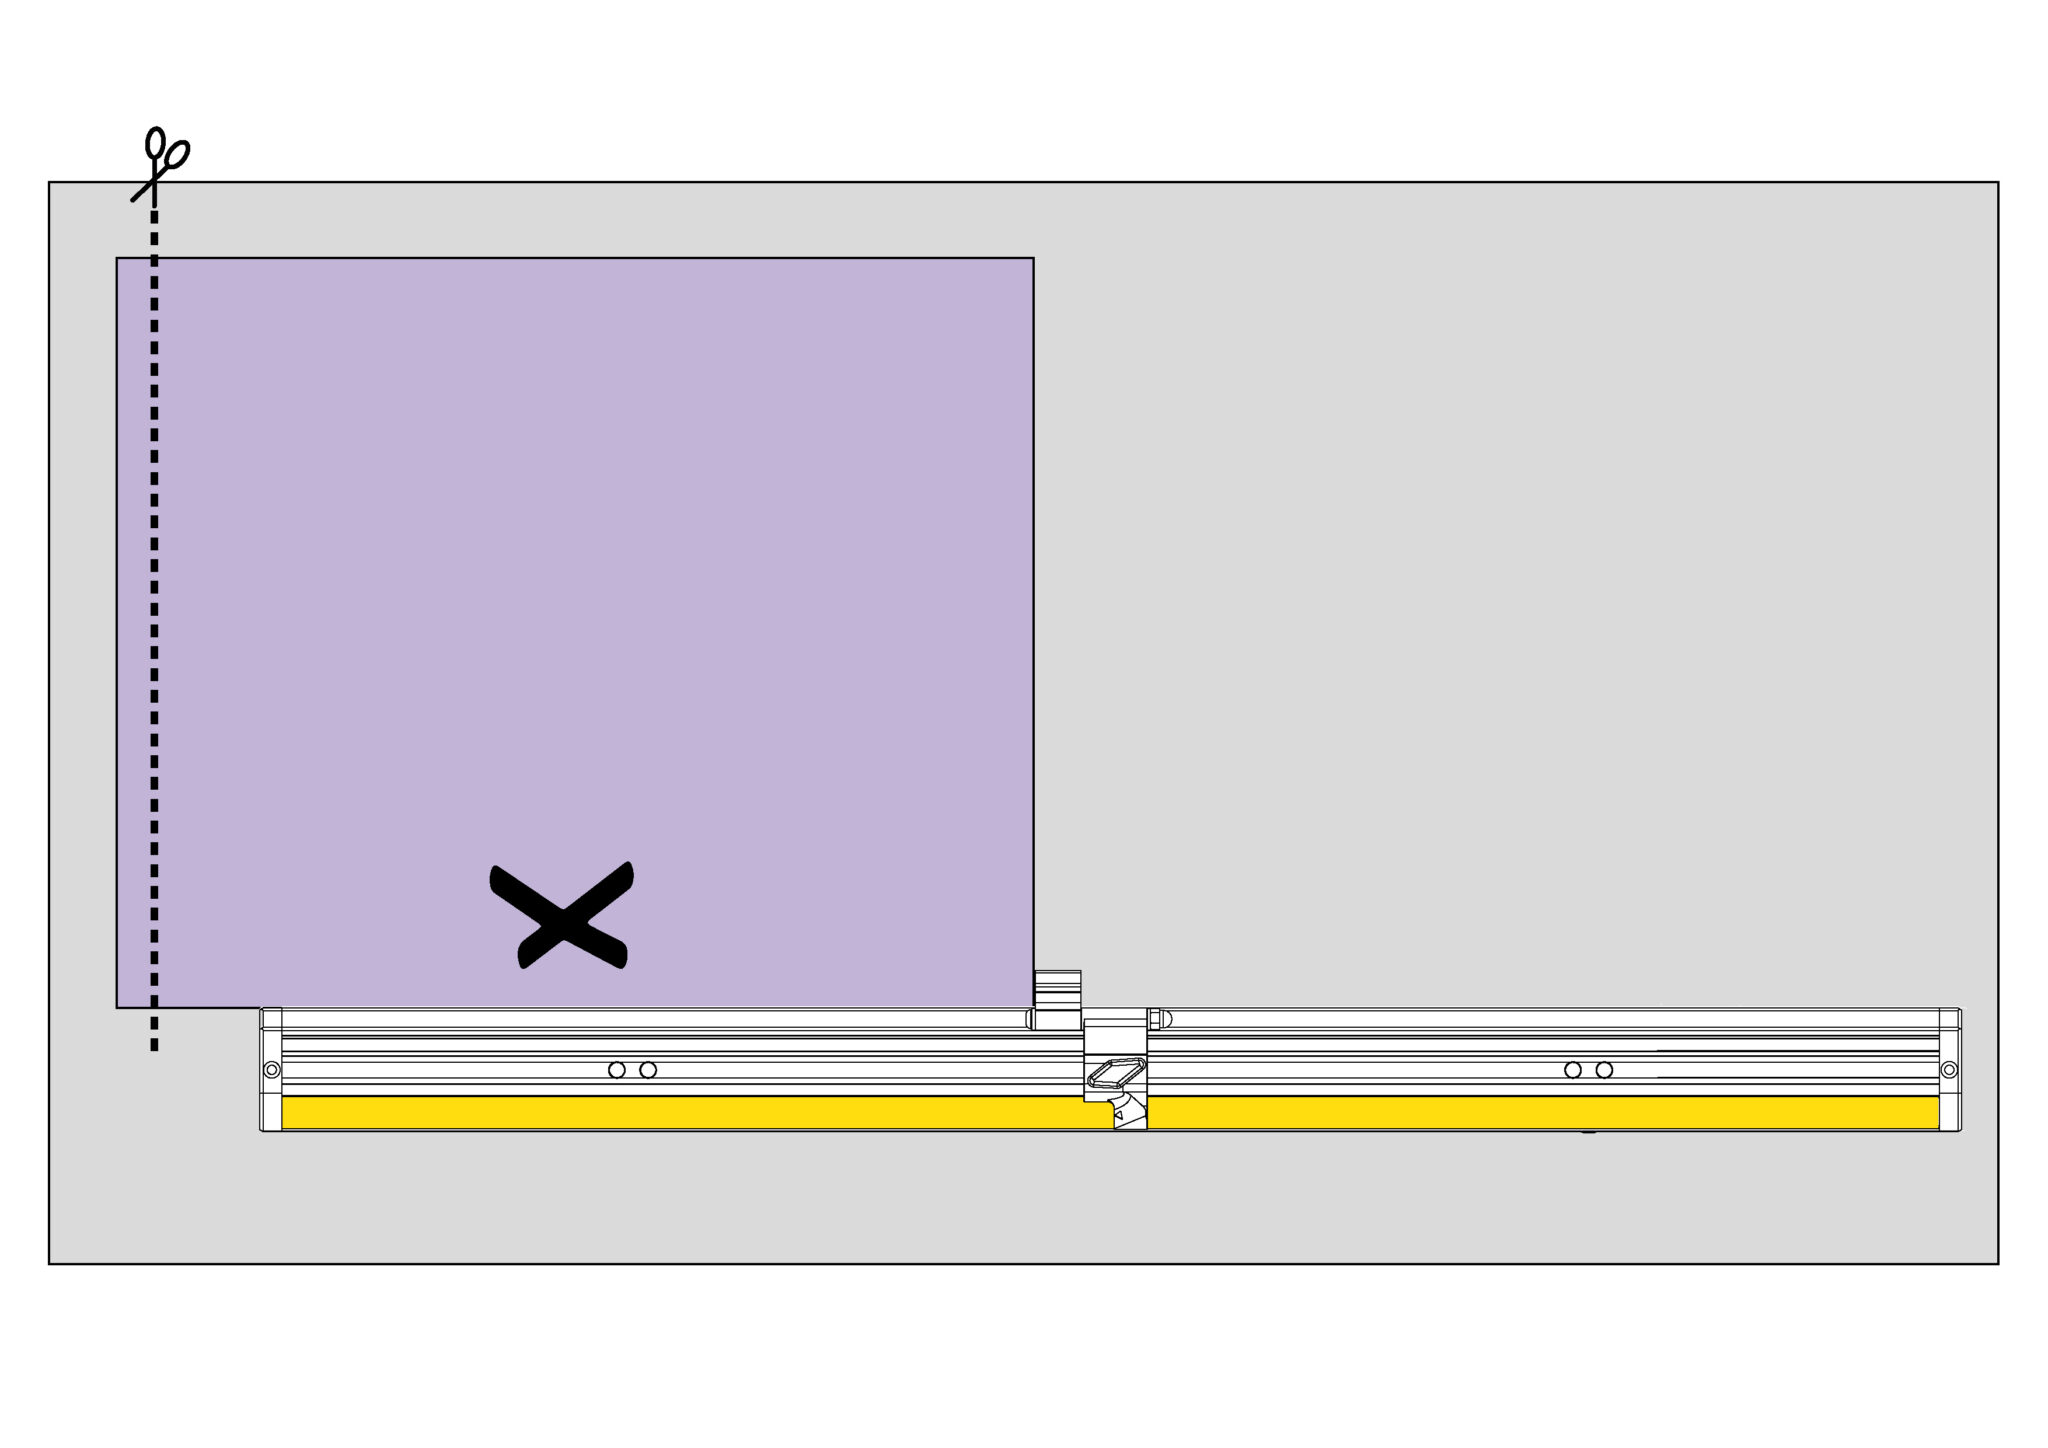
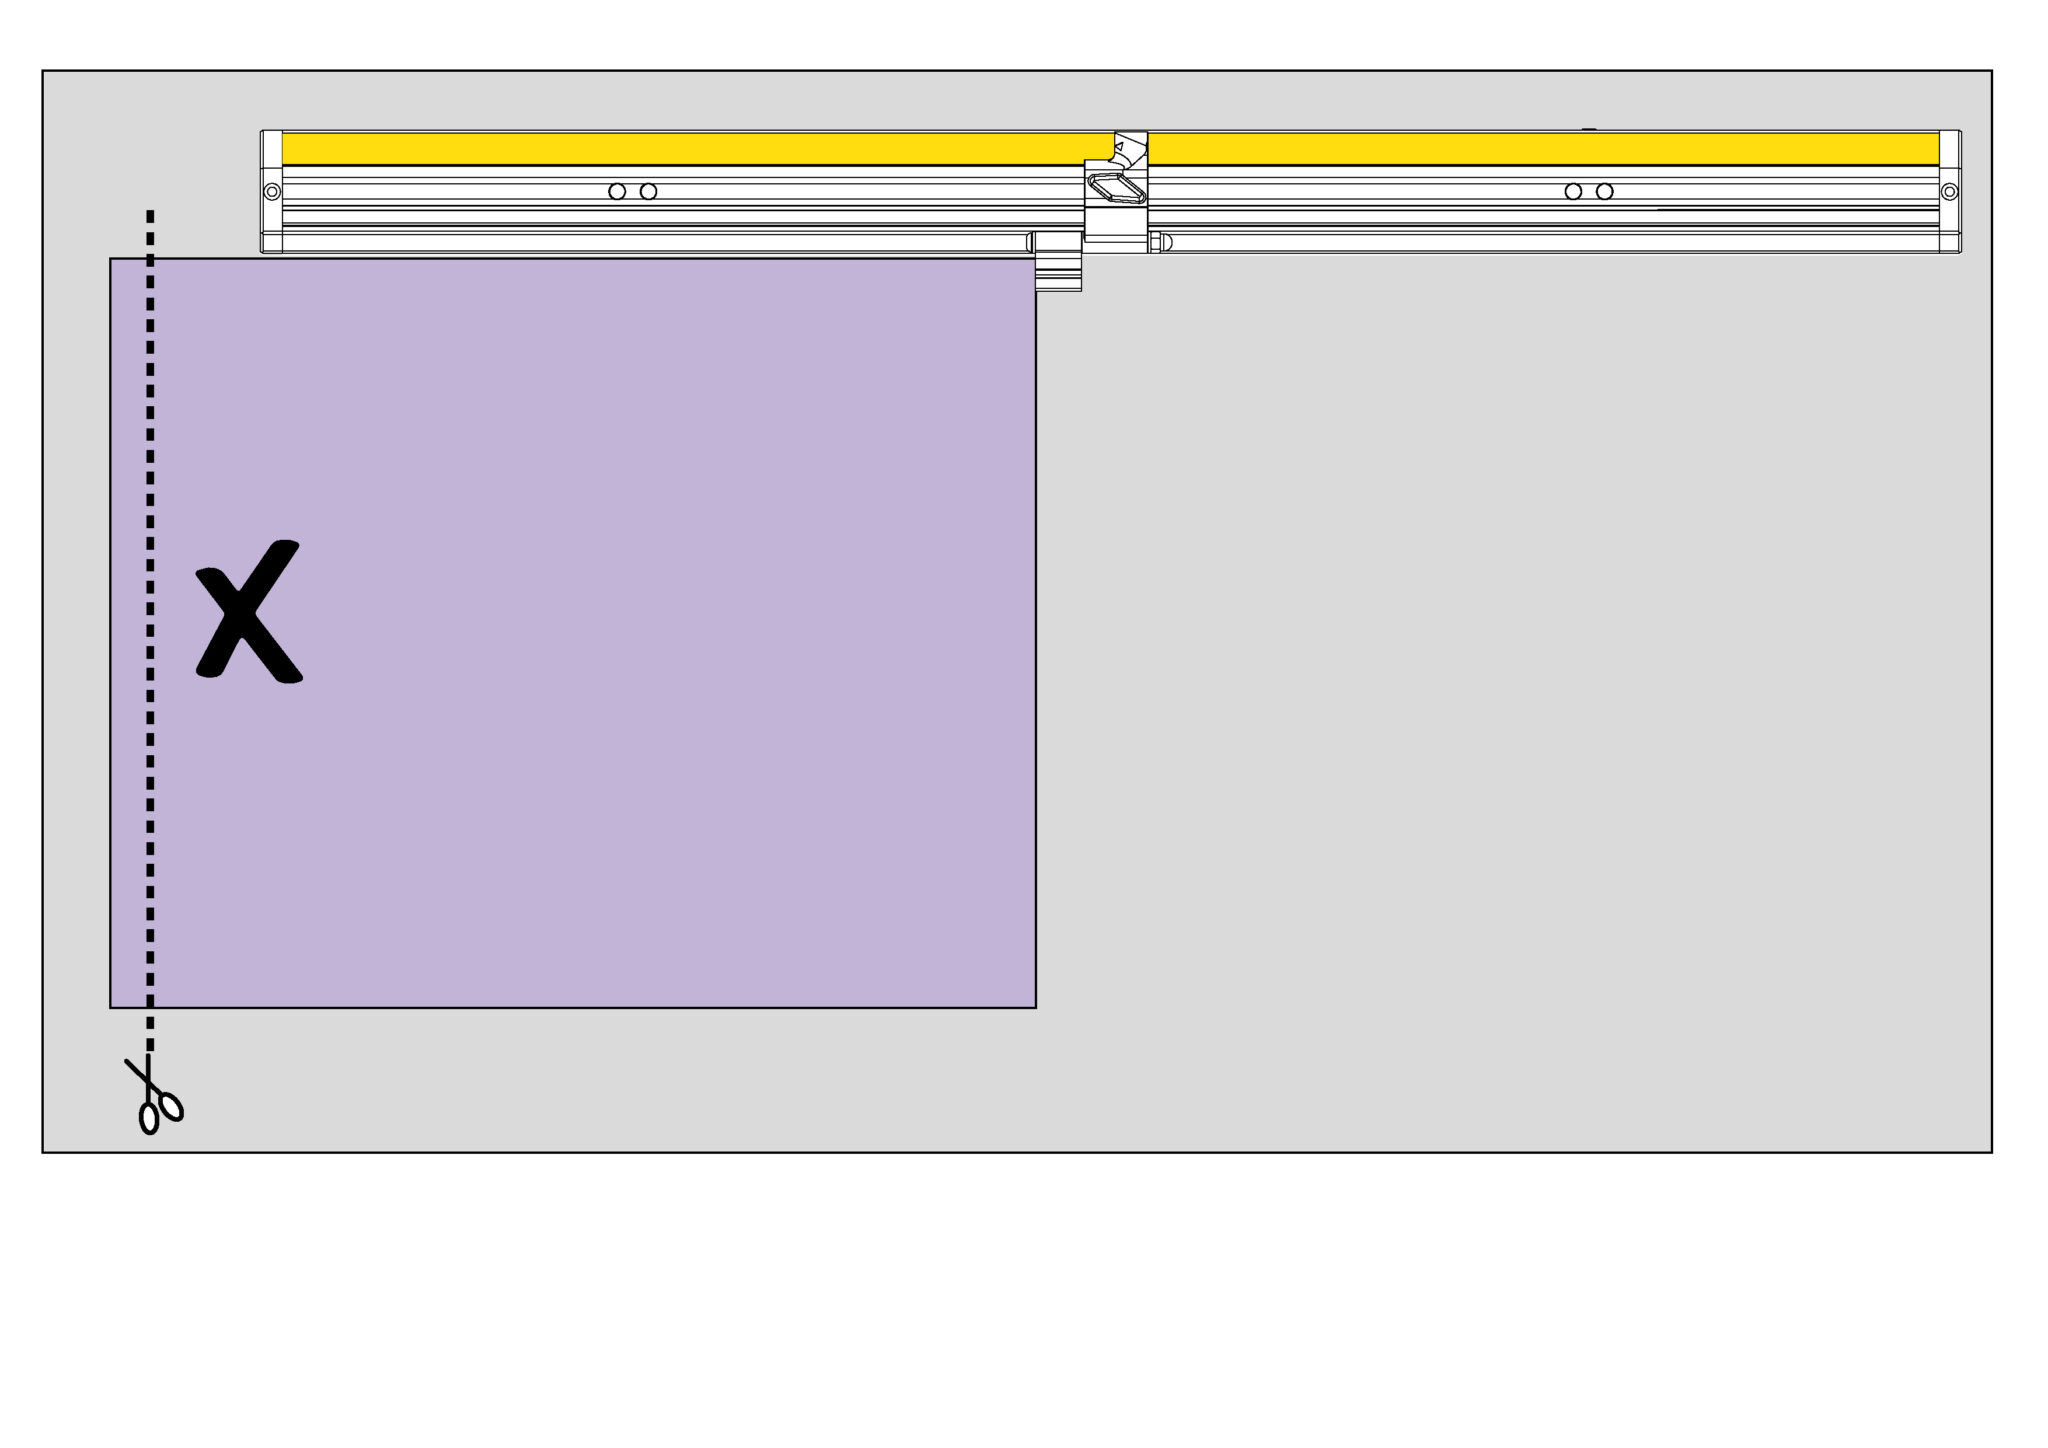
Rotate the board 90 degrees so the edge you have just trimmed ‘X’ is against the Material Guide and trim the second edge
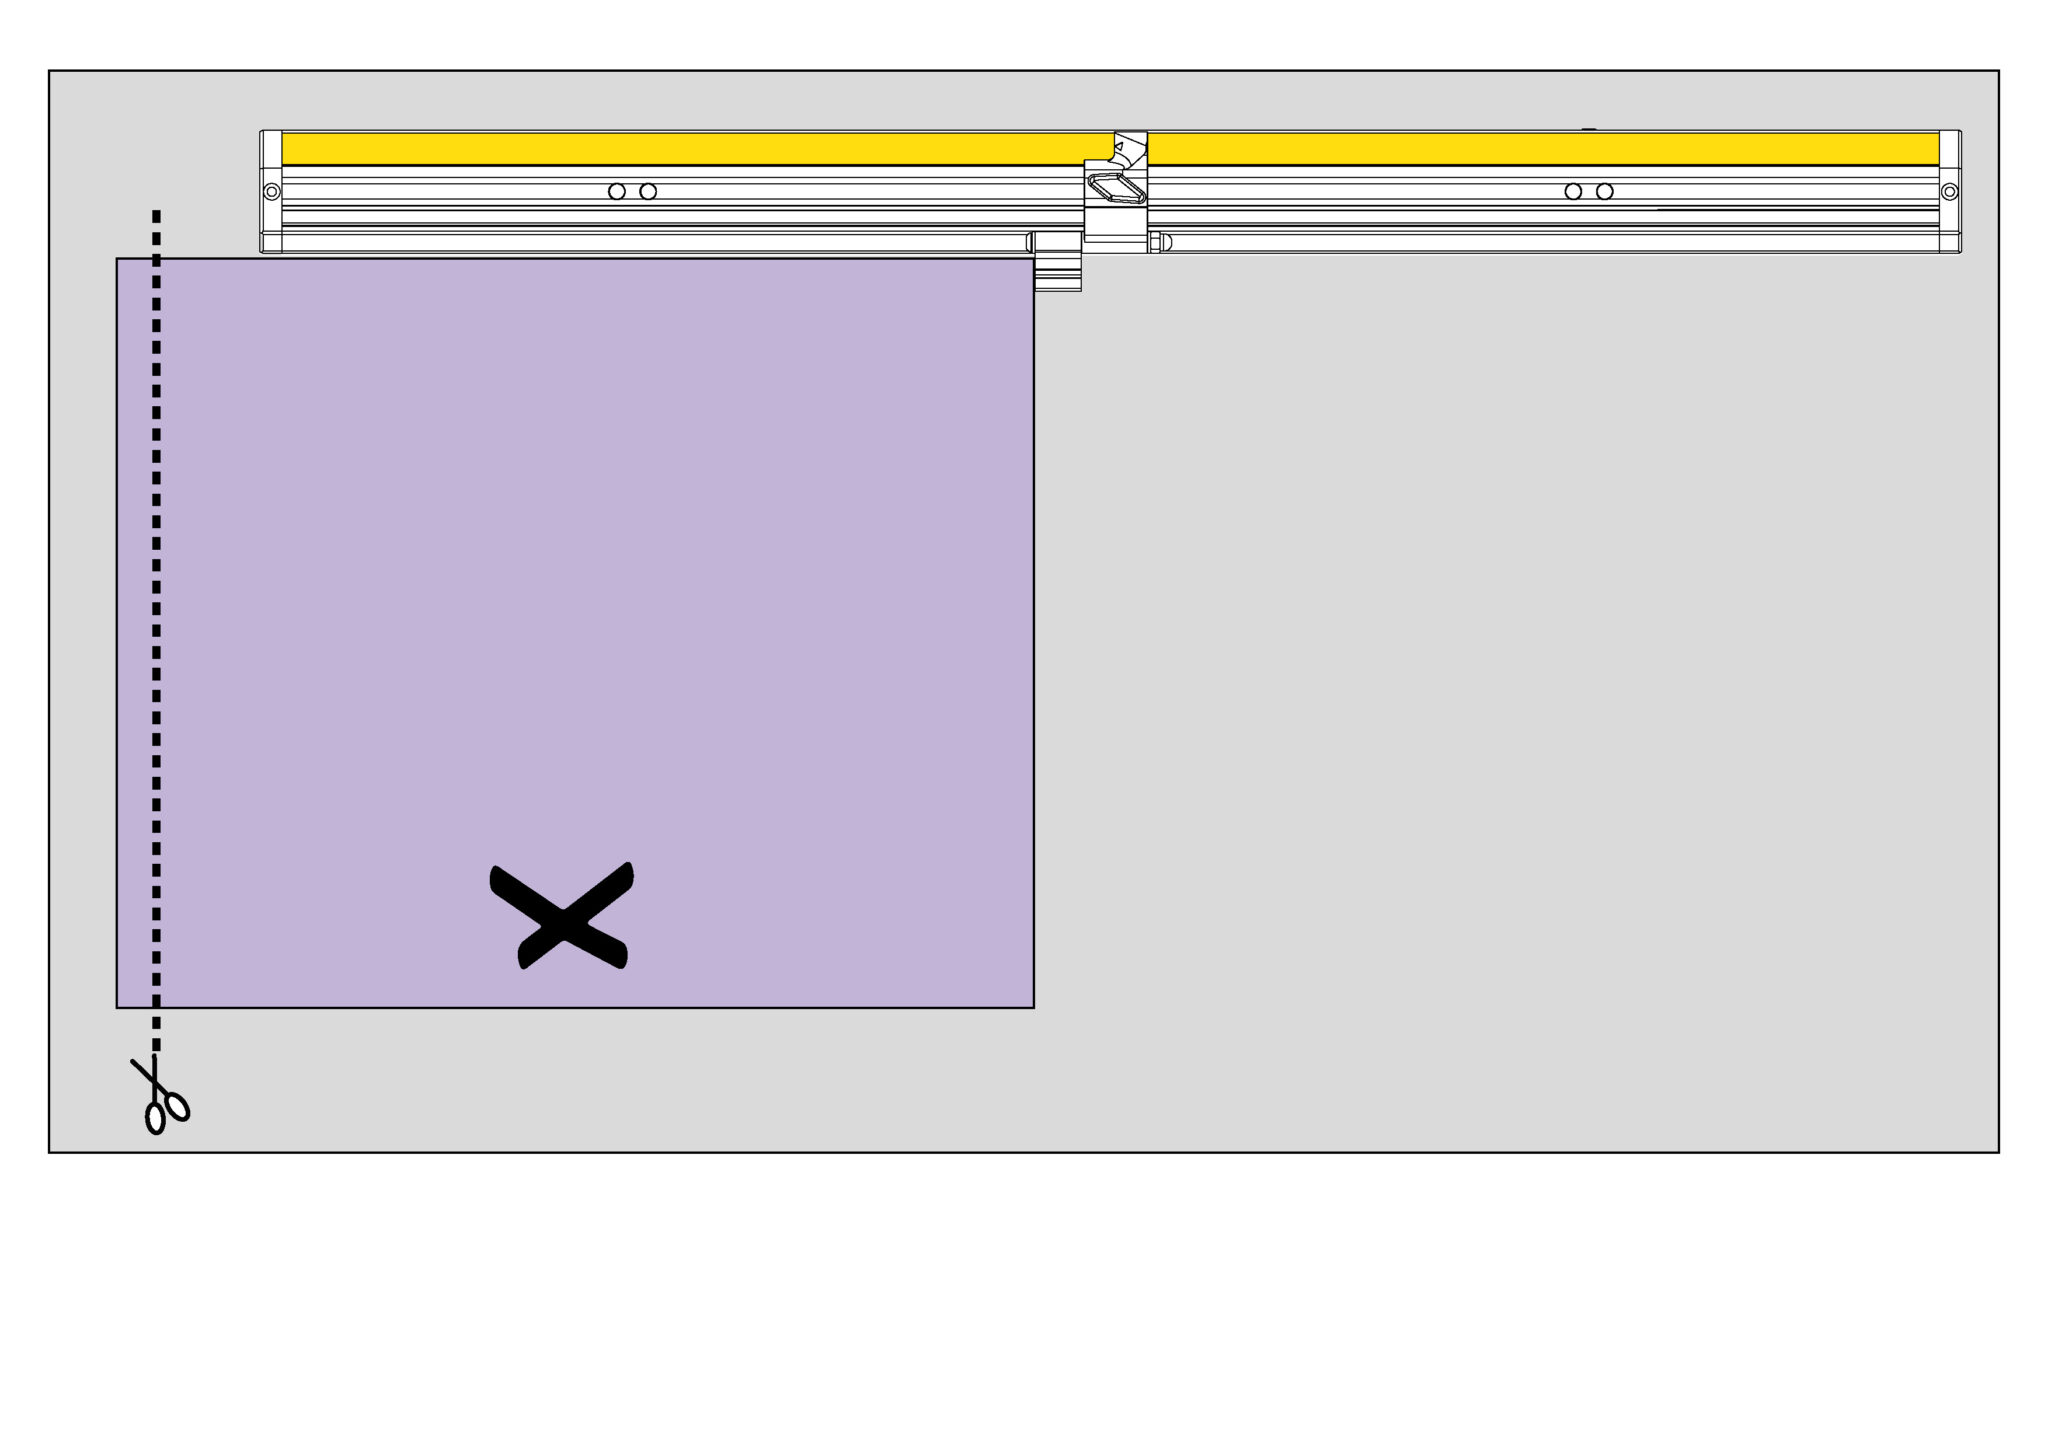
Rotate again in the same direction and trim (X should be on the opposite edge)
Repeat again, X should be on the opposite edge to the Material Guide
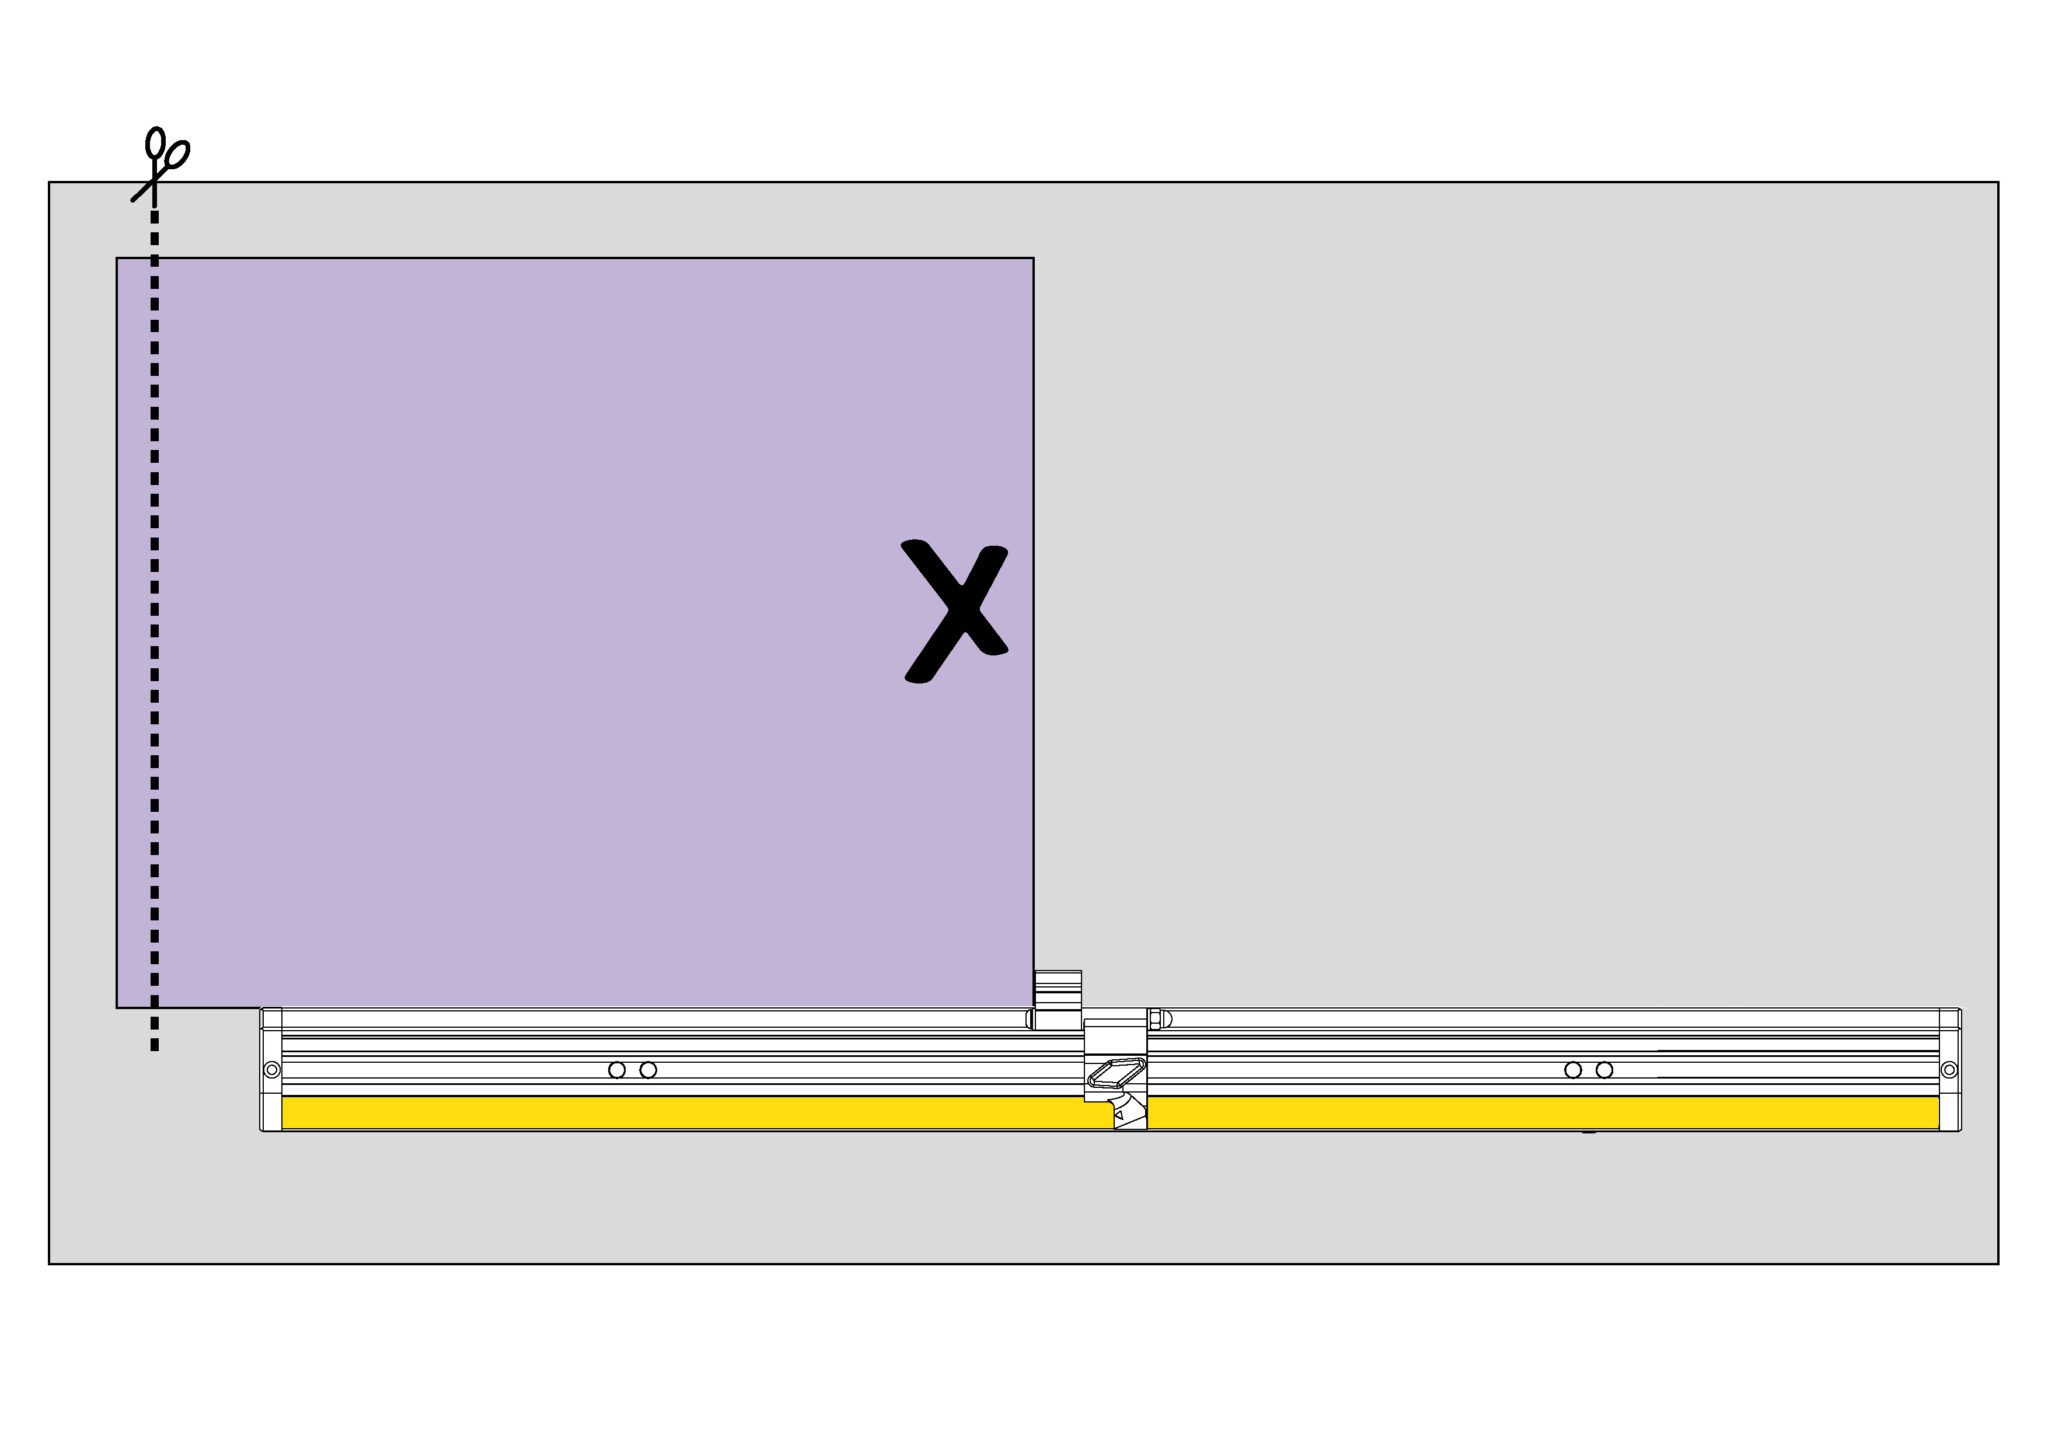
Rotate the board a final time and align the board with the Material Guide, if it has been positioned at exactly 90 degrees edge X will align with the cut line.
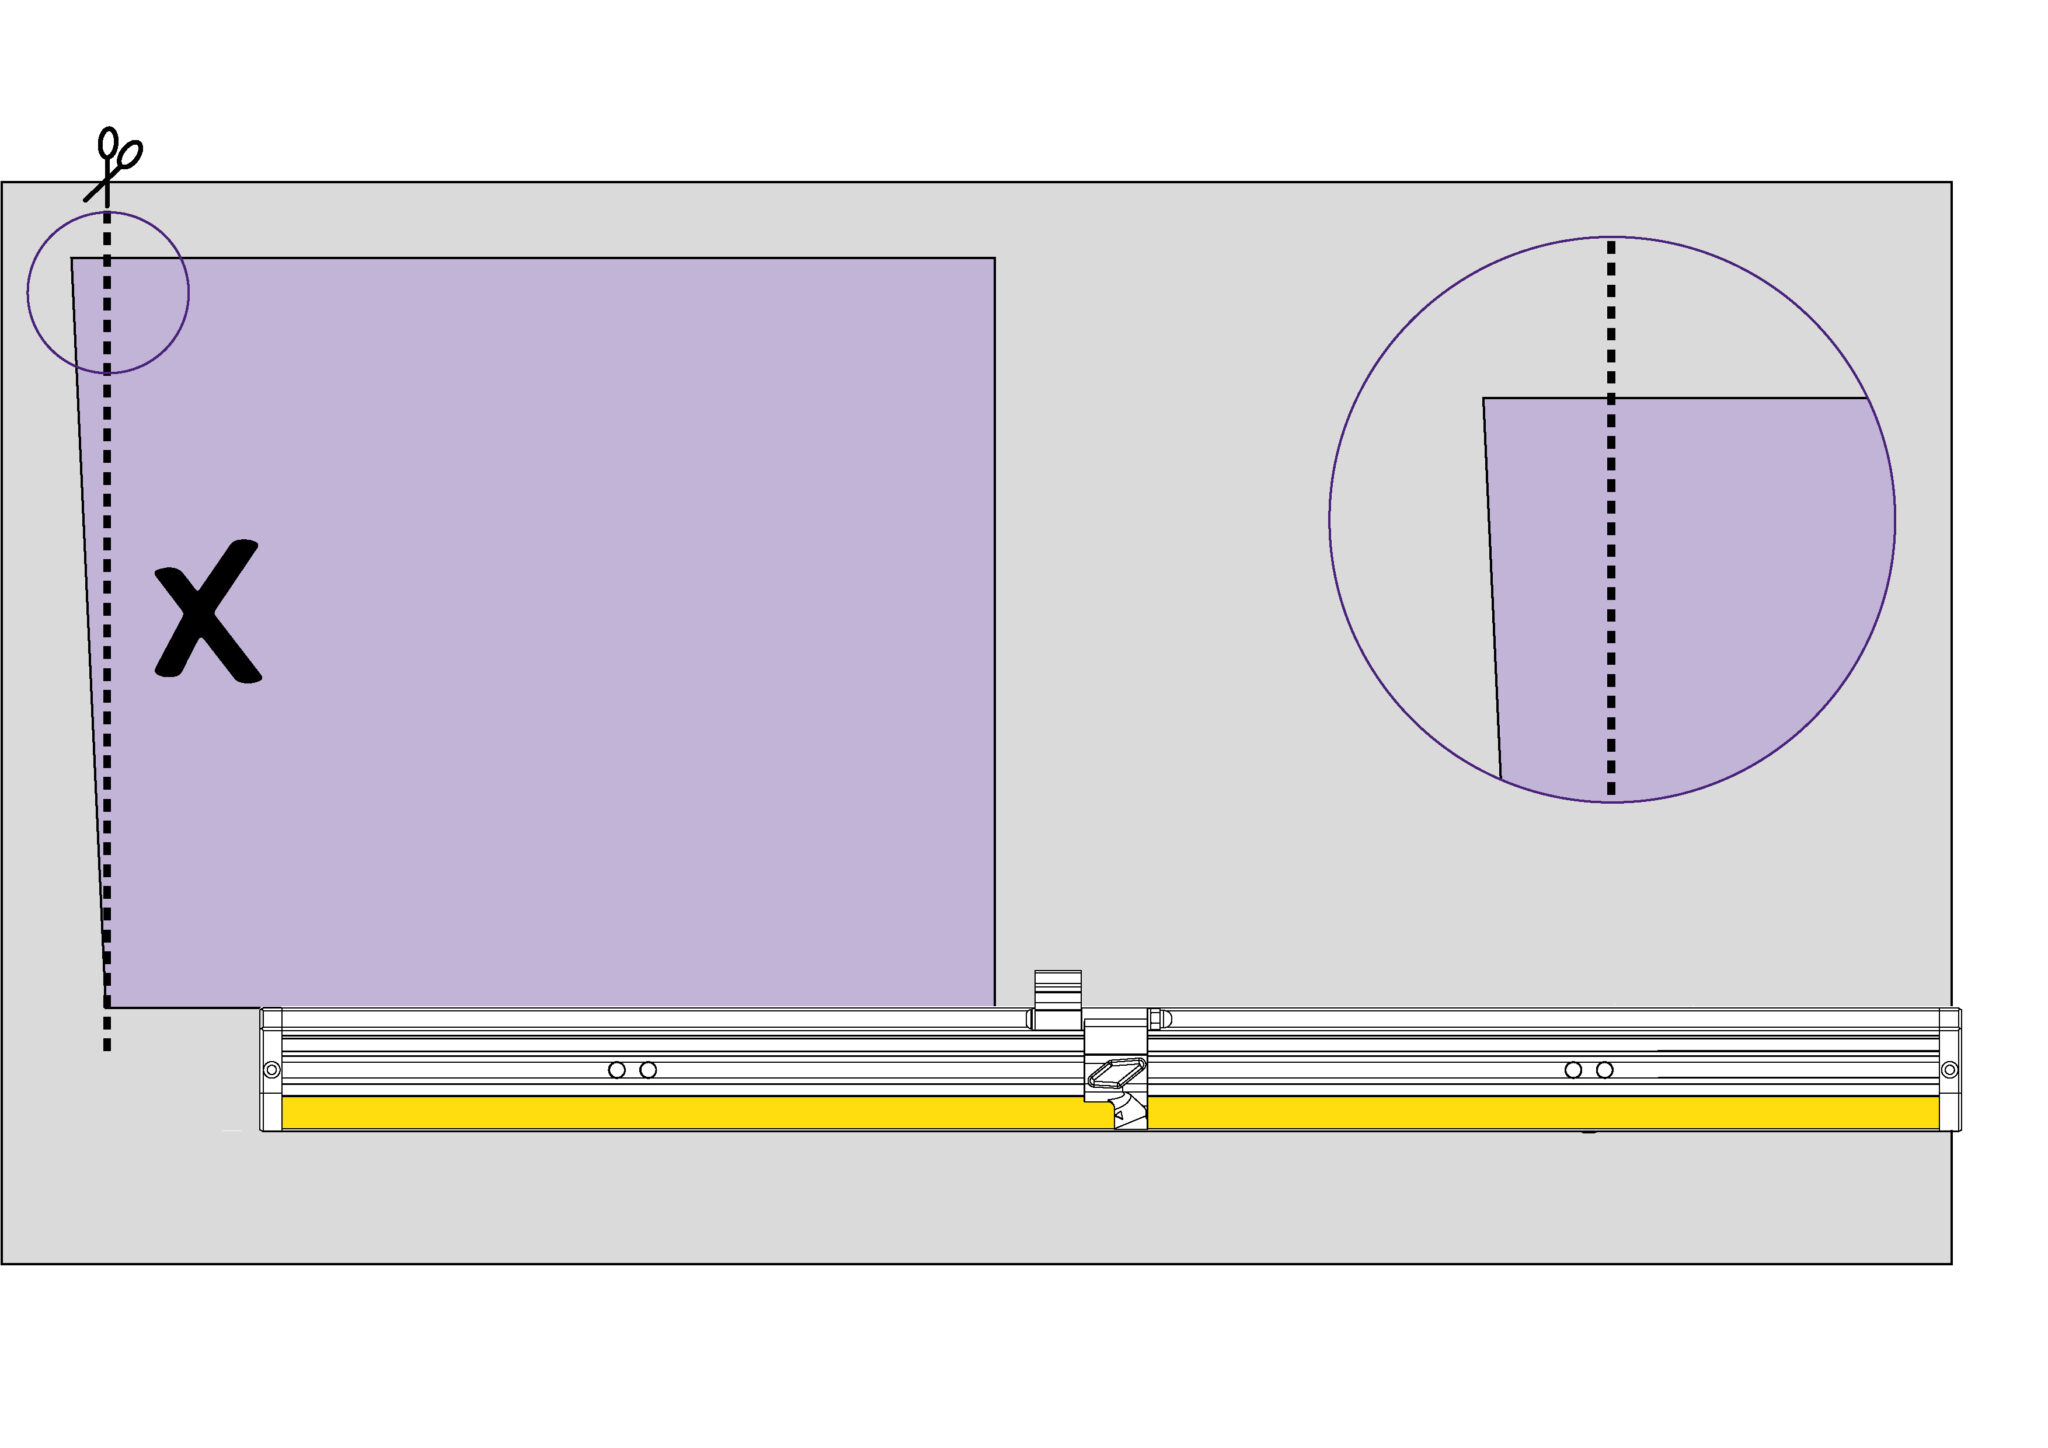
If not, edge X will show a discrepancy with the cut line that is FOUR TIMES THE ERROR. Remove the two screws in the plastic end caps if fitted and rotate the fine adjustment screws to remove a QUARTER of the discrepancy. Repeat the test and make further adjustments as necessary, insert the end fixing screws.
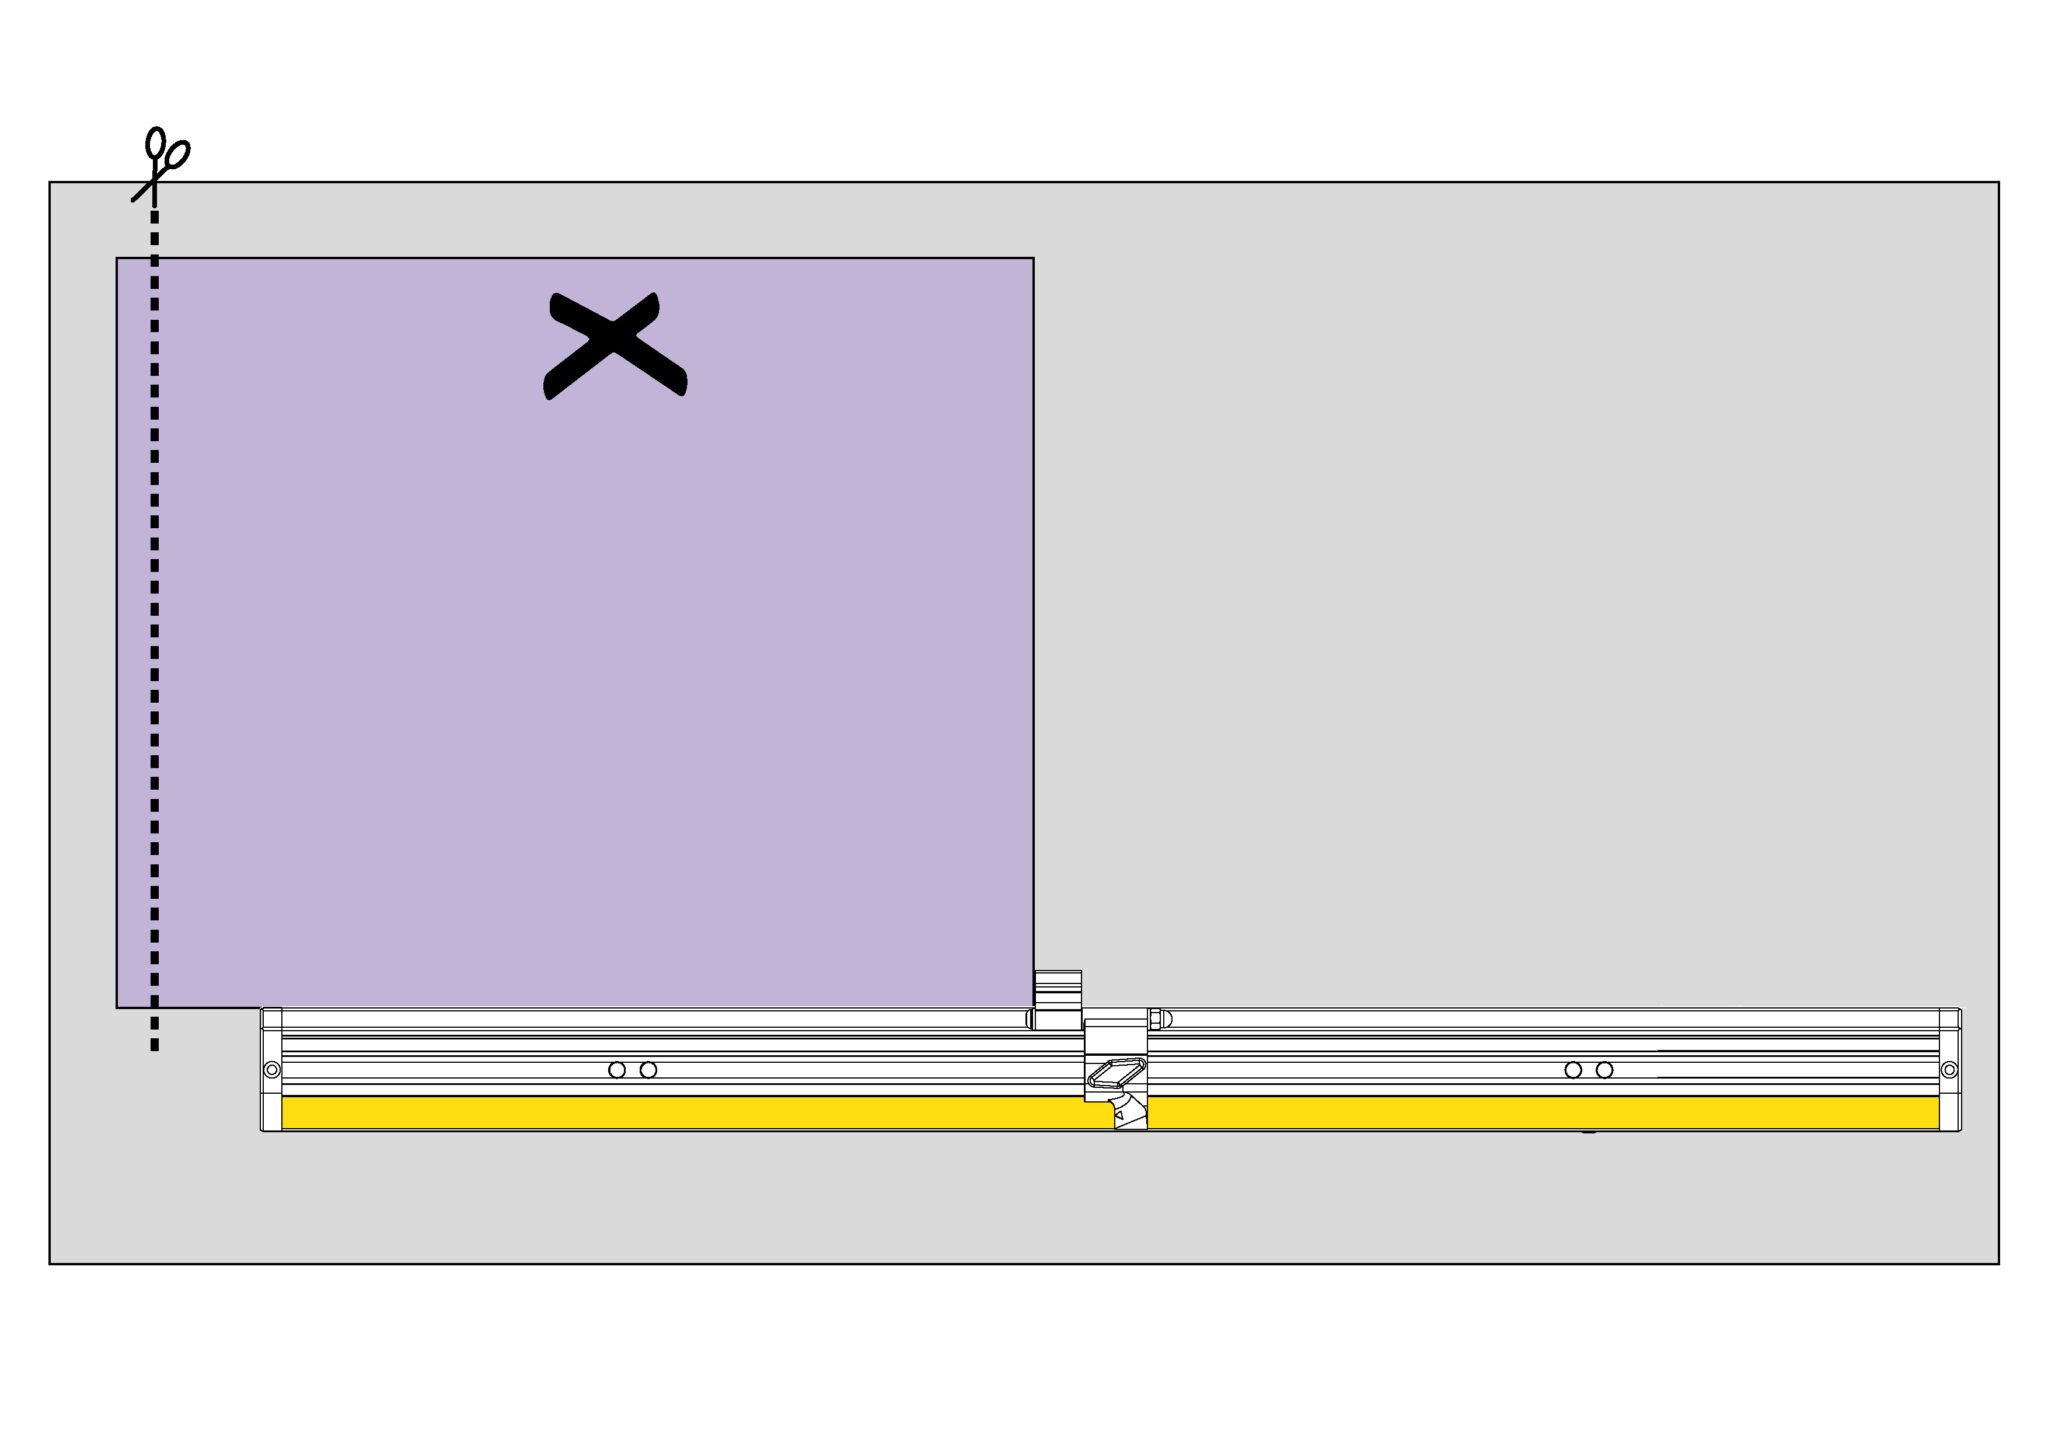
Place the board on the cutter as if to trim approximately 6mm (1/4”) from the edge, place the side of the board firmly against the Material Guide. Use the pencil to mark the edge being trimmed with a ‘X’.
Rotate the board 90 degrees so the edge you have just trimmed ‘X’ is against the Material Guide and trim the second edge
Rotate again in the same direction and trim (X should be on the opposite edge)
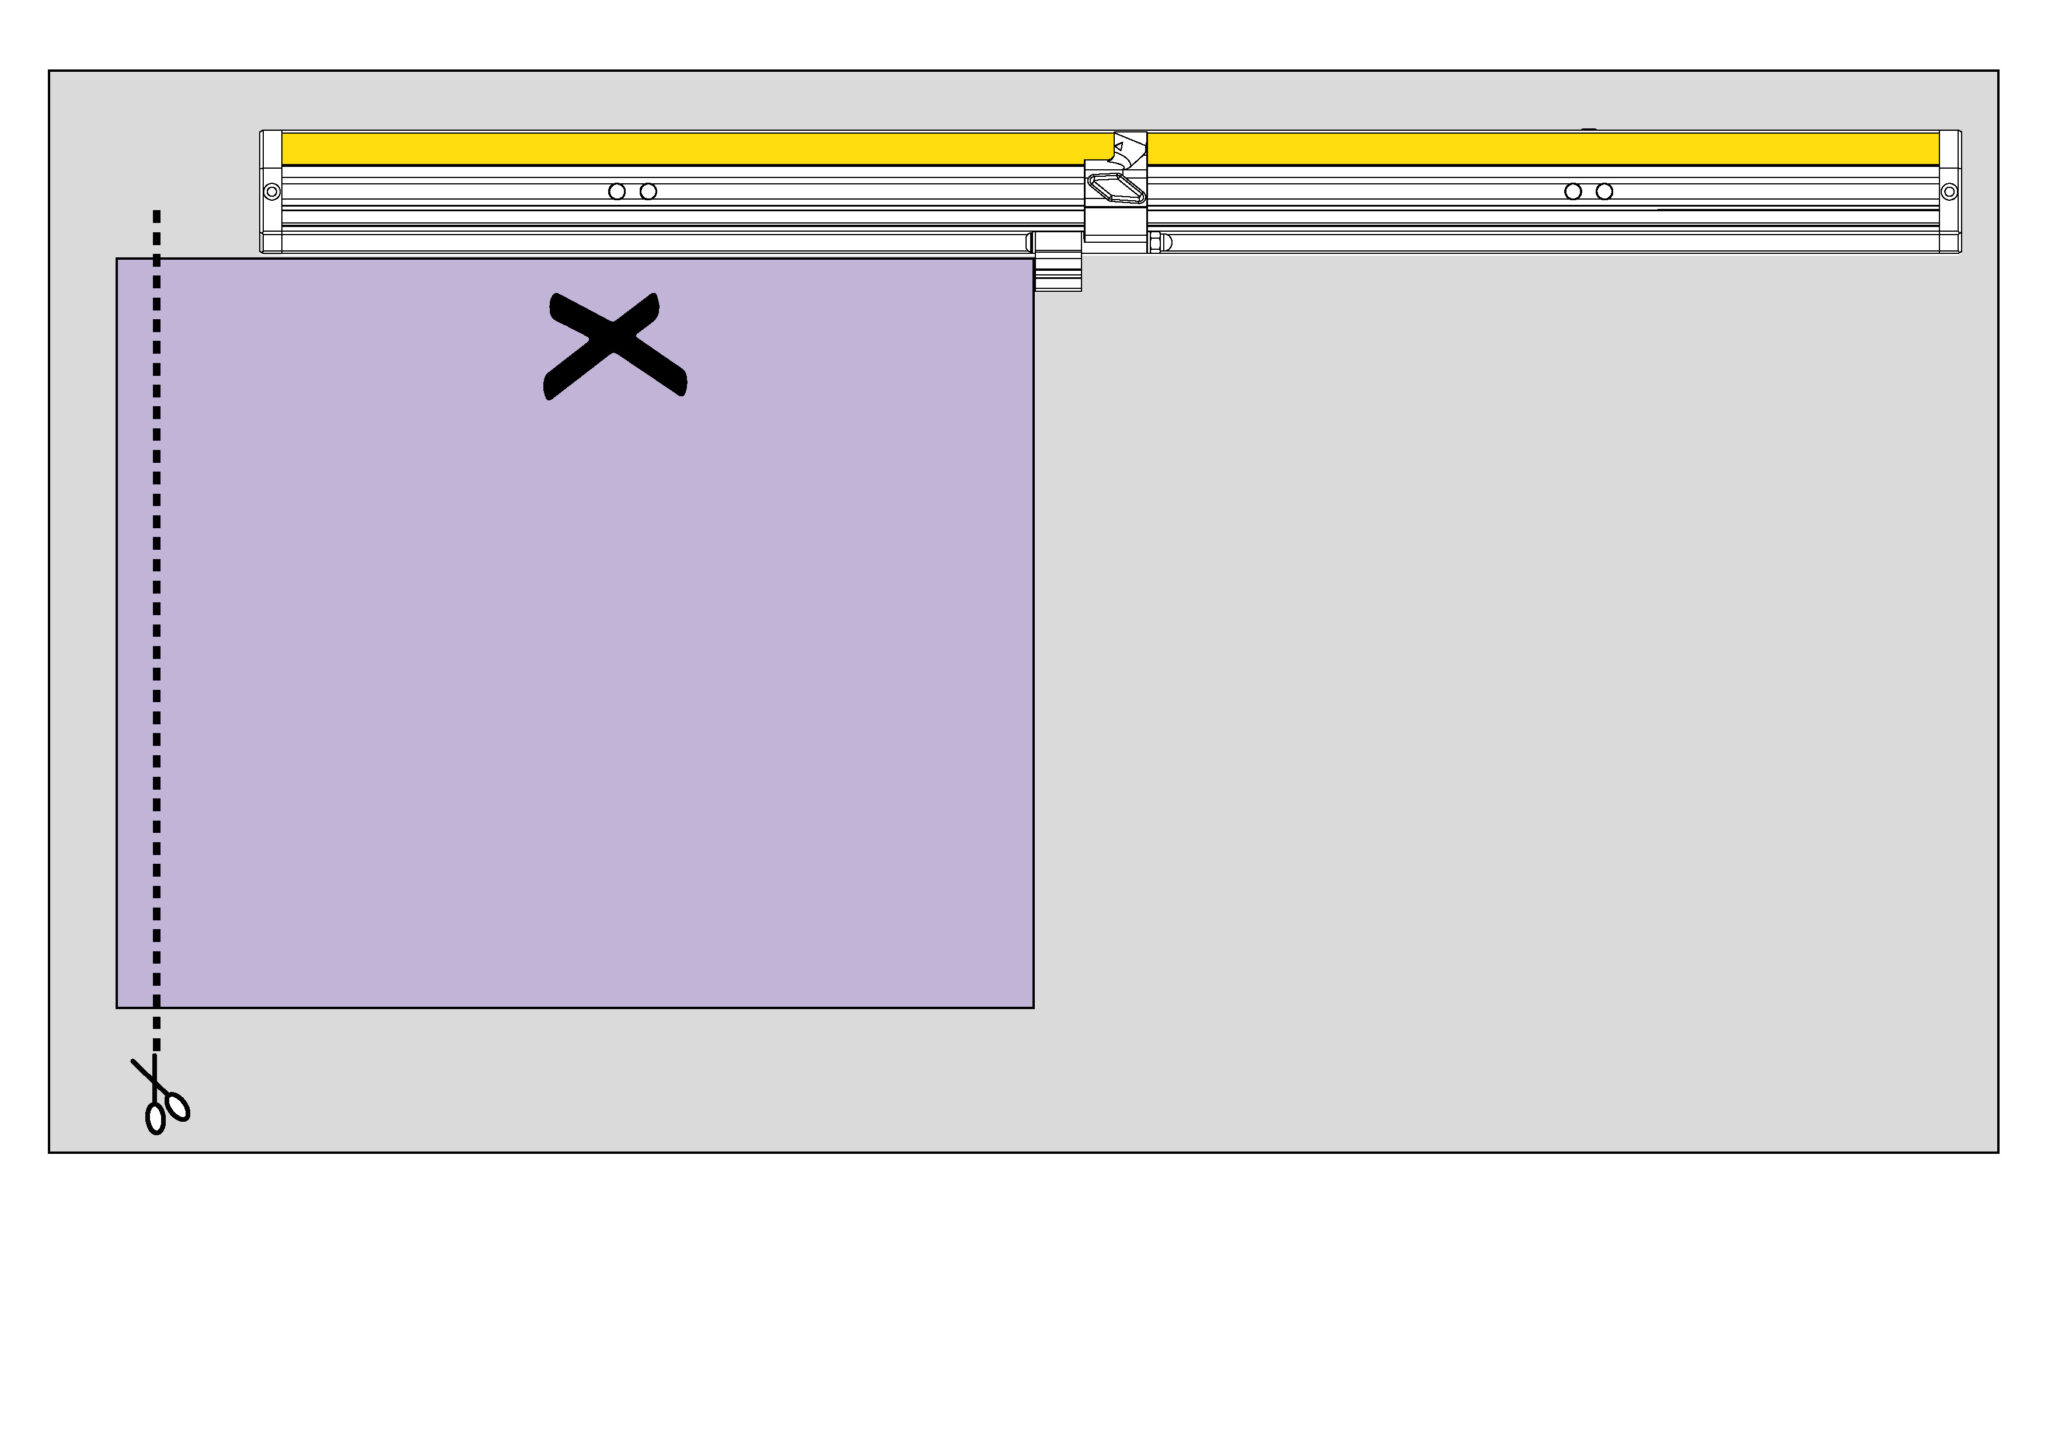
Repeat again, X should be on the opposite edge to the Material Guide
Rotate the board a final time and align the board with the Material Guide, if it has been positioned at exactly 90 degrees edge X will align with the cut line.
If not, edge X will show a discrepancy with the cut line that is FOUR TIMES THE ERROR. Remove the two screws in the plastic end caps if fitted and rotate the fine adjustment screws to remove a QUARTER of the discrepancy. Repeat the test and make further adjustments as necessary, insert the end fixing screws.
Place the board on the cutter as if to trim approximately 6mm (1/4”) from the edge, place the side of the board firmly against the Material Guide. Use the pencil to mark the edge being trimmed with a ‘X’.
Rotate the board 90 degrees so the edge you have just trimmed ‘X’ is against the Material Guide and trim the second edge
Rotate again in the same direction and trim (X should be on the opposite edge)
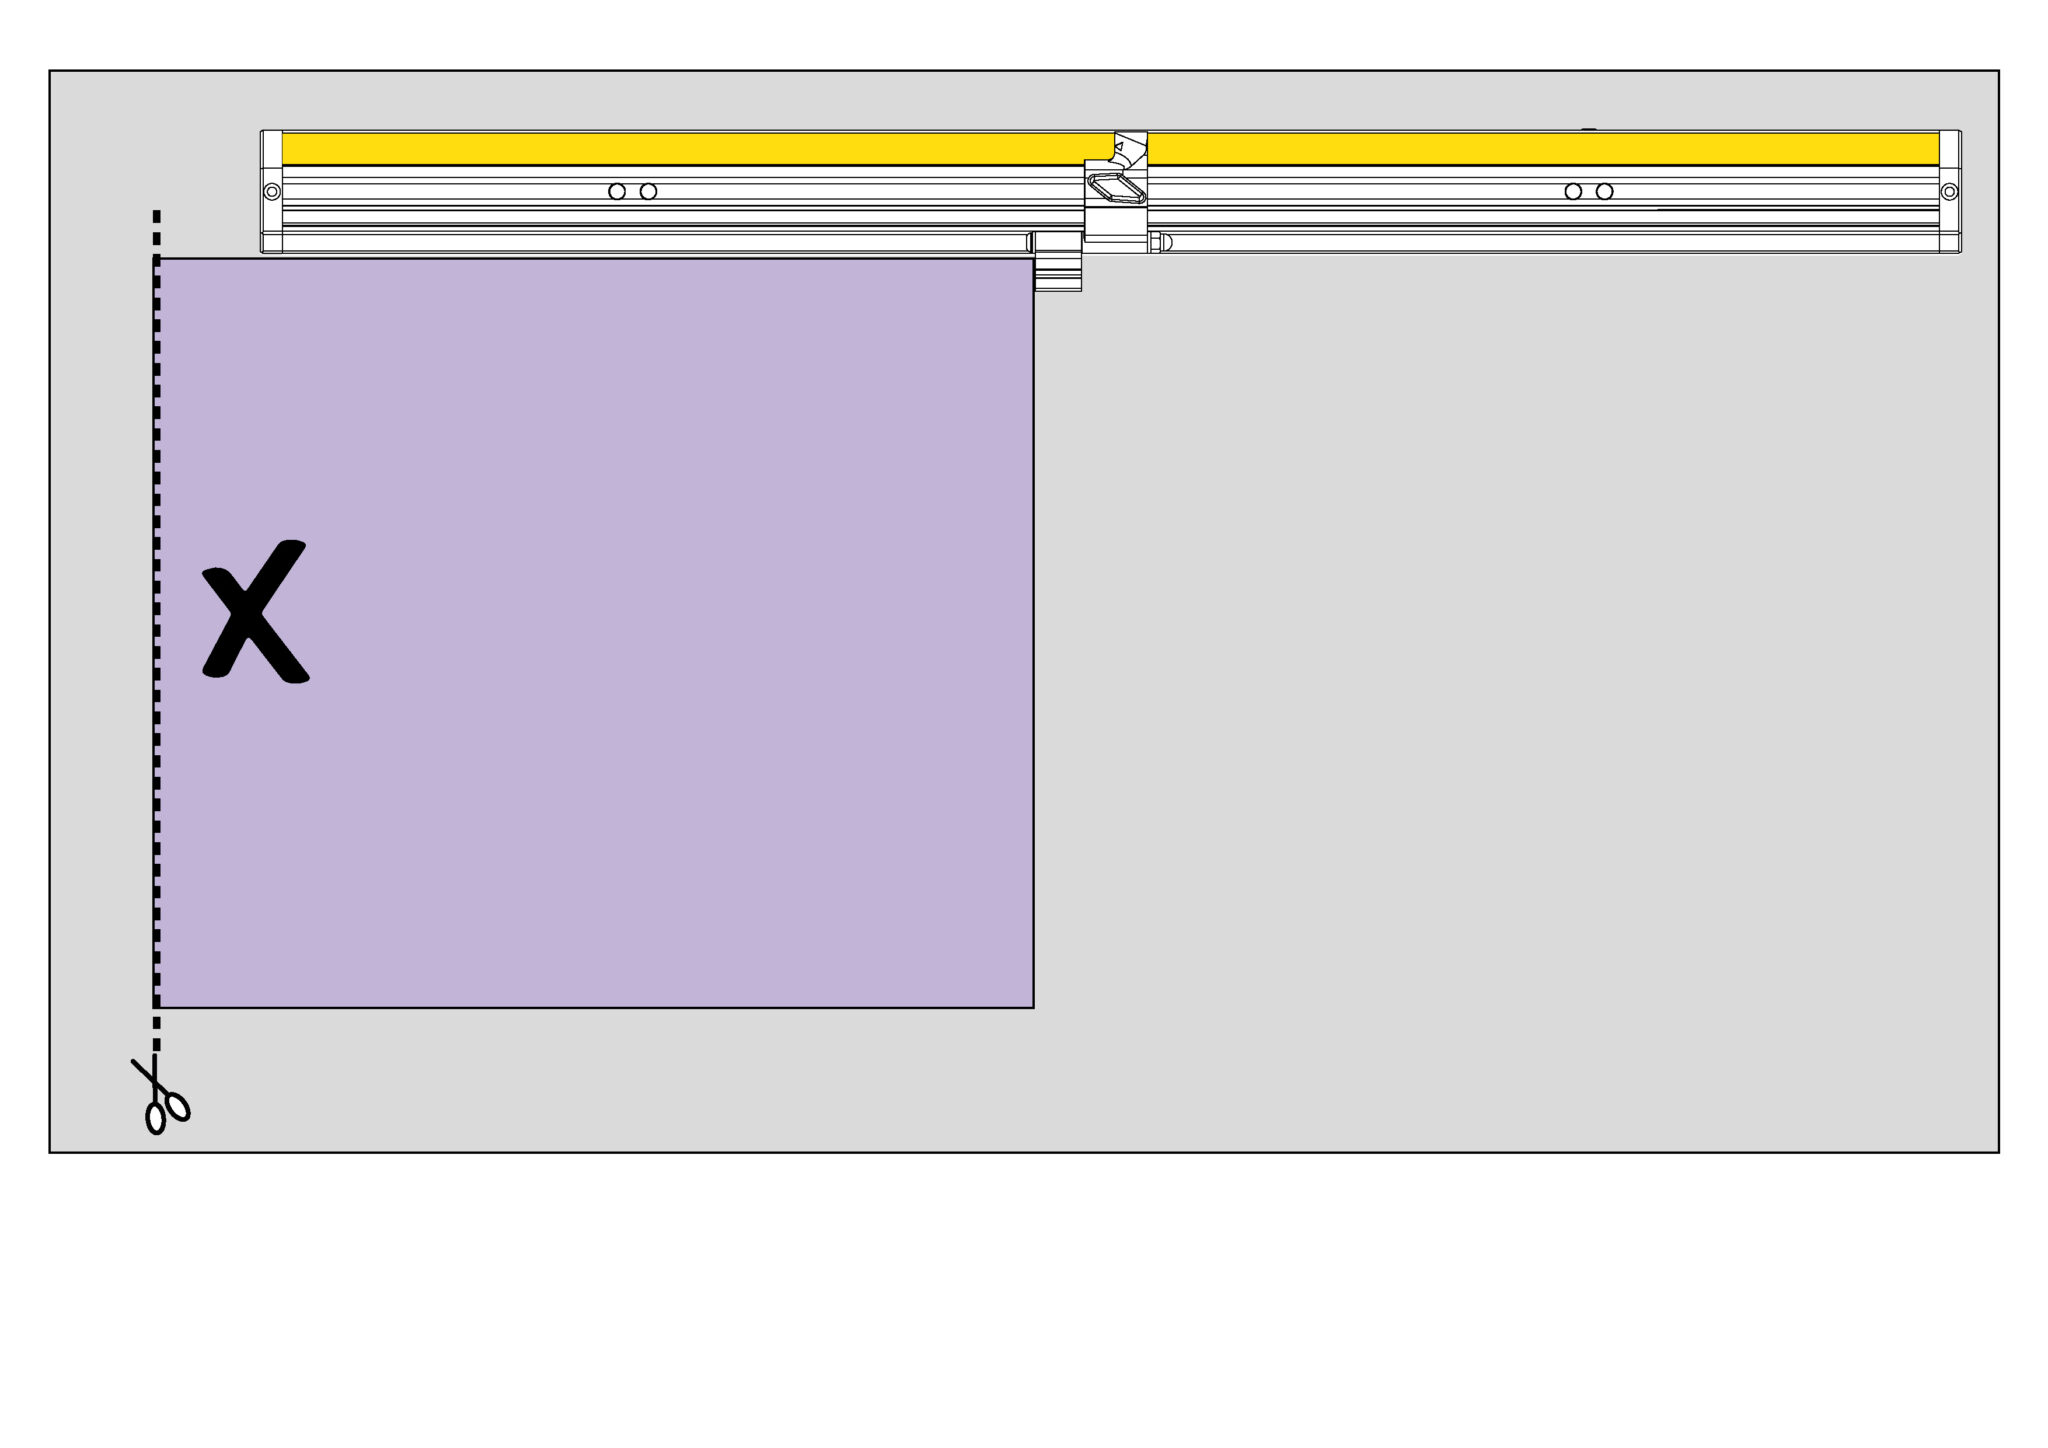
Repeat again, X should be on the opposite edge to the Material Guide
Rotate the board a final time and align the board with the Material Guide, if it has been positioned at exactly 90 degrees edge X will align with the cut line.
If not, edge X will show a discrepancy with the cut line that is FOUR TIMES THE ERROR. Remove the two screws in the plastic end caps if fitted and rotate the fine adjustment screws to remove a QUARTER of the discrepancy. Repeat the test and make further adjustments as necessary, insert the end fixing screws.
Place the board on the cutter as if to trim approximately 6mm (1/4”) from the edge, place the side of the board firmly against the Material Guide. Use the pencil to mark the edge being trimmed with a ‘X’.
Rotate the board 90 degrees so the edge you have just trimmed ‘X’ is against the Material Guide and trim the second edge
Rotate again in the same direction and trim (X should be on the opposite edge)
Repeat again, X should be on the opposite edge to the Material Guide
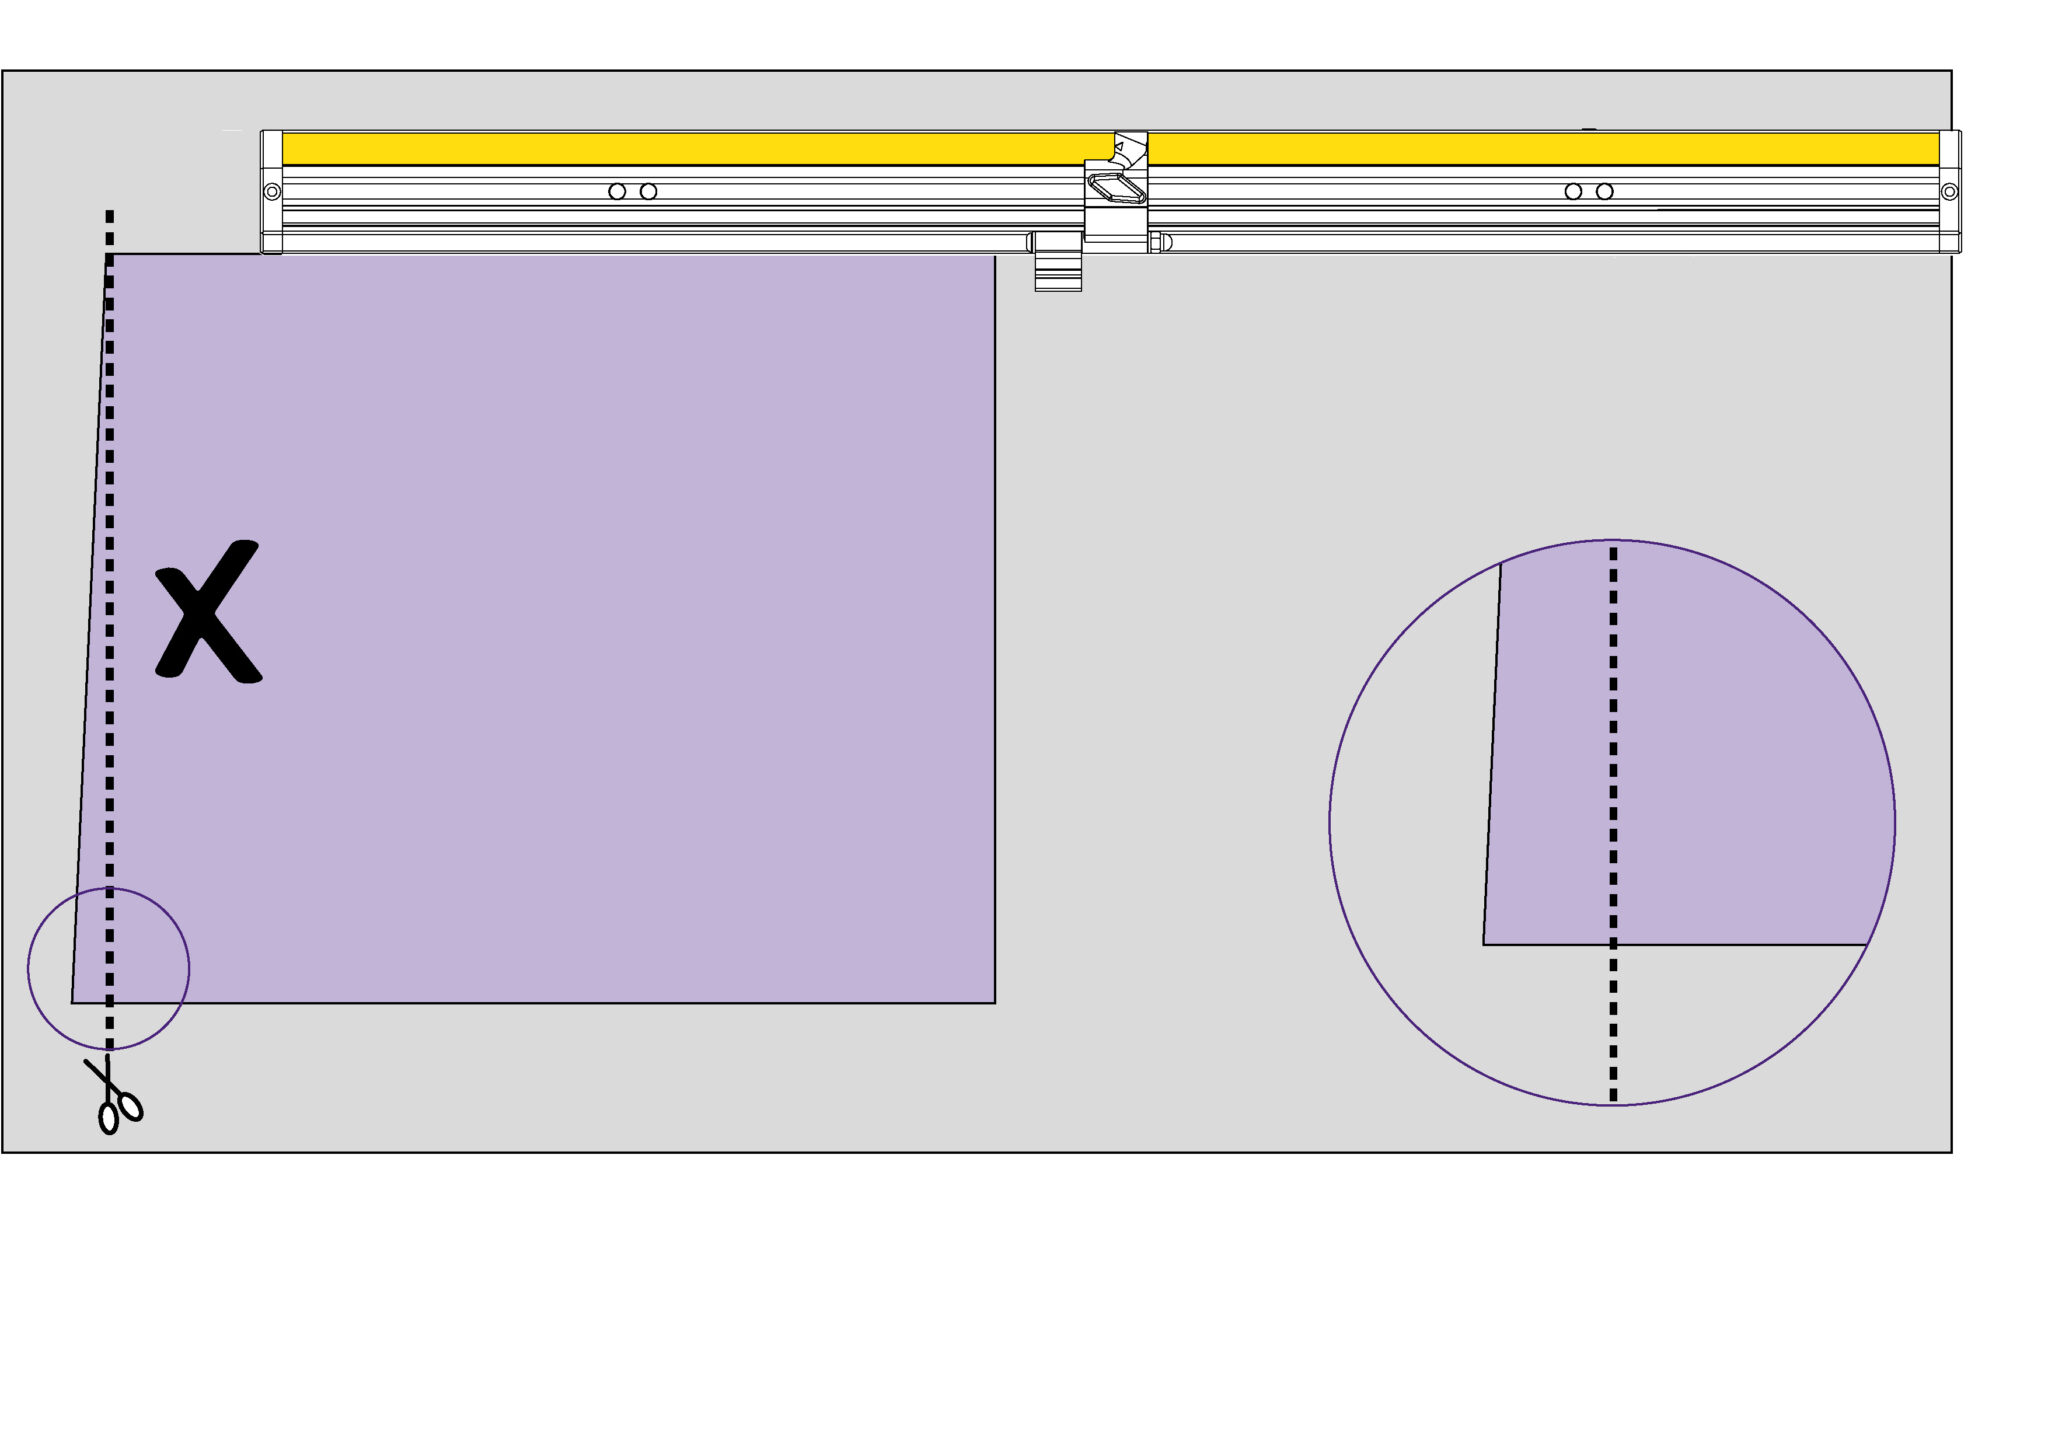
Rotate the board a final time and align the board with the Material Guide, if it has been positioned at exactly 90 degrees edge X will align with the cut line.
If not, edge X will show a discrepancy with the cut line that is FOUR TIMES THE ERROR. Remove the two screws in the plastic end caps if fitted and rotate the fine adjustment screws to remove a QUARTER of the discrepancy. Repeat the test and make further adjustments as necessary, insert the end fixing screws.
Ⓒ Keencut 2020 | Baird Rd, Corby NN17 5ZA United Kingdom | Contact us
Created by DeType | Privacy | Website Disclaimer | Terms & Conditions