
How to adjust the SteelTrak clamp alignment
When cutting tough materials it is essential that the clamping system operates at its’ optimum. The moving clamp bar must press evenly onto the board being cut and not clamp it only at the top or bottom.
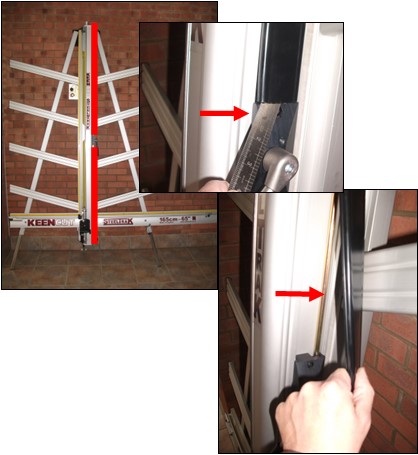
1. Remove clamp cover
Open the clamp by at least 1-2mm and remove the black plastic cover strip situated above the clamp handle. It just clips out of place, use the end of a small steel rule to lever it from its’ groove.
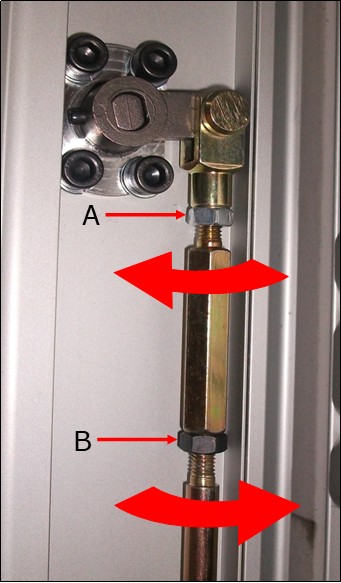
2. Locate and adjust the clamp adjuster
The clamp adjuster is at the top end of the push rod and is locked in position by two locking nuts.
- The silver nut (A) has a normal right-handed thread, slacken this nut using a 10mm wrench by turning it counter-clockwise when looking from below.
- Now slacken the black nut (B), this has a left hand thread and should be turned clockwise when viewed from below.
- The ‘adjuster’ is the hexagonal bar between the two nuts, by turning it with the spanner it alters the clamps alignment with the back of the machine.
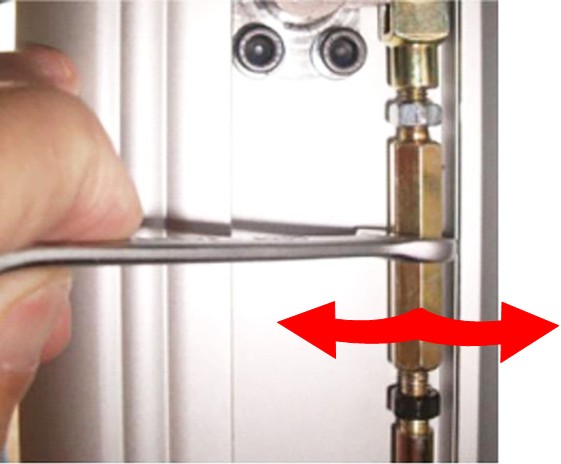
3. Rotate the adjuster
Rotate the adjuster whilst observing the clamp from the side and bring the clamp into parallel.
Now check if the clamp is parallel by using 2 pieces of A4 paper. Place one at the bottom of the clamp and hold the other at the top of the clamp whilst depressing the clamp handle. Now make sure that the clamp firmly grips both pieces of paper.
Make further adjustments if neccessary.
4. Tighten and re-assemble
Tighten the two locking nuts back up whilst holding the adjuster in position with the second spanner, then operate the clamp a few times, check and adjust further if necessary.
Finally, replace the plastic cover strip.
Ⓒ Keencut 2020 | Baird Rd, Corby NN17 5ZA United Kingdom | Contact us
Created by DeType | Privacy | Website Disclaimer | Terms & Conditions