
How to replace the cutter return spring on the Excalibur 6000
To do this you will need the Excalibur 6000 cutter return spring kit >
Tools required:
- 4mm Allen (Hex) Key
- 10mm spanner/wrench
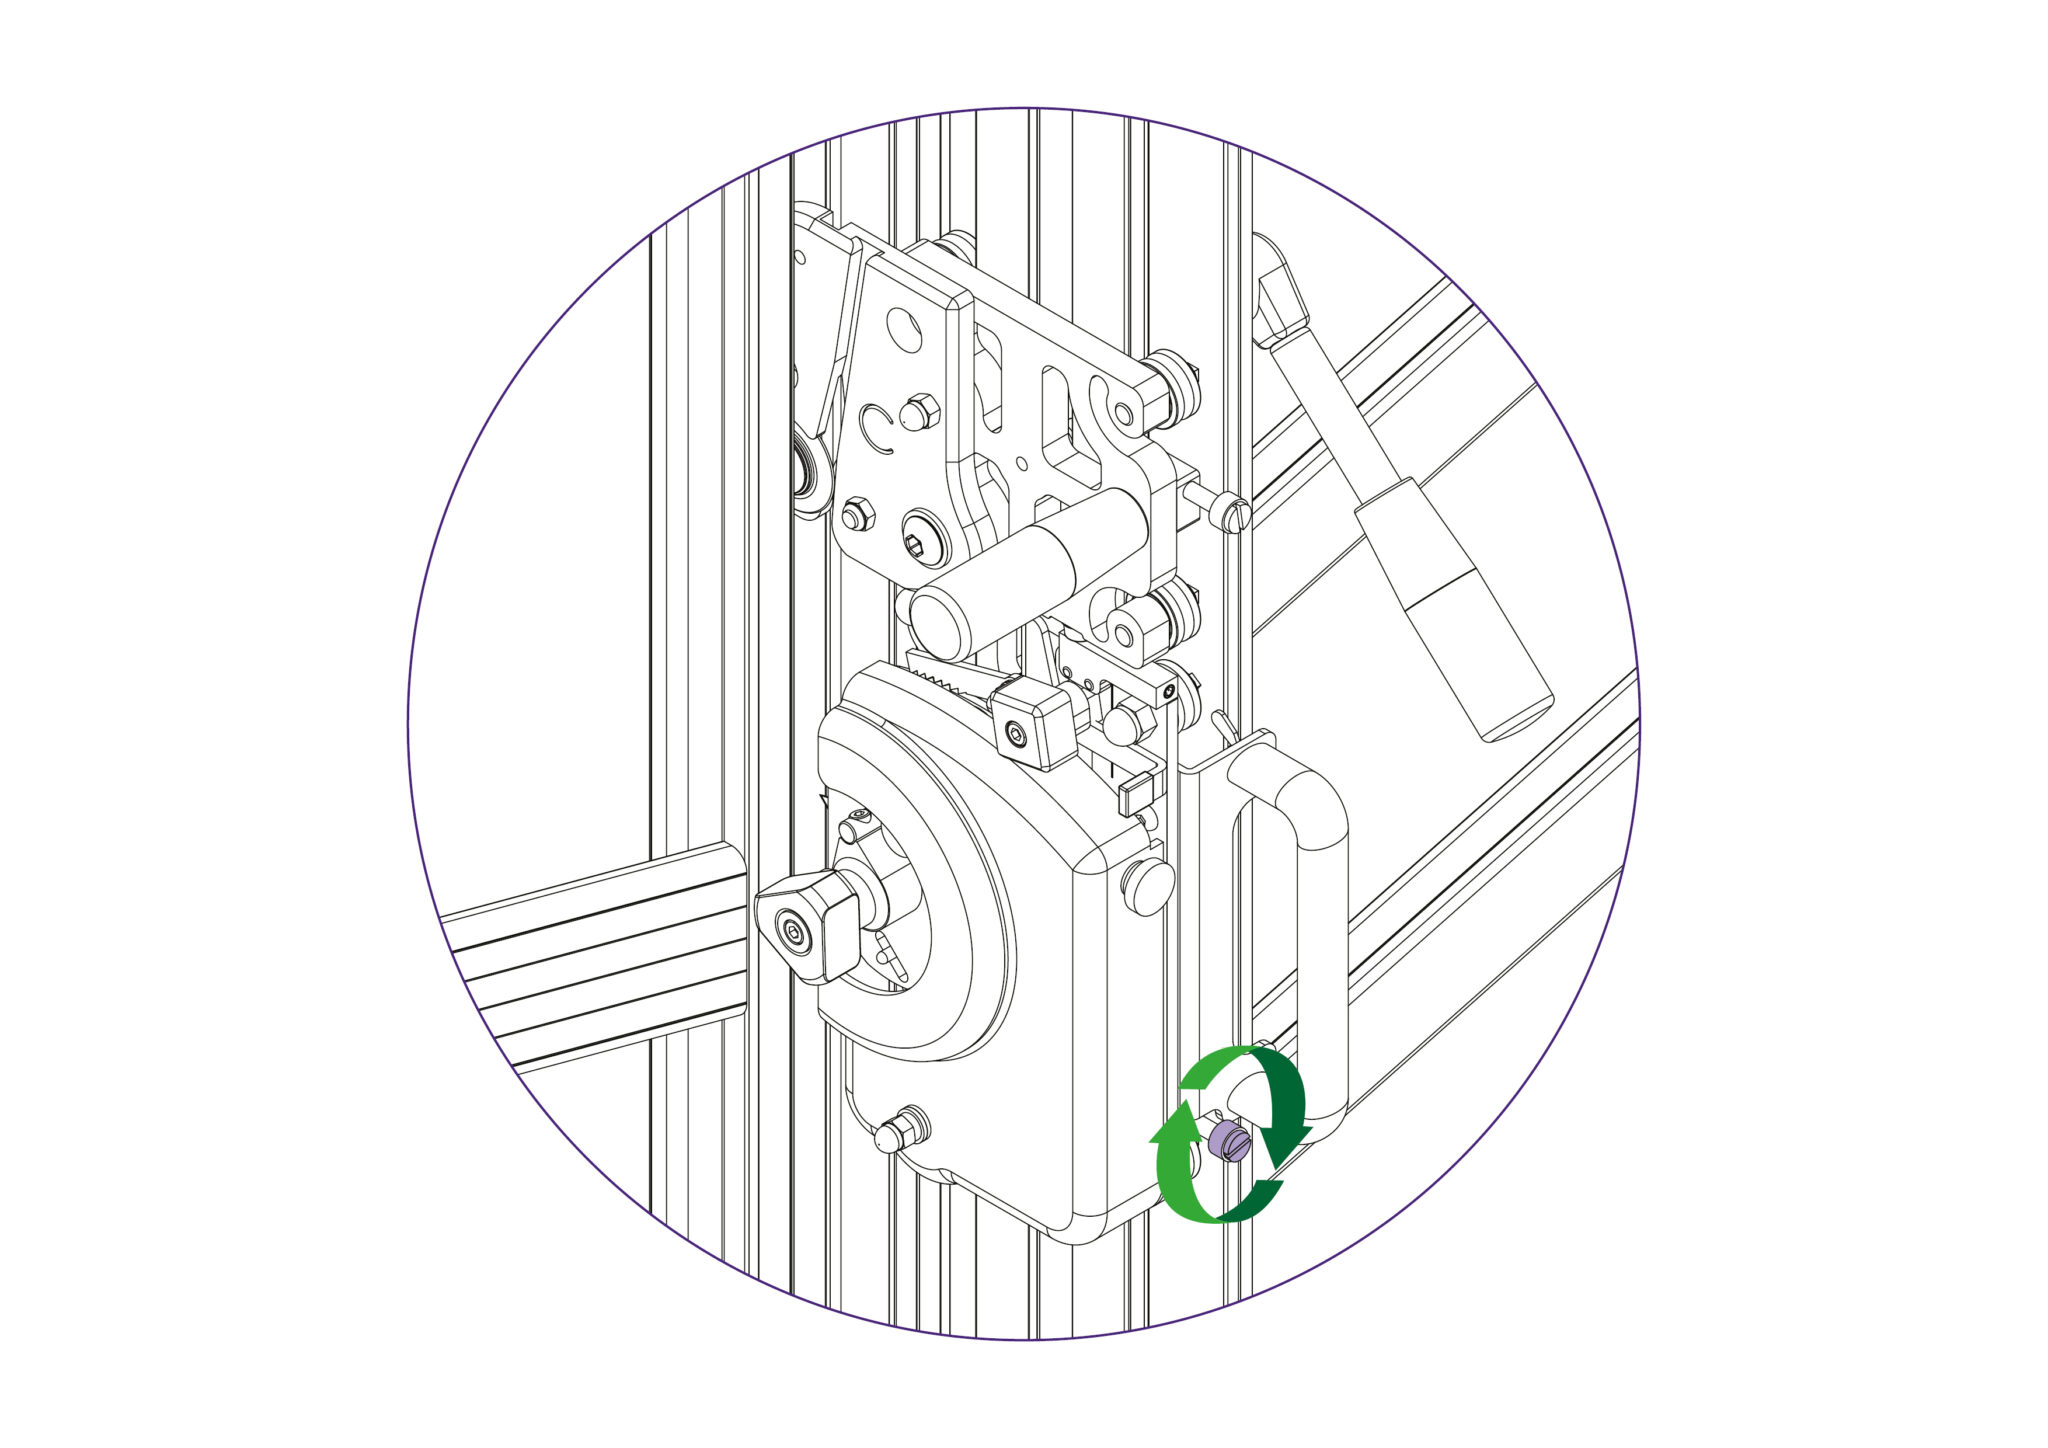
- Move the multi-tool cutter to a comfortable height and lock it in position using the white nylon locking screw.
- Ensure that this is done tightly.
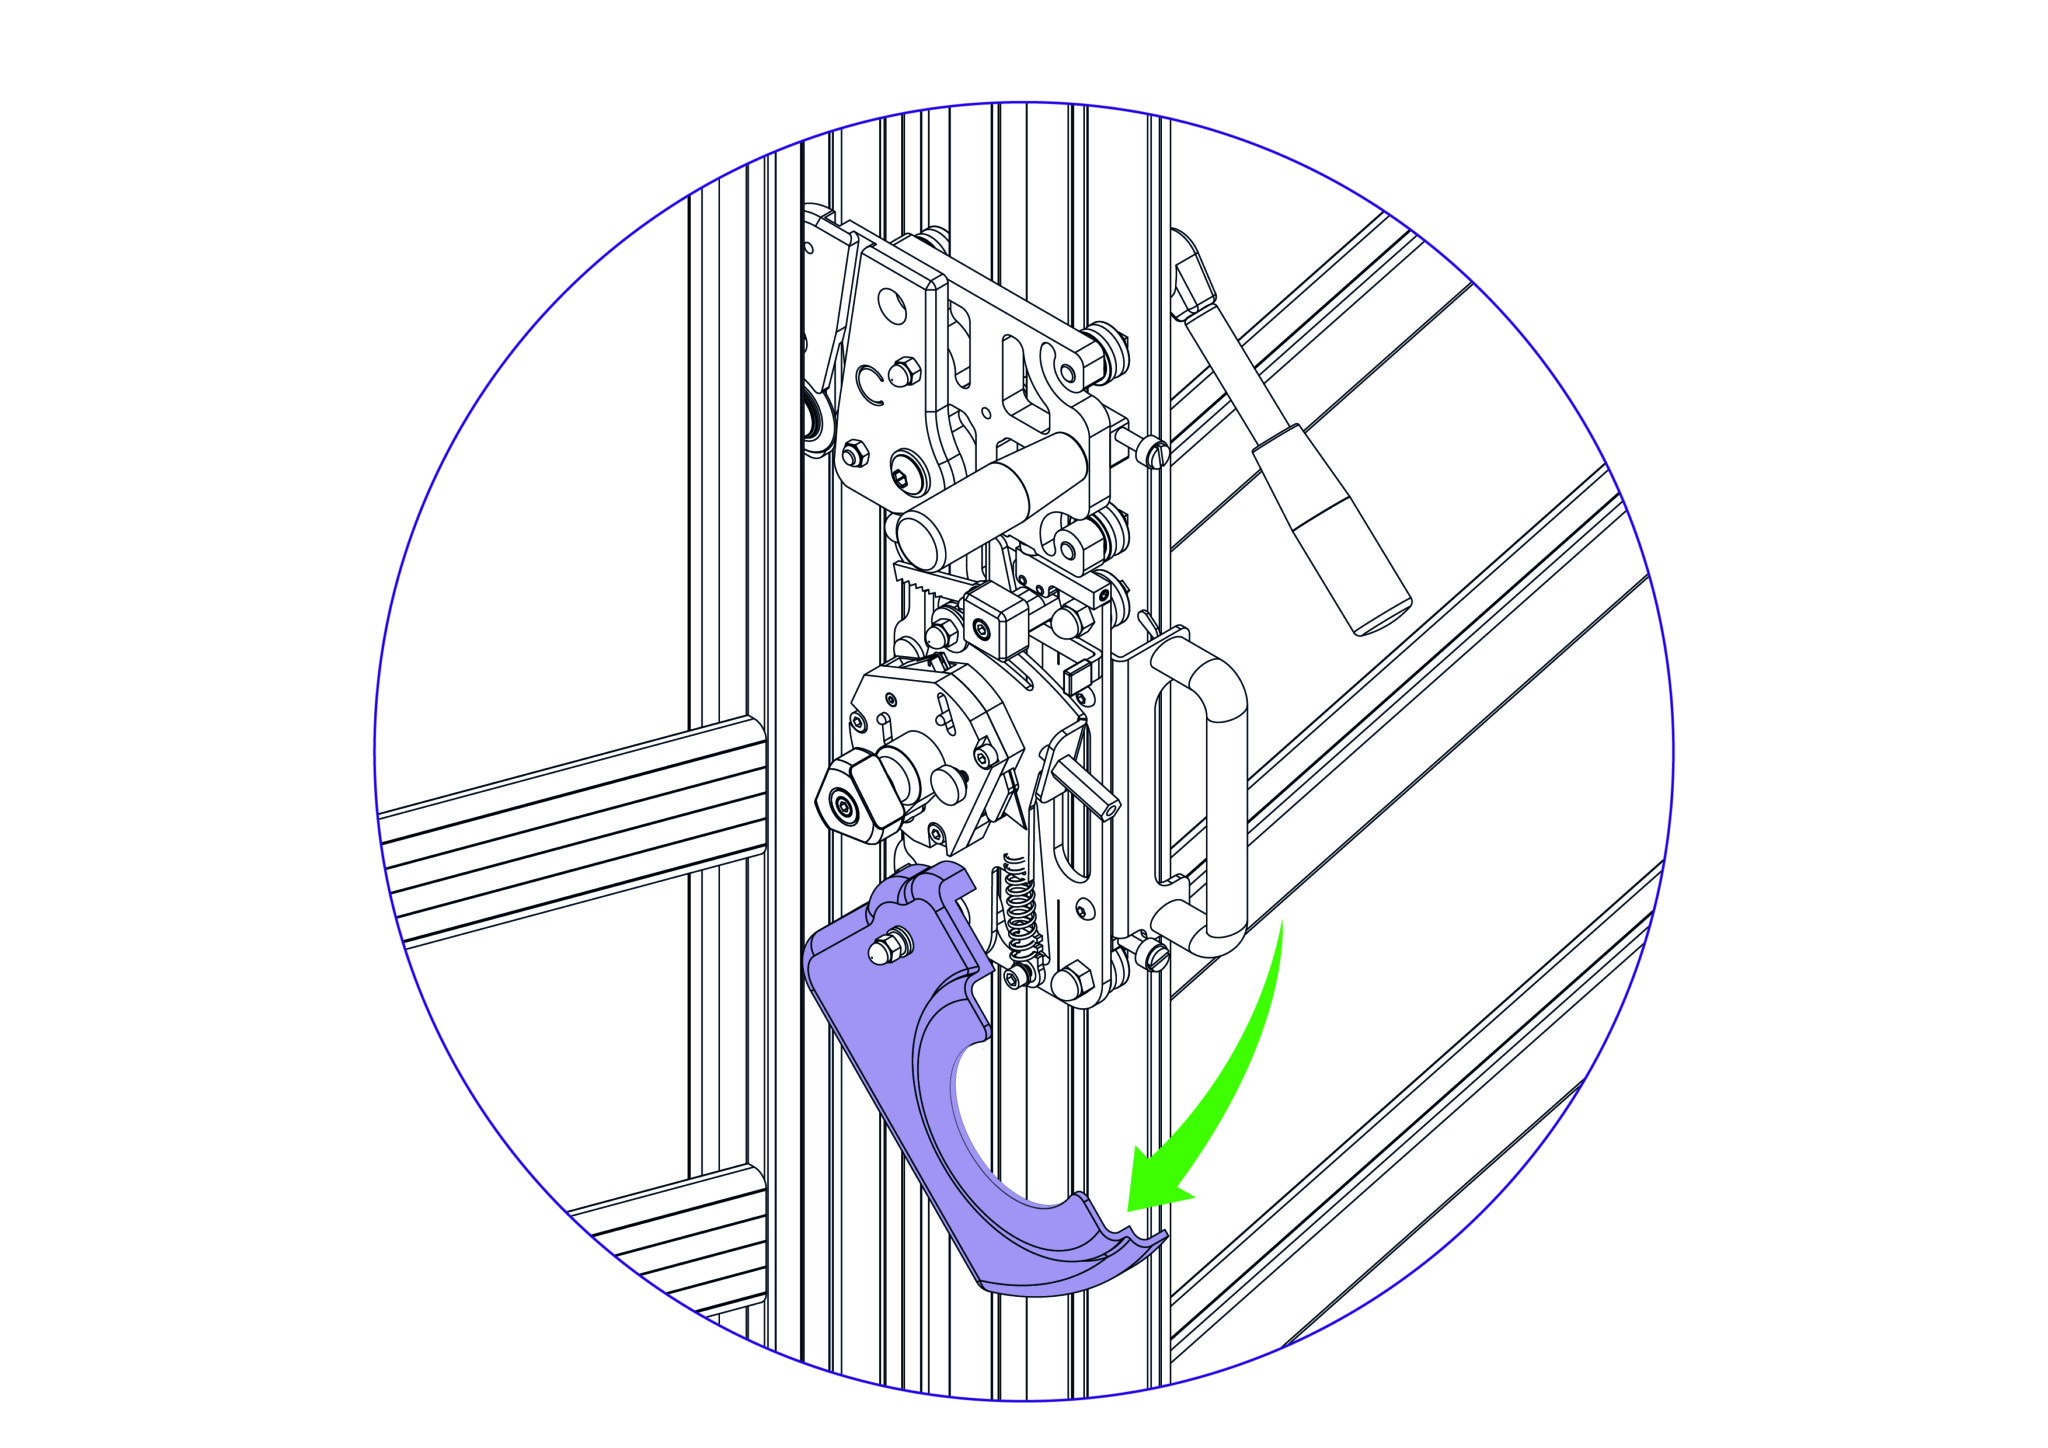
- Unlock and swing down the cutter guard.
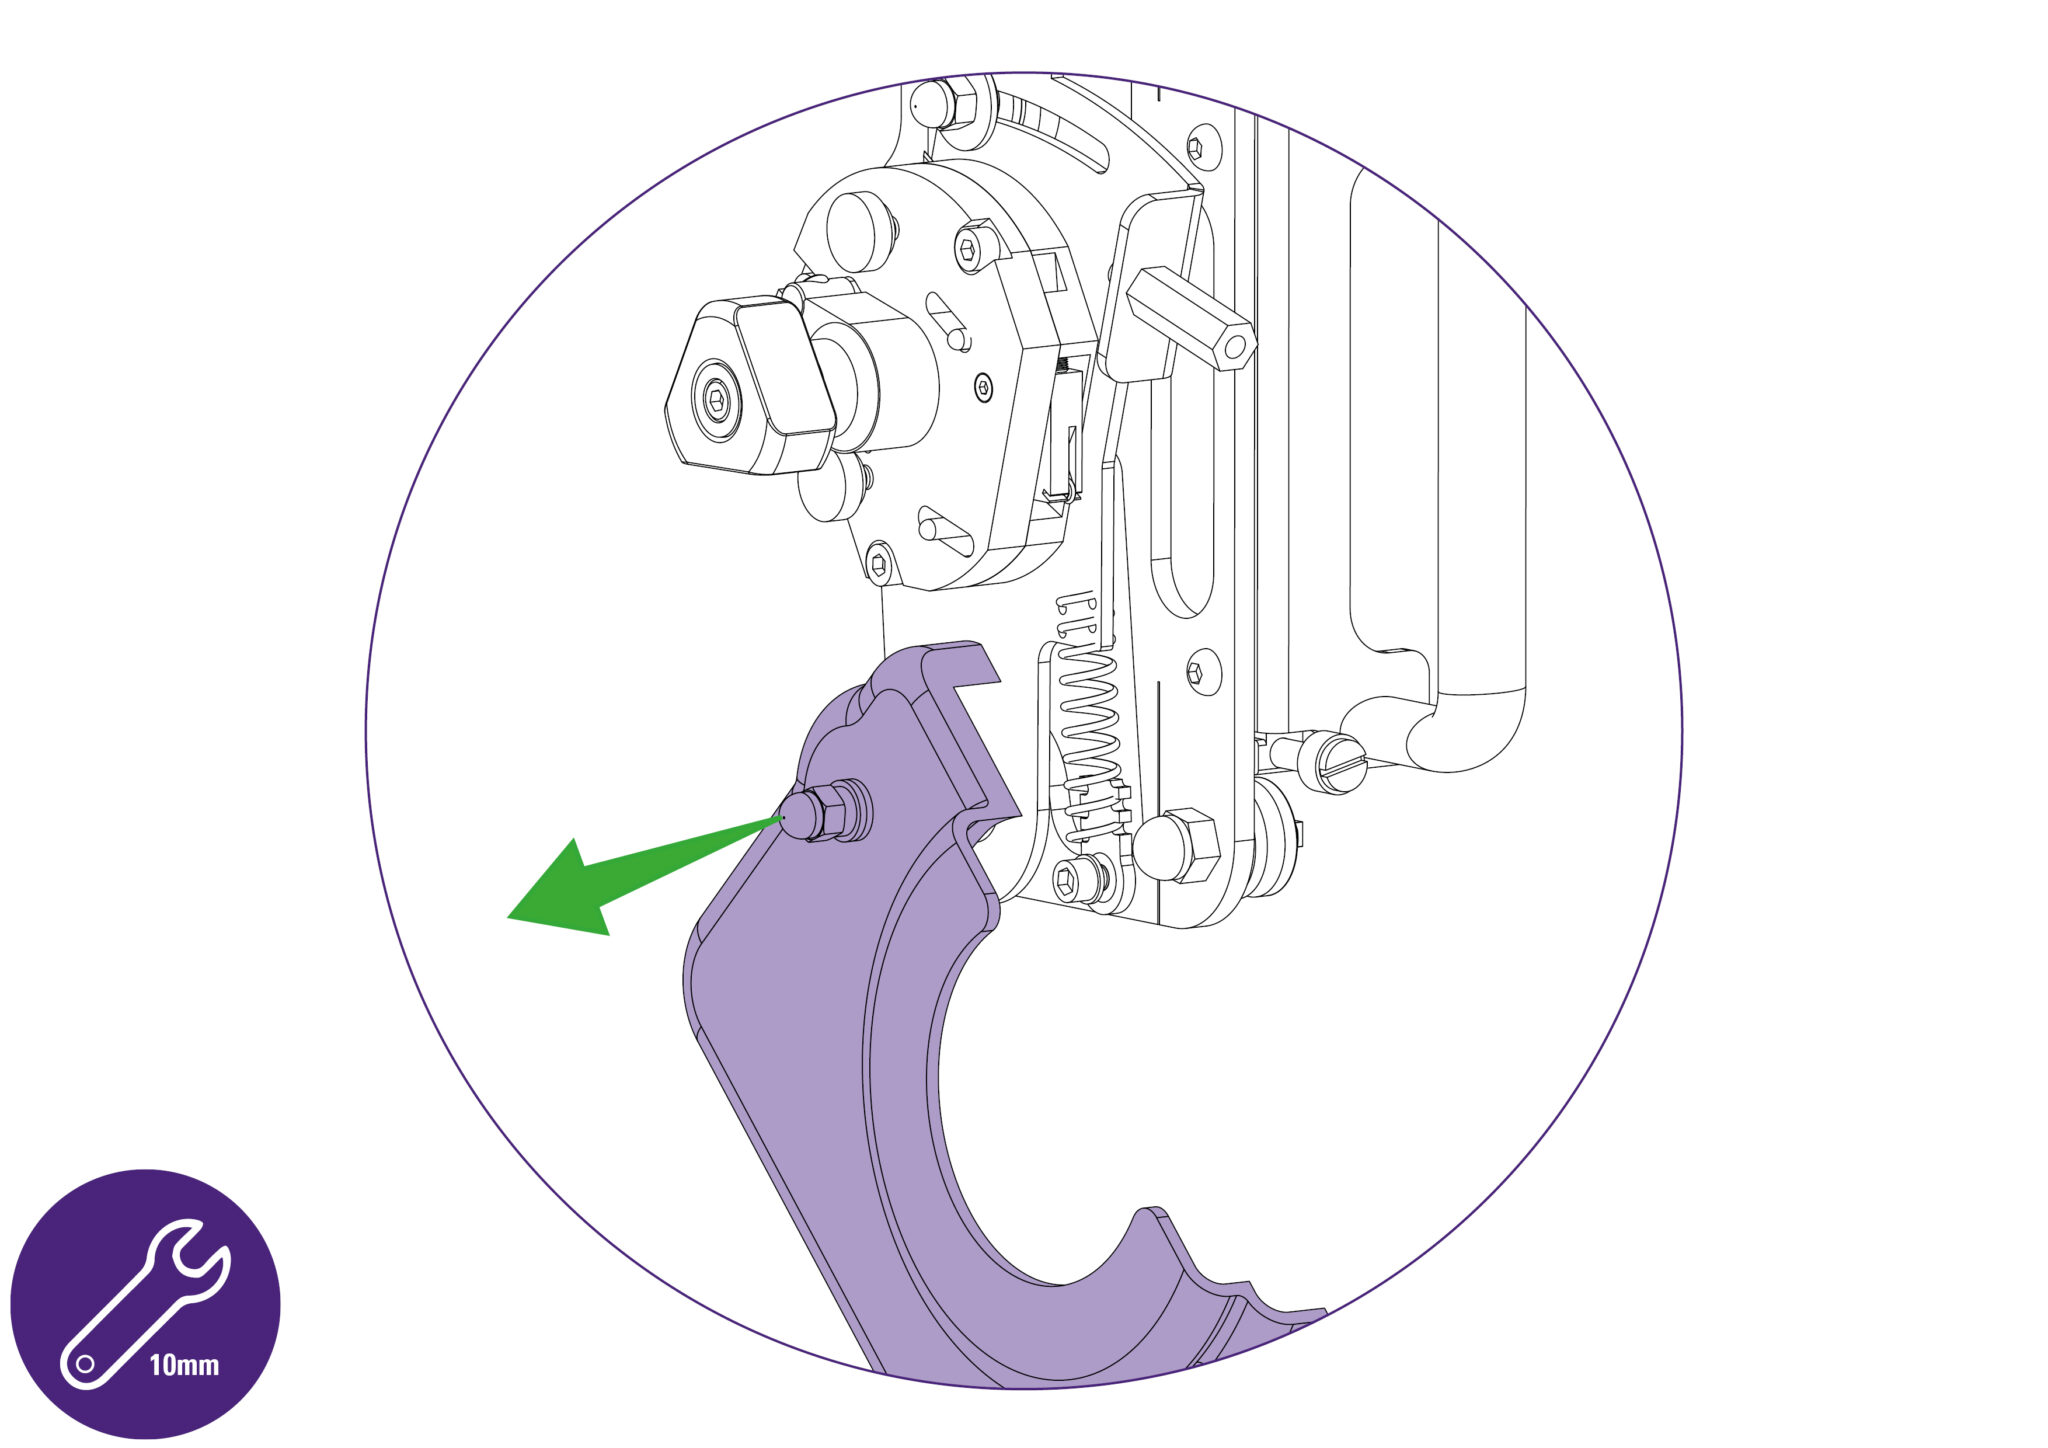
- Remove the dome headed nut using a 10mm spanner/wrench.
- Remove the guard along with the two steel washers and rubber washer.
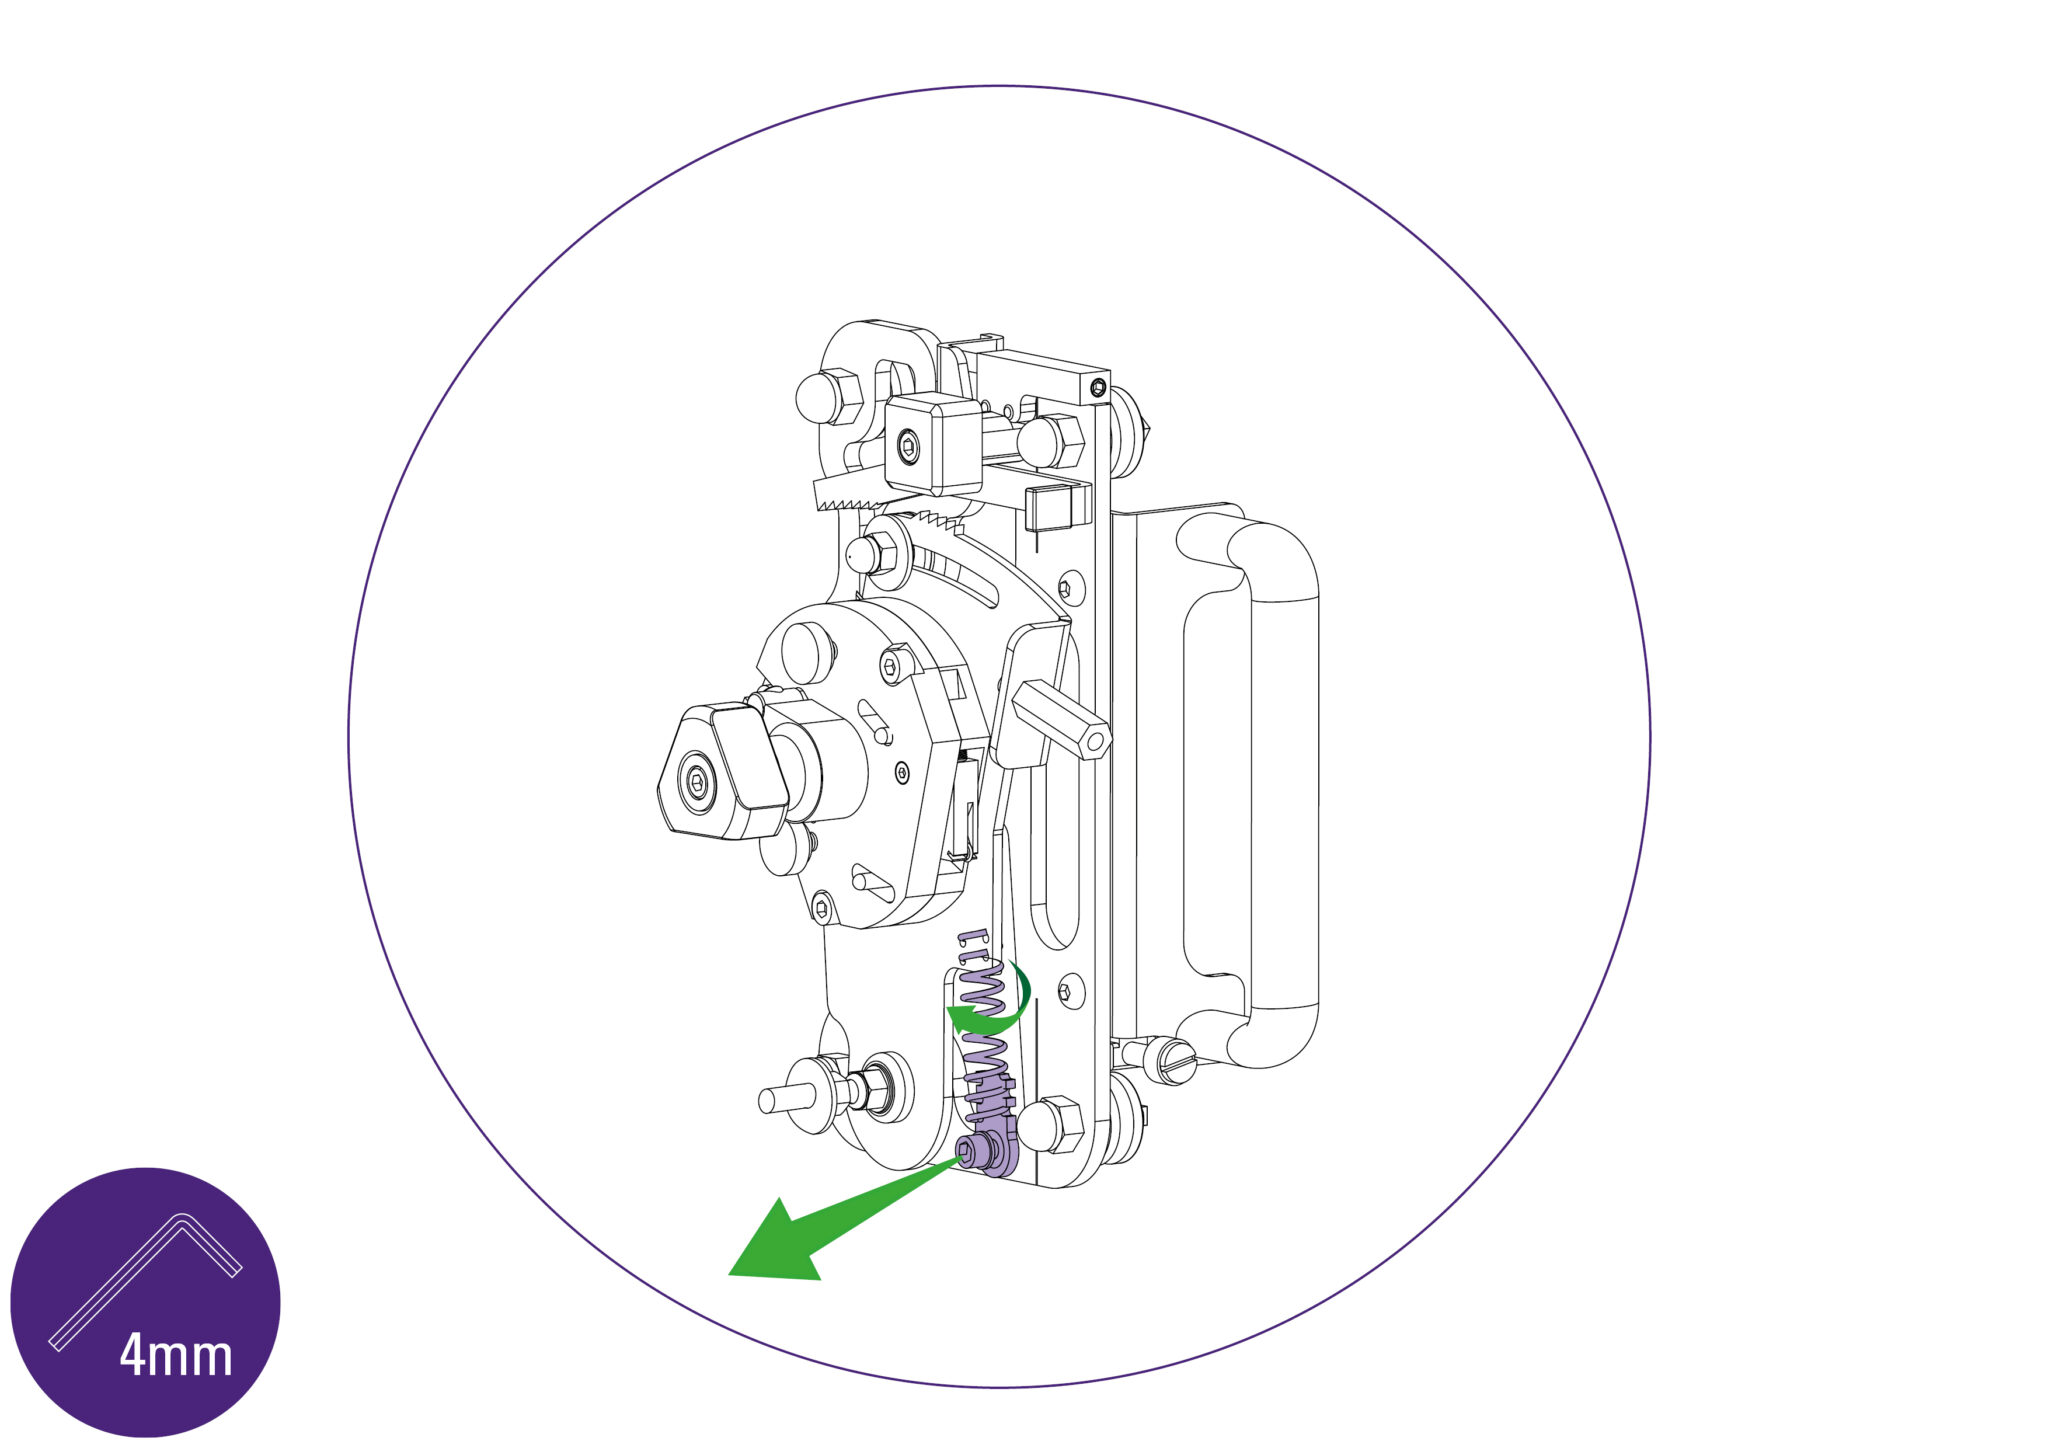
- Remove the spring anchor screw and be careful not to drop the washers that are on either side of the spring anchor.
- Unwind the spring from the holes on the swinging arm plate.
- Wind the replacement spring on to the spring anchor, then wind the spring into the holes of the swinging arm plate.
- Re-attach the spring anchor, ensuring that one washer is placed in between the screw head and the spring anchor, and that three washers are placed in between the spring anchor and the cutter head plate.
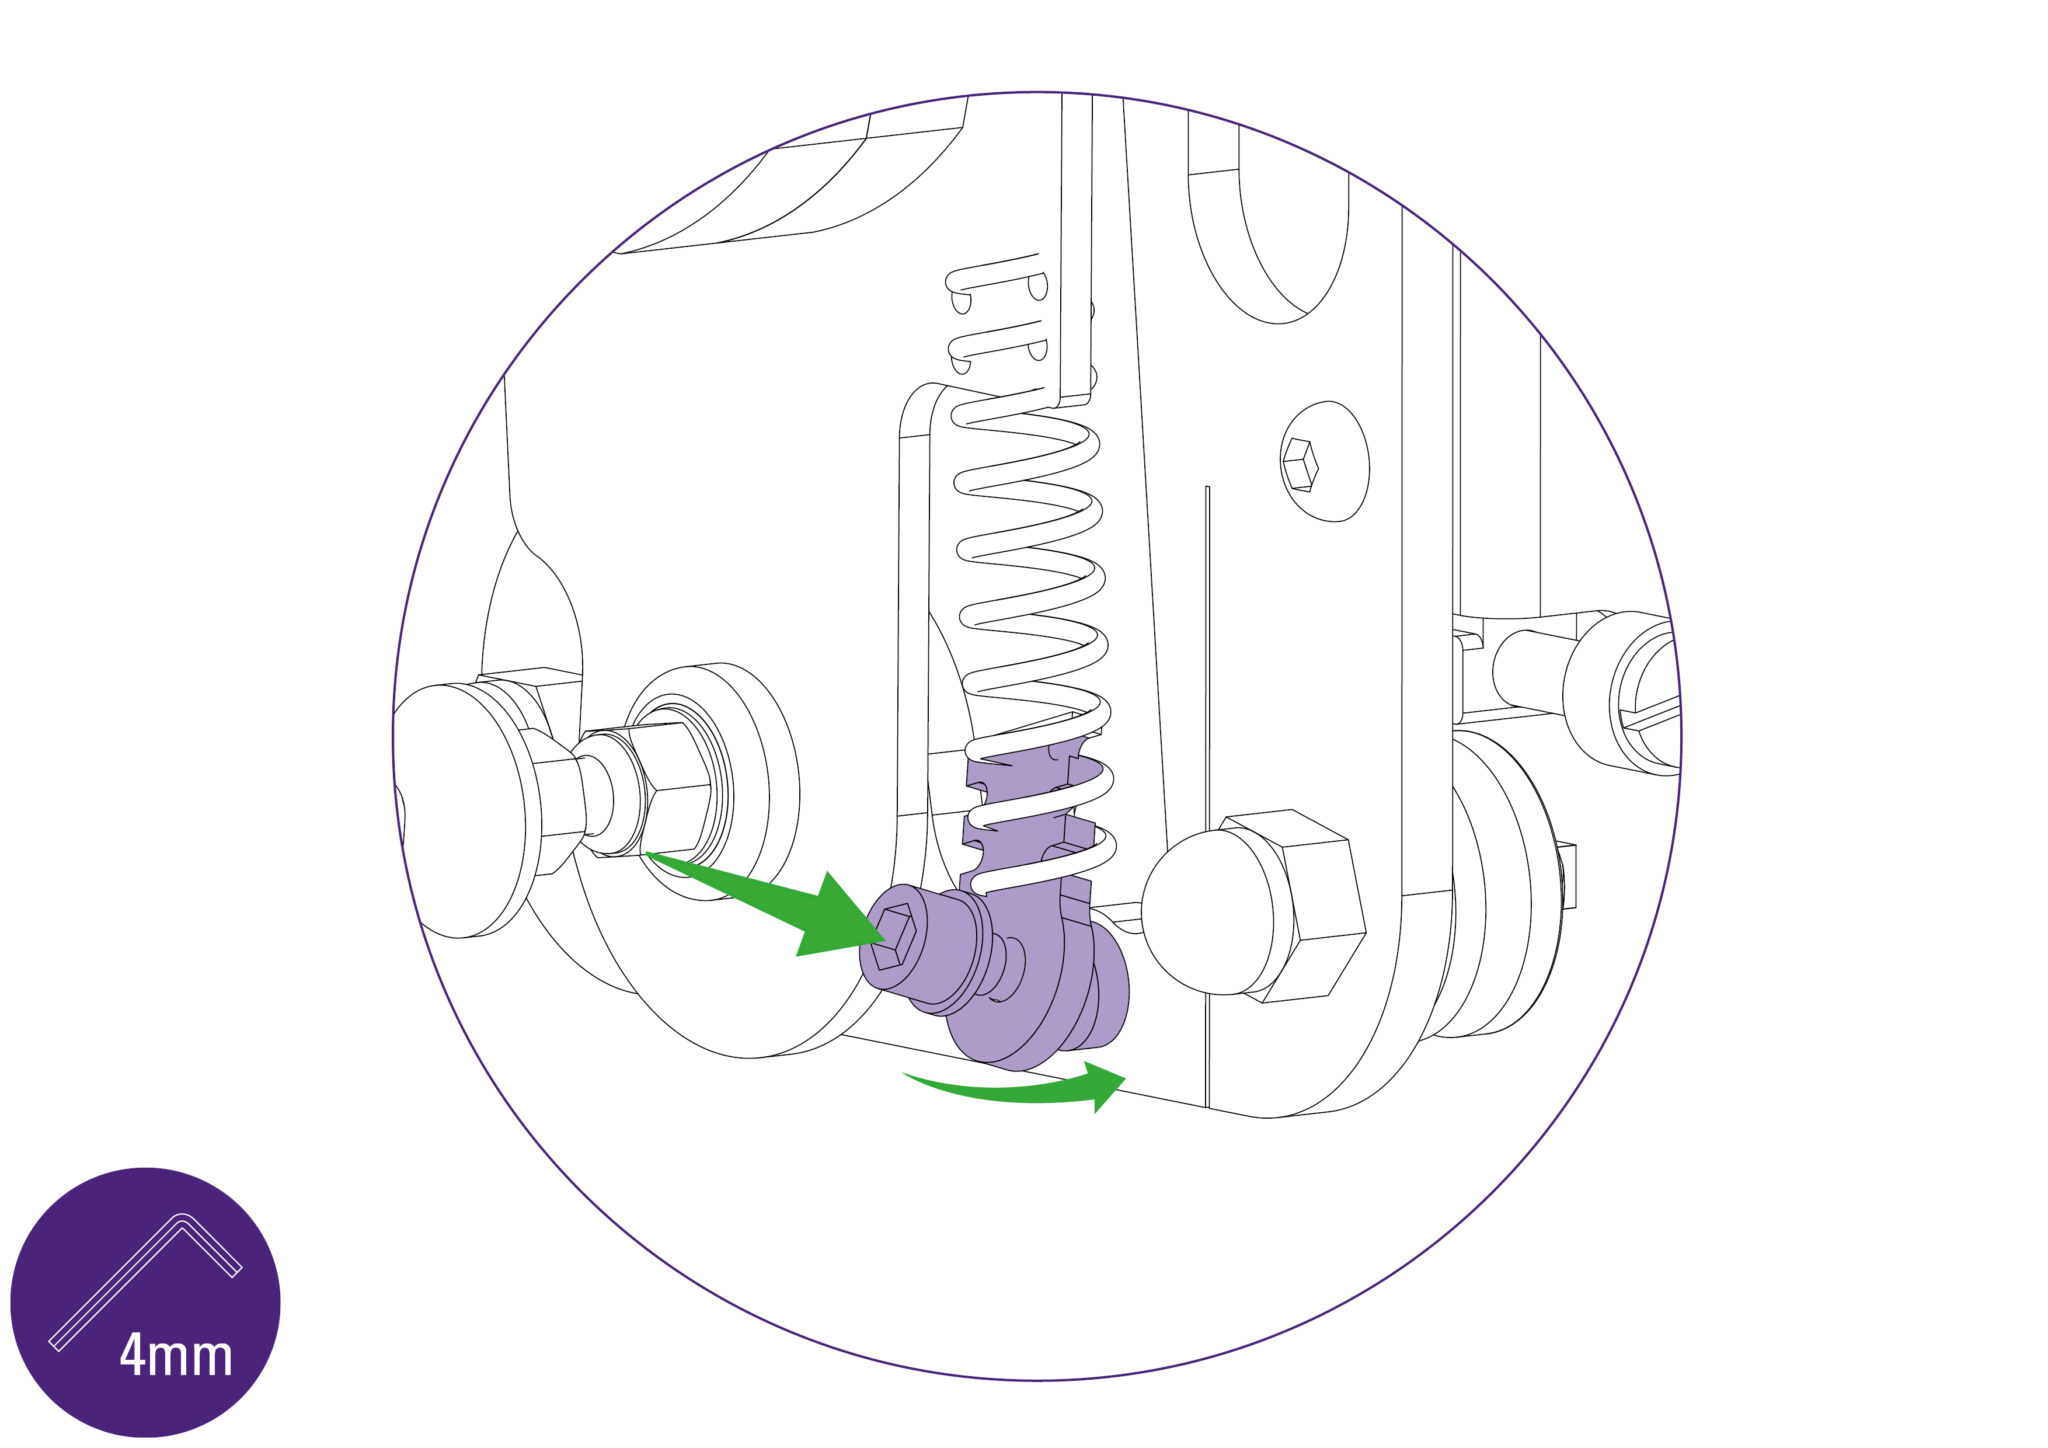
- Using the 4mm Allen key, offer the screw to the hole at an angle, push it gently into the hole and bring it perpendicular to the aluminum plate to align the thread, then rotate the screw.
- Do not tighten the screw fully at this stage.
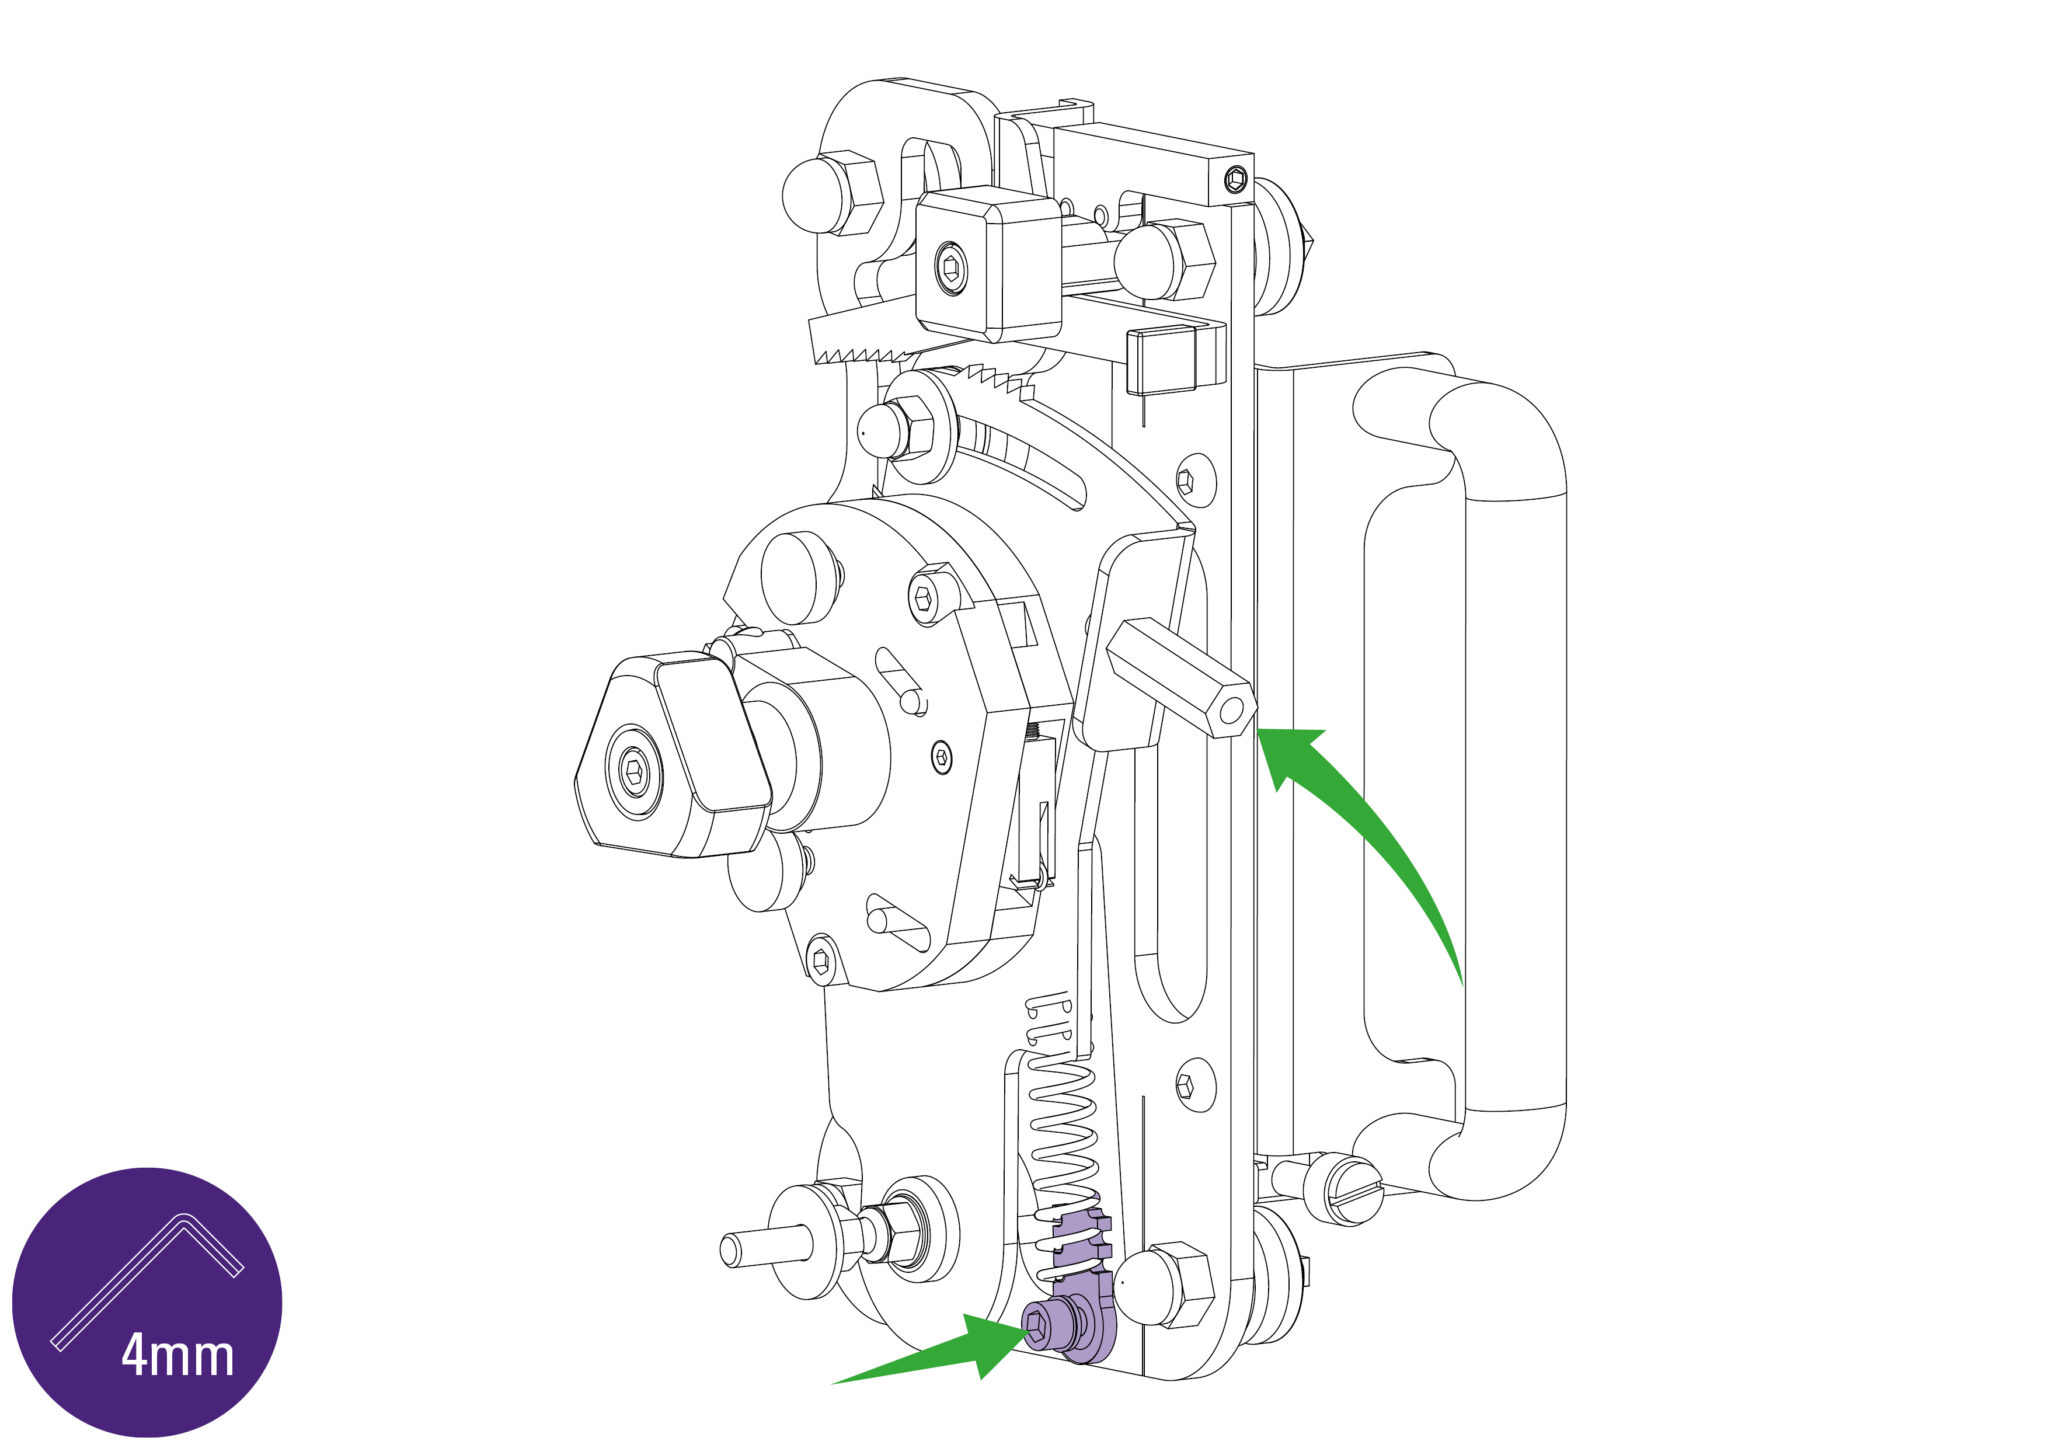
- Push the swinging arm forward to the full extent of the ratchet, then tighten the screw fully.
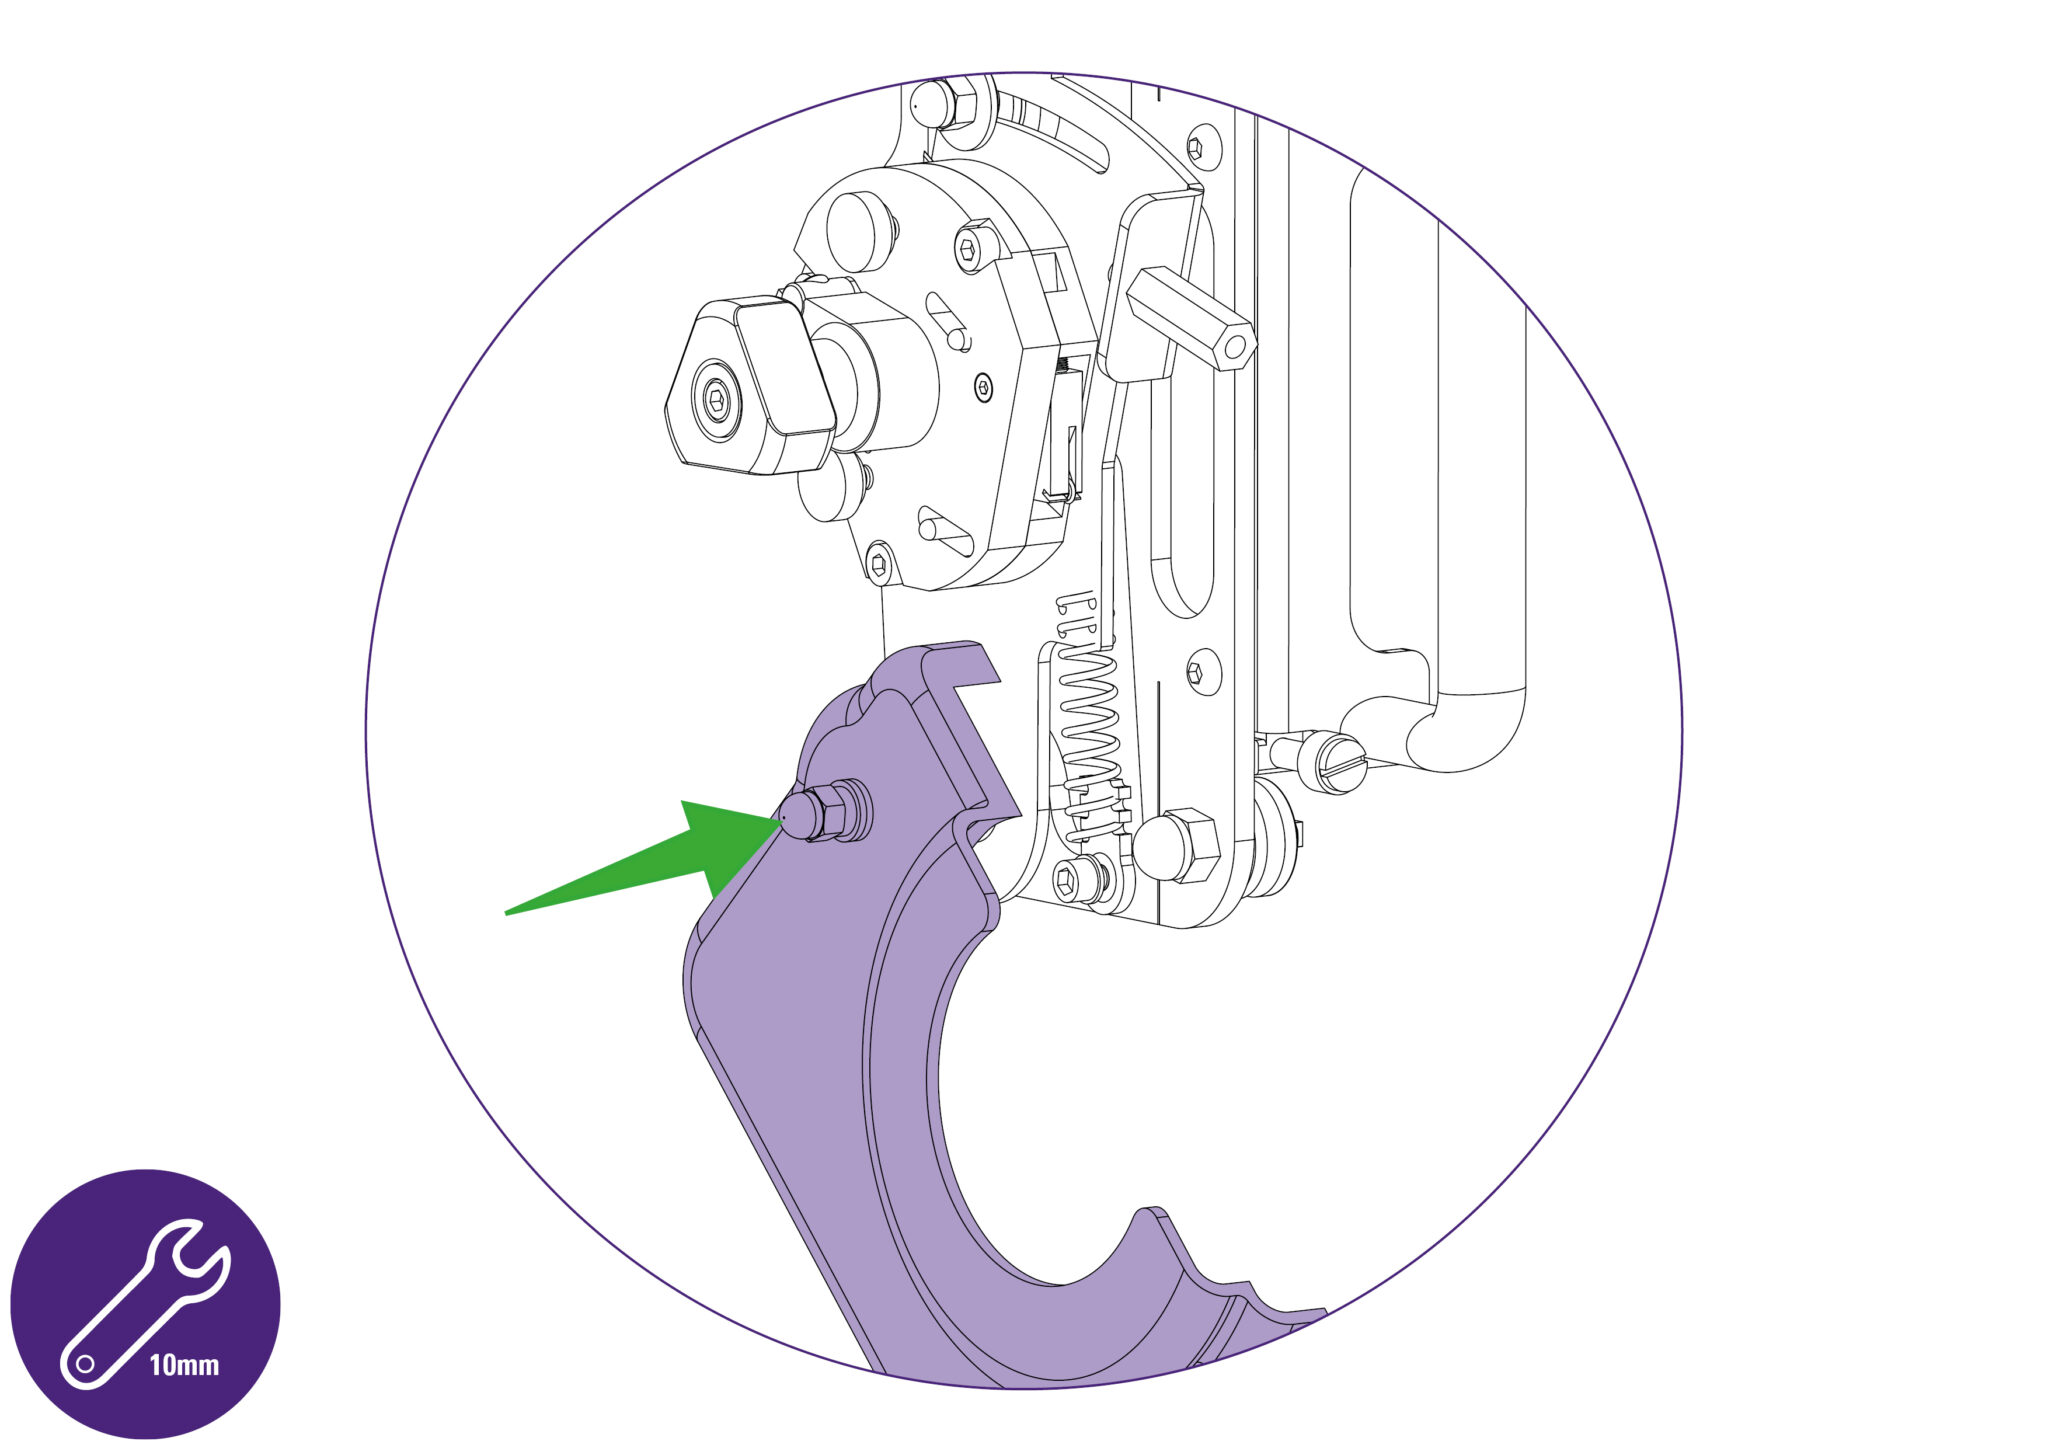
- Reassemble the guard along with the two steel washers, rubber washer, and dome headed nut using a 10mm spanner/wrench.
- Tighten the dome headed nut so the guard swings up and down but is not too loose to fall off.
- Swing the guard up, ensuring it is locked close with the black knob.
Ⓒ Keencut 2020 | Baird Rd, Corby NN17 5ZA United Kingdom | Contact us
Created by DeType | Privacy | Website Disclaimer | Terms & Conditions